One of the best ways to get more value from your crafting supplies is to challenge yourself to use them in different ways. Instead of reaching for a new product, see how many unique looks you can create with what you already have.
In this tutorial, you’ll use one floral stencil and die set to create three completely different cards: a soft and elegant design, a modern card with baroque-inspired details, and a bold, high-contrast project.
You can watch the detailed YouTube tutorial here. I’ve also included a complete visual list of the supplies that are currently available in the next section and a detailed list of tools at the end of the blog post for your convenience:
✂️ Supplies Used
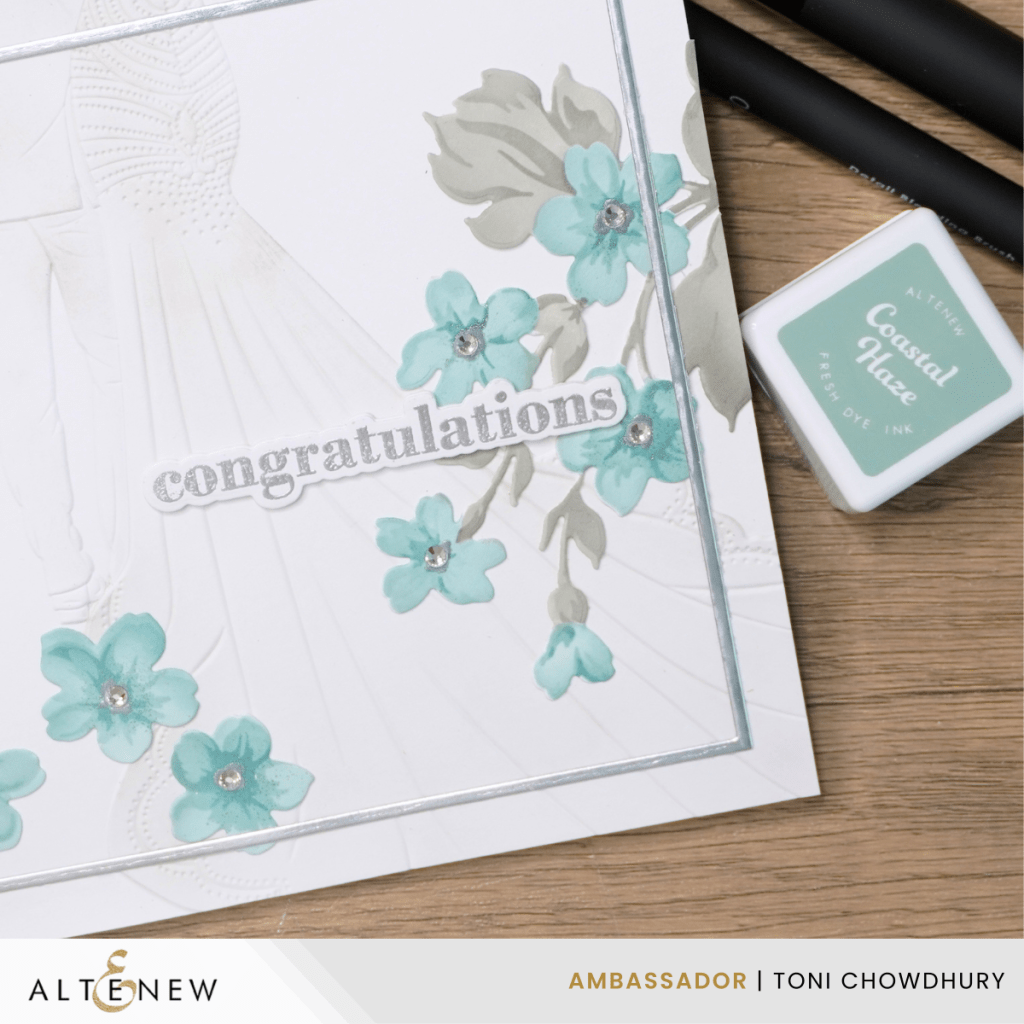
Card 1: Romantic Elegance


Step 1: Create the floral design
Stencil the floral image onto an A2 panel of Neenah Classic Crest white cardstock using soft, coordinating ink colours. Blend lightly to create smooth transitions between colours.
Use embossing ink on the detail layer for the flower centres and heat emboss in silver.
Optionally, you can stencil another floral image and use the coordinating die for the individual flowers to cut them out, then add them as standalone flowers at the bottom of the card, as shown in the photo.
Die-cut the finished floral image using the coordinating die.
Step 2: Create the card base
Create a 5 ½ in. x 5 ½ in. square card base using white cardstock.
Step 3: Create the embossed panel
Cut out another 5 ½ in. x 5 ½ in. panel from Neenah Classic Crest.
Use the Enchanted Beginnings embossing folder and emboss the square panel.
Use the coordinating stencils to add a very light blend of blue or grey to the bride dress and the grooms suit.
Step 4: Create the sentiment
Create a bold sentiment by heat embossing with silver to coordinate with the silver accents on the flowers.
Step 5: Assemble the card
Arrange the floral die cut on the card front, leaving plenty of white space to keep the design light and elegant.
Add a thin square silver frame to the card front and add a simple sentiment.
Step 6: Embellish
Finish with a few pearls or clear gems for subtle sparkle.
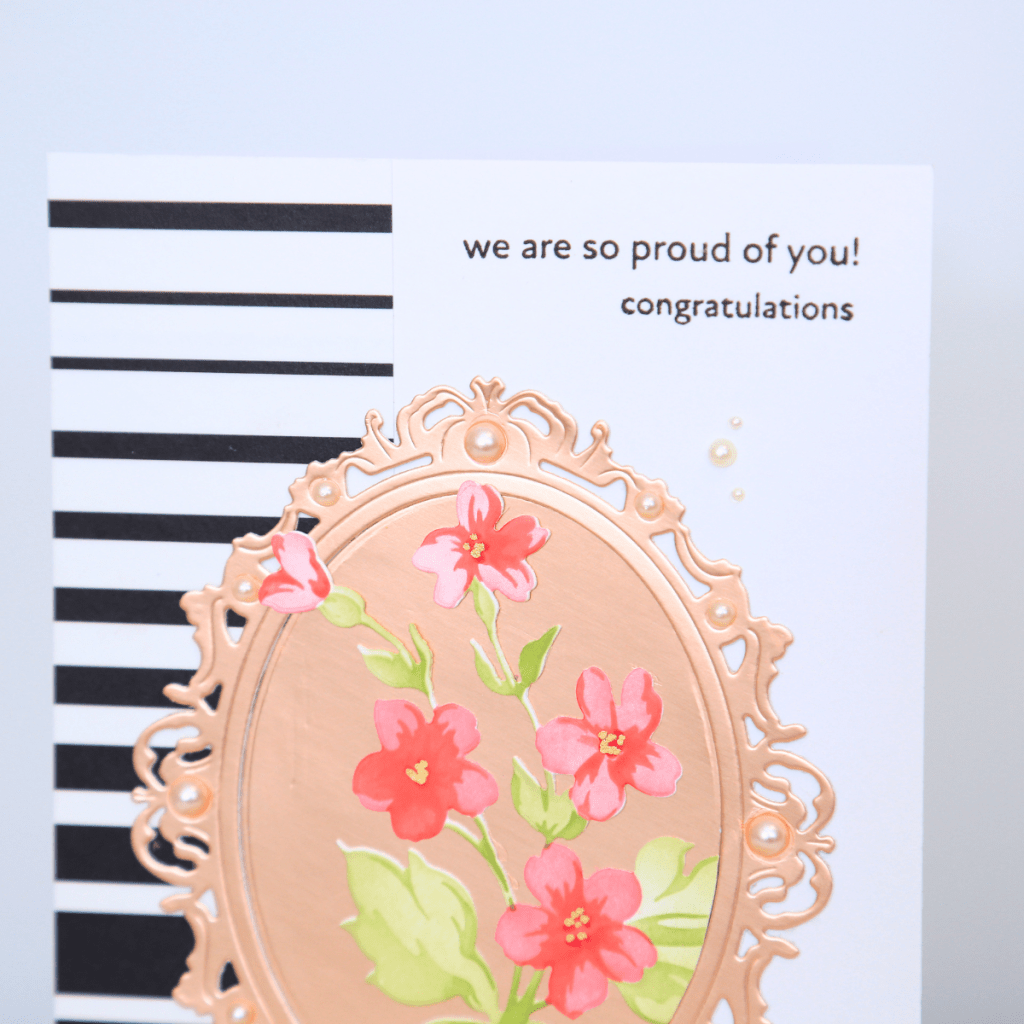
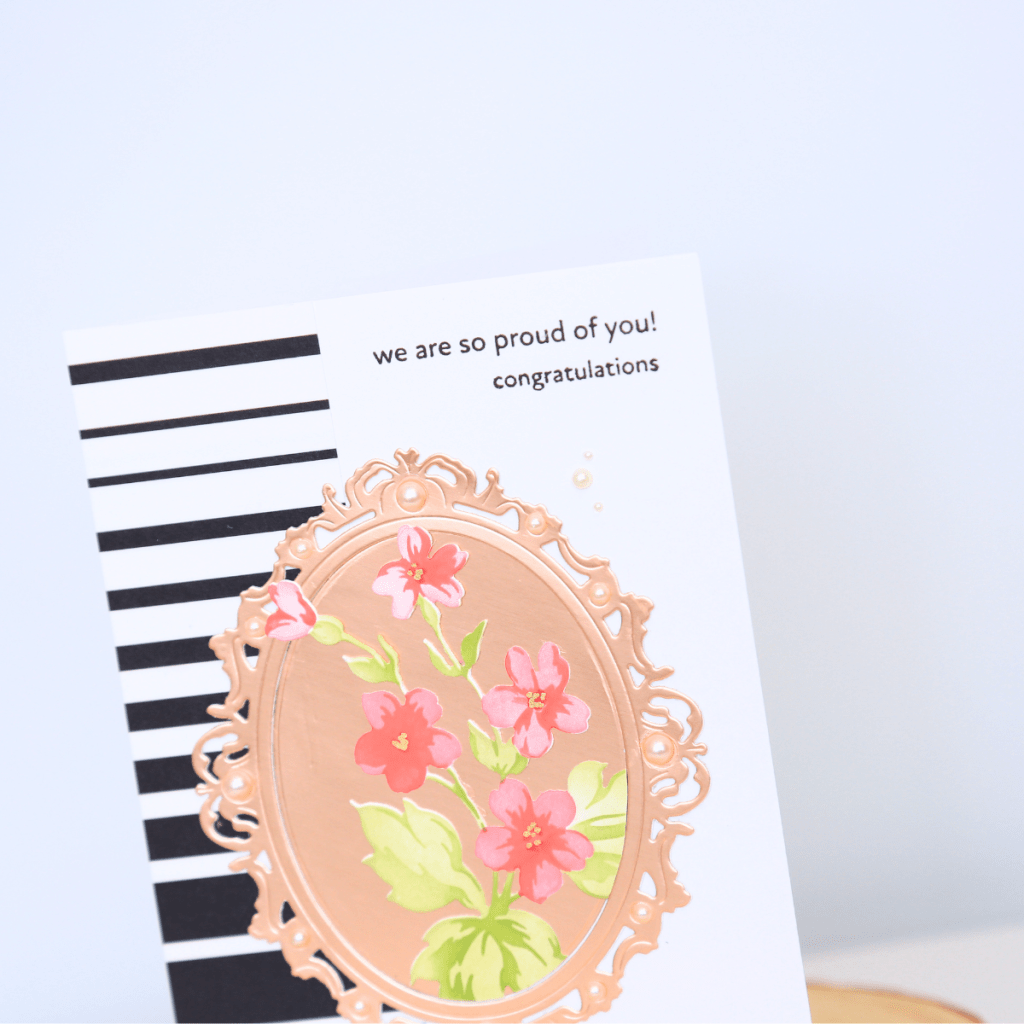
Card 2: Modern Meets Baroque

Step 1: Create the floral design
Stencil the floral image onto an A2 panel of Neenah Classic Crest white cardstock using a bold colour palette. Blend with varying pressure to create depth and contrast. You can check the list of supplies for the inks used on this card.
Use a darker ink through the detail layering stencil to create a placeholder for the flower centres. Use a gold permanent marker or gel pen to add gold details to the flower centres.
Die-cut the finished floral image using the coordinating die.
Step 2: Create the card base
Create a 5 in. x 7 in. card base using white cardstock.
Step 3: Create the background
Cut out another 5 in. x 7 in. panel from white cardstock.
Adhere washi tape or patterned paper with a bold geometric design to another piece of lightweight (card) stock and cut out a strip measuring 1 ½ in. x 7 in. Adhere the strip along the left edge of the 5 in. x 7 in. card panel.
Step 4: Create the frame
Use a piece of rose gold metallic cardstock to cut out the baroque frame.
Cut out another frame from white cardstock and layer it behind the metallic frame to reinforce it.
Step 5: Create the focal image
Adhere the floral die-cut to the central oval piece cut out by the frame die. Leave some of the petals loose so they can be draped over the frame. Trim the overhanging foliage bits from the bottom of the oval panel.
Centre and adhere the assembled oval piece to the centre of the card panel.
Now position the baroque frame around the oval piece.
Step 6: Stamp the sentiment
Stamp the sentiment onto the card base. Pick a sentiment that fits around the oval frame in the top right corner of the card base. I used the Playful Flowers stamp set for the perfect-sized sentiment.
Step 7: Embellish
Finish with gems or pearls around the rose gold frame to emphasize the elegant, decorative style.
Card 3: Bold Modern Contrast

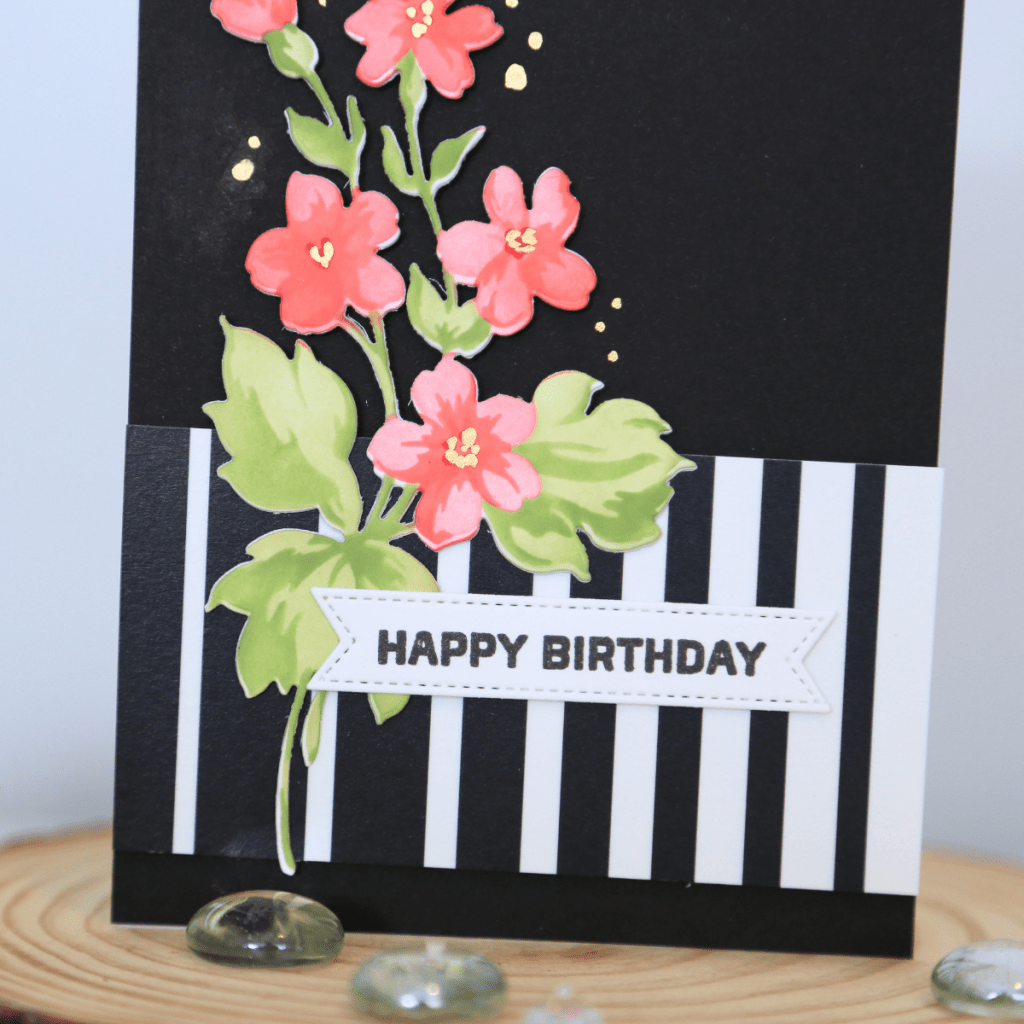
Step 1: Create the floral design
Stencil the floral image onto an A2 panel of Neenah Classic Crest white cardstock using a bold colour palette. Blend with varying pressure to create depth and contrast. You can check the list of supplies for the inks used on this card.
Use a darker ink through the detail layering stencil to create a placeholder for the flower centres. Use a gold permanent marker or gel pen to add gold details to the flower centres.
Die-cut the finished floral image using the coordinating die.
Step 2: Create the card base
Create an A2 card base measuring 4 ¼ in. x 5 ½ in. using white (or black) cardstock.
Step 3: Create the background
Cut out another 4 ¼ in. x 5 ½ in. panel from black cardstock.
Use a leftover piece of the washi tape or patterned paper strip you created for the previous card. The strip should measure 1 ½ in. x 4 ¼ in. Adhere the strip horizontally in the lower third of the card panel.
Step 4: Create the focal point
Cut out two floral branches and stack them behind the stencilled layer for dimension.
Step 5: Create the sentiment
Stamp the sentiment in black and cut it out, either as a simple label or as a banner, according to your preference. Be sure to stack the sentiment label with a couple of layers to match the floral die-cut’s look and feel.
Step 5: Assemble the card
Adhere the floral die-cut over the washi tape strip, aligning it to the left third of the card panel.
Centre the sentiment in the lower third of the card panel and adhere it.
Step 6
Finish with a few coordinating embellishments or a few dots with a metallic gold pen while keeping the overall design clean and graphic.
Final Thoughts
Using the same floral stencil and die set in three different ways shows just how versatile a single product can be. By changing your colour palette, layout, and design style, you can create cards that feel completely unique without buying additional supplies.
Try mixing modern with vintage elements, floral with geometric, non-traditional or unexpected colours to create stunning designs.
The next time you add a new crafting product to your collection, challenge yourself to see how many different looks you can create. You may discover that one set is capable of much more than you expected.
✂️ Want to craft along with me? Members get perks like monthly live Q&A sessions, badges, shout-outs, and Foiled Florals craft-along livestreams. Join the membership here: https://www.youtube.com/channel/UCDKhctb1ss7hbxVHivhT5YQ/join


Leave a comment