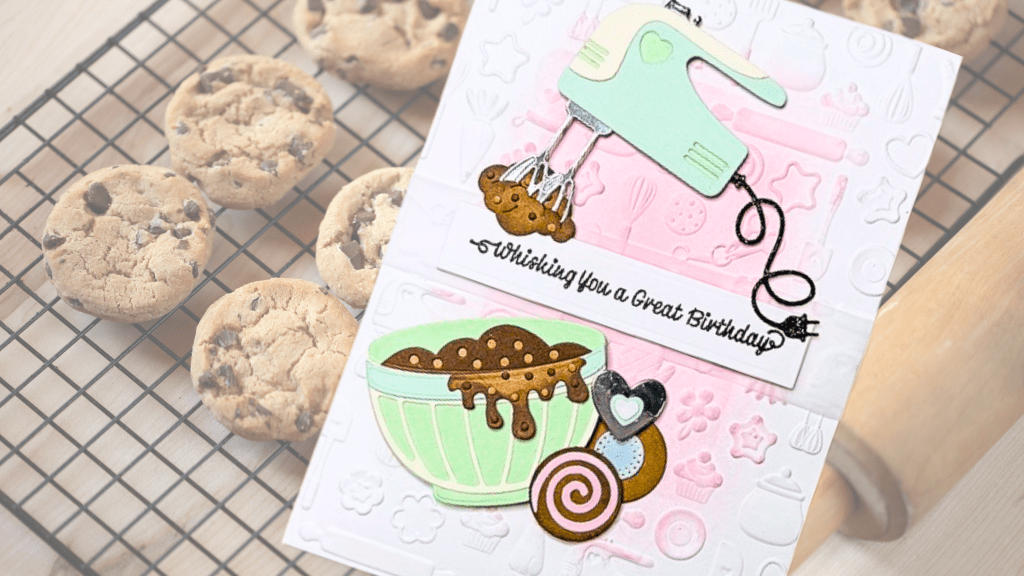
In today’s tutorial, I’m sharing three different cards created with the same embossing folder and coordinating die sets. By changing how we build the background — apertures, spotlight colouring, and masking — we can achieve completely different looks.
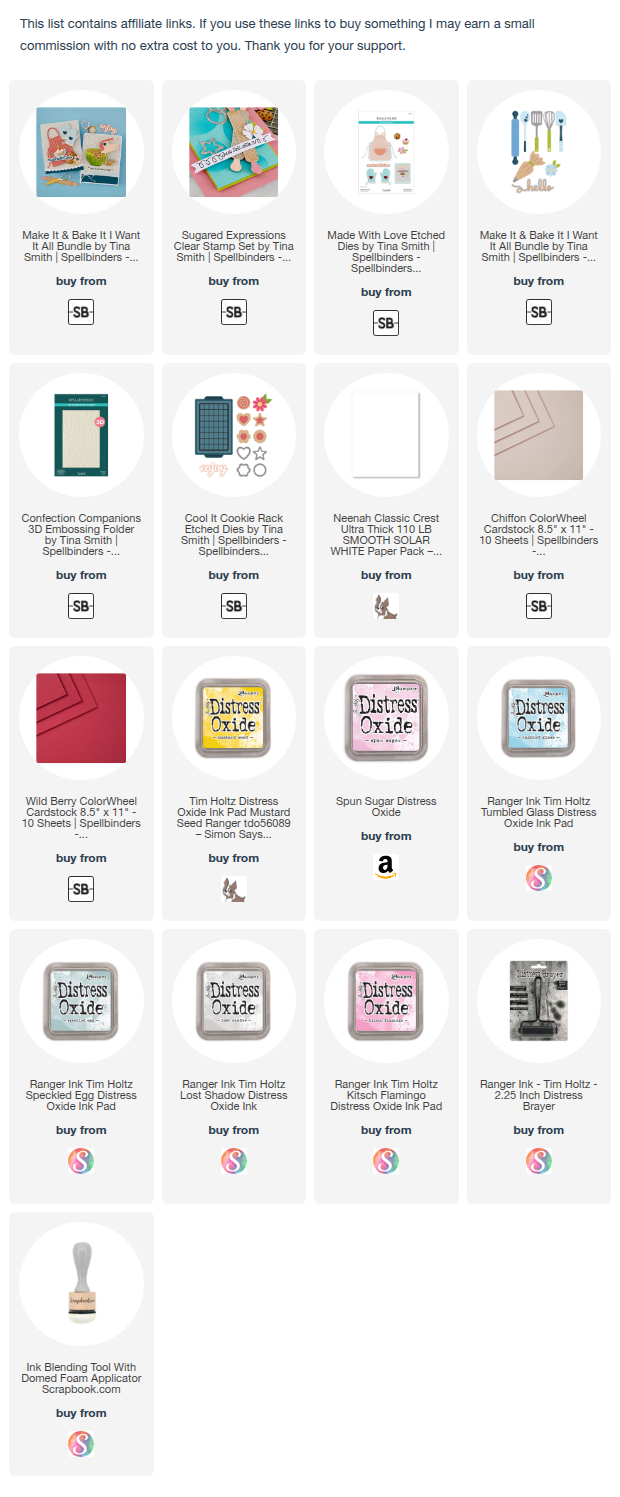
You can watch the detailed YouTube tutorial here. I’ve also included a complete visual list of the supplies that are currently available at the end of the blog post for your convenience:
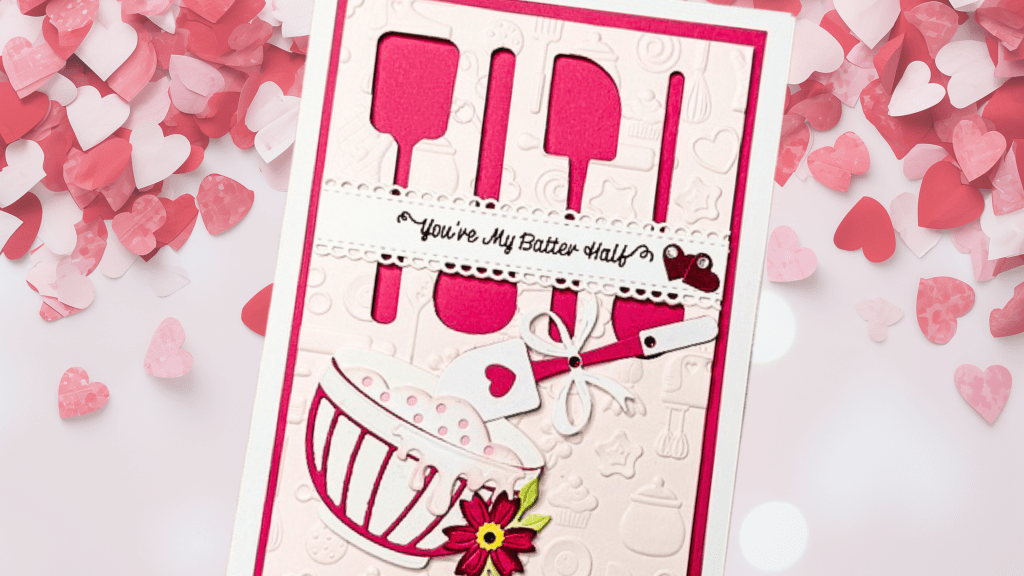
Card 1: Die-Cut Aperture Background
For this first card, we’re creating interest by cutting apertures directly into the panel and layering a darker cardstock underneath for contrast.

Supplies
- Spellbinders 3D embossing folder
- Spellbinders Magi Mixer etched dies
- Spellbinders Made with Love etched dies
- Spellbinders Fluff, Frost & Roll etched dies
- Spellbinders Cool It Cookie Rack etched die set
- Spellbinders Sugared Expressions clear stamp set
- White heavyweight cardstock for card base
- Dark pink cardstock (Spellbinders)
- Blush cardstock (Spellbinders)
- Craft cardstock (for cookies)
- Distress Oxide ink: Spun Sugar
- Blending brushes
- Foam tape
- Bearly Art liquid glue
- Painter’s tape
- Embellishments
Step 1: Create the Aperture Panel
- Trim the Blush pinl panel to 5” x 7”,
- Position your dies where you’d like the apertures.
- Tape them down carefully using painter’s tape.
- Run through your die-cutting machine.
- Adhere a darker pink cardstock panel behind the openings for contrast.
Pro Tip: If you have a spare magnetic sheet, use it while positioning your dies on the card panel to prevent the dies from shifting.
Step 2: Emboss the Panel
- Lightly mist the reverse side of the cut-out panel.
- Place inside the 3D embossing folder.
- Run through your machine.
Step 3: Create the Focal Elements
Create your focal elements using the Spellbinders collection or use your preferred dies and embellishments.
- Mixing bowl with dough
- Spatula
- Whisk and handle
- Flowers and leaves
- Frosting details
Add light ink blending to the cookie dough and accessories for dimension.
Step 4: Assemble with Dimension
- Assemble the bowl and insert the spatula slightly behind the top layer.
- Use foam tape to lift selected elements.
- Add a sentiment strip to the card front.
Finish by adhering everything to a 5” x 7” card base.
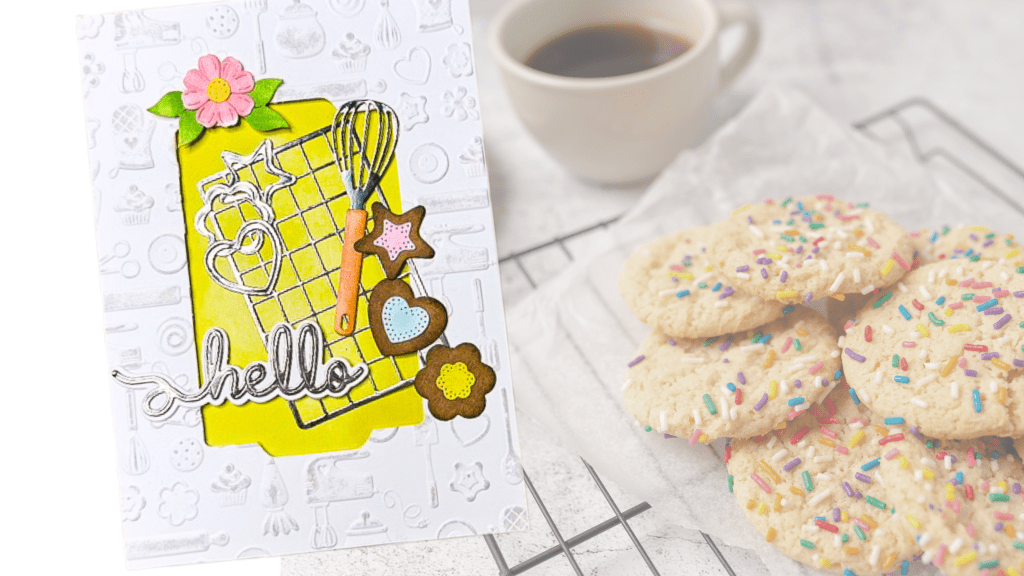
Card 2: Spotlight Colouring + Dimensional Foreground
This version uses spotlight colouring inside an embossed background and builds dimension in the foreground.
Supplies
- Same embossing folder
- Same die sets
- White cardstock (5” x 7” panel)
- Distress Oxide inks:
- Mustard Seed
- Lost Shadow
- Brayer / foam blender
- Foam tape
- Liquid adhesive
- Craft cardstock
- Silver cardstock
Step 1: Prepare the Front and Background Panels
- Lightly blend Mustard Seed distress oxide to the part of the background layer that’s visible through the aperture.
- Use the cookie tray die to cut out an aperture in the centre of a 5 x 7 panel.
- Lightly mist and emboss the front panel using the embossing folder.
- Use a brayer or foam blender to lightly add Lost Shadow distress oxide over the embossed details for contrast.
This creates a soft, stoneware look.
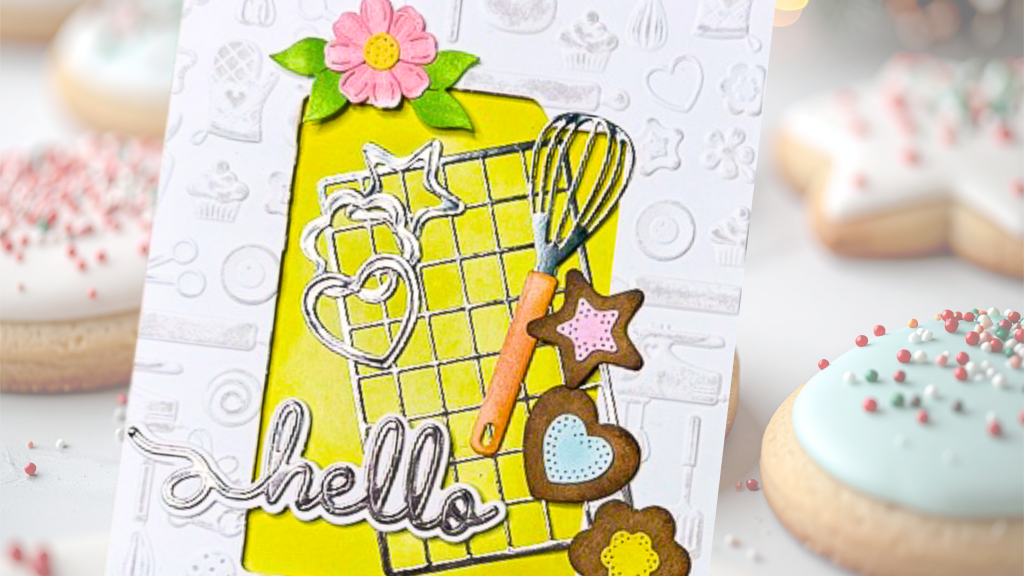
Step 2: Build Focal Point
- Create the cookie rack using both the solid and detailed dies.
- Stack layers slightly offset for depth.
- Add cookies and cookie cutters.
- Use foam tape to add dimension to selected cookies.
This layering creates beautiful dimension against the embossed background.
Pro Tip: Use press-and-seal (Jennifer McGuire’s trick) to keep your layout intact before adhering.
Step 3: Finish the Card
- Adhere the sentiment in the lower-thirds to create interest.
- Adhere to the card base and keep embellishments minimal to let the texture shine.
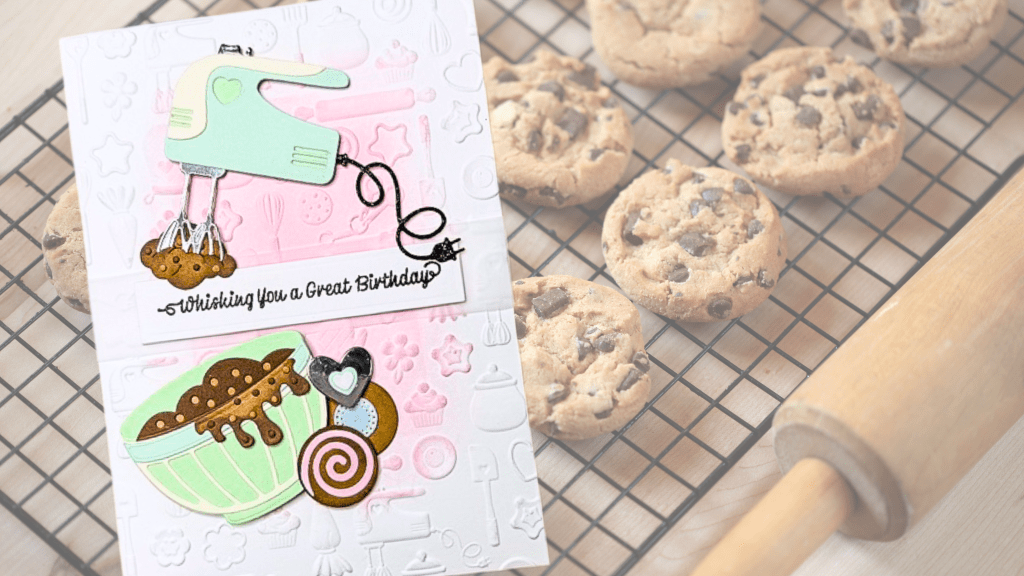
Card 3: Masked Spotlight Colouring + Colour Swatching
This card uses a die cut as a mask to create a controlled spotlight effect.
Supplies
- White cardstock (Neenah Classic Crest recommended)
- Die cut negative (cookie tray shape)
- Distress Oxide ink of your choice
- Foam blender / brayer
- Post-it tape or masking tape
- Embossing folder
- Foam tape
- Liquid adhesive
- Vellum strip
- Versafine Onyx Black ink
- Clear embossing powder
- Heat tool
Step 1: Create Colour Swatches
Before committing:
- Blend small panels in different colour combinations.
- Test with your die-cut elements on top.
- Compare how each interacts with your focal pieces.
For this card, Spun Sugar provided the best balance.
This step prevents wasted cardstock and helps you make confident colour choices.
Step 2: Create the Masked Spotlight
- Place the negative die cut onto your white panel.
- Mask off surrounding areas.
- Blend Spun Sugar inside the opening.
- Concentrate colour in the centre.
- Lighten toward the edges.
- Remove mask.
- Gently soften harsh lines.
Step 3: Emboss Over the Spotlight
- Lightly mist the back of the ink-blended panel.
- Place in embossing folder.
- Align so the design falls where you want it.
- Run through your machine.
Lightly blend Lost Shadow over raised areas if needed.
Step 4: Add Sentiment & Finishing Touches
- Heat-emboss a sentiment on a scrap piece of white cardstock.
- Add a vellum strip behind the sentiment to soften contrast.
- Use foam tape for dimension.
- Edge detailed die cuts with a coordinating coloured marker if white core shows.
Adhere everything to a 5” x 7” card base.
Final Thoughts
All three cards use:
- The same embossing folder
- The same collection of dies
- The same core supplies
Yet the backgrounds feel completely different:
- Card 1: Aperture with contrast
- Card 2: Faux spotlight and textured layering
- Card 3: Masked spotlight
This is such a great reminder to dig into your stash and stretch what you already own.
Which background technique is your favourite?
Let me know in the comments — and don’t forget to save your colour swatches for future projects!
📥 FREE DOWNLOAD:
You can click this link to get your free Printable Checklist for Background Techniques (no email needed): https://cutt.ly/NtmbTBiD


Leave a comment