Do you have a collection of gorgeous Washi and PET tapes just waiting to be used? Have you been wondering how to get started with them? You’re in for a treat! These tapes are fantastic for creating quick, easy, and pretty cards, especially for those last-minute ones. You will also learn some of the best tips for working with these transparent tapes. They are forgiving, so you can get perfect results every time.
Use code SCHOOL for 18% discount at https://www.thewashitapeshop.com?aff=1836 (valid until August 21, 2025 only).
You can watch the detailed YouTube tutorial here. I’ve included a complete visual list of supplies at the end of the blog post for your convenience:
Supplies You’ll Need
Tapes Washi / PET Tapes
- Pre-cut Rose Sonata
- Pre-cut Purple Muse
- Pre-cut French Courtyard
- Pre-cut Sweet Rosé
- Pixel Dash Slim Washi/PET Tape Set
- Pre-cut Pink Velvet
- Pre-Cut Rosé Script
Dies
- Scallop and Stitched Edge Ovals Etched Dies
- Fancy Rectangle Frames
- Edgers Dies
- Thank You Sentiments III
- Slimline – Braided Circles
Stamps
Inks
- Distress Oxide:
- VersaFine Onyx Black
Adhesives
- Bearly Art Liquid Glue
- Tape Runner
Paper and Cardstock
- Neenah Classic Crest cardstock
- Hammermill Lightweight white cardstock
- A2 pre-made card base / card stock in Sea Glass from Simon Says Stamp
- A2 pre-made card base / card stock in Fog Gray from Simon Says Stamp
- Clear acetate sheet from Simon Says Stamp
- Copper mirror cardstock
Tips for Using Washi & PET Tapes
- Keep labels: Preserve the labels on the packaging for future reference in case you want to reorder. Tuck a small piece of the label inside the tape roll for safekeeping and easy identification.
- Easy peeling: Peeling PET tapes can be tricky. To make it easier, gently touch a corner of the tape until it separates from the backing, or peel off a bit of the surrounding sticky area first.
- Forgiving: If you place a sticker down a little crooked, you can carefully lift a corner with a pick tool and reposition it without it tearing.
- Layering: Since PET tapes are transparent, you can easily layer them over each other or over washi tape to create unique and complex designs.
- Trimming: You can cut around a sticker to trim off any excess and no one will ever know.
Step-by-Step Instructions
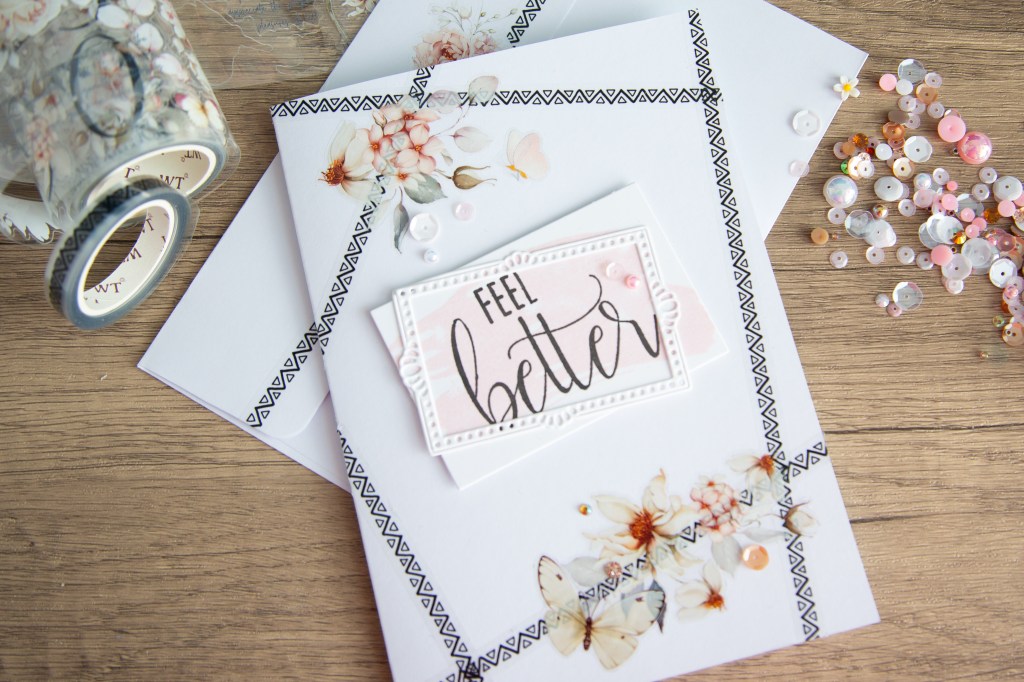
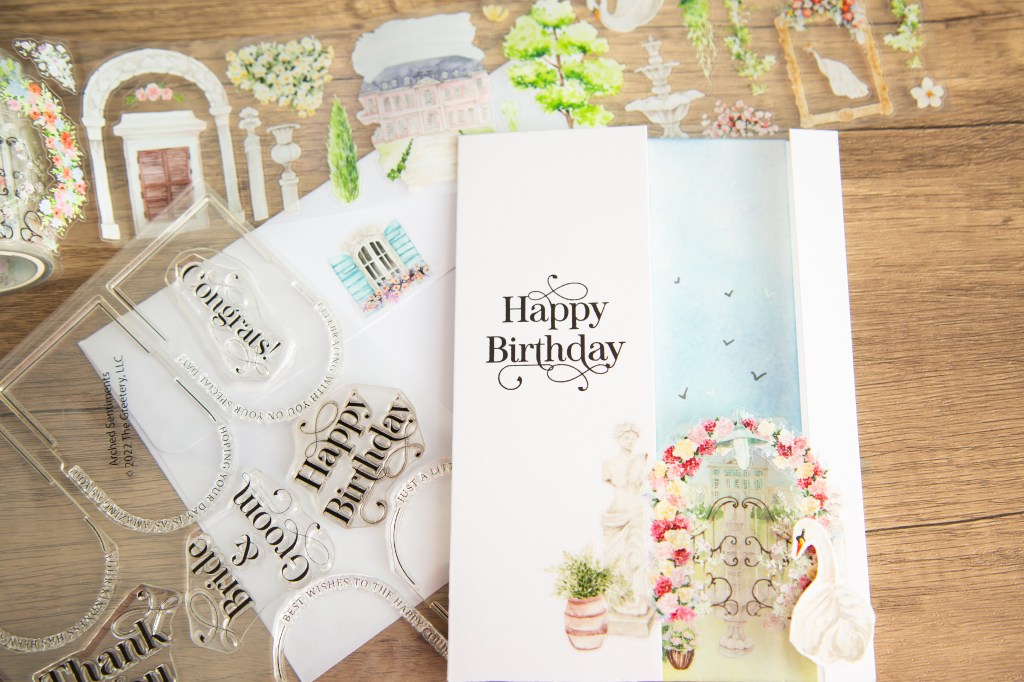
Card 1: French Courtyard Window Card

This project uses stickers from the Pre-cut French Courtyard PET tape to create a scene with a see-through window.
- Create the card base and window opening.
- Start with a 5 x 7 in. card base made from heavyweight card stock.
- Cut a 2 ½ in. strip from the card front and save it.
- Cut a ½ in. strip from the 2 ½ in. strip.
- Take a piece of clear acetate measuring 2 in. x 7 in. long.
- Wipe down the acetate with alcohol to remove any fingerprints or residue.
2. Assemble the window.
- Apply a thin line of liquid glue along one edge of the card opening.
- Line up the acetate with the glued edge and press it down.
- Repeat the process with the narrow card stock strip you cut earlier. Glue it to the other side of the acetate. Align it with the card edges.
3. Decorate the front and interior scene.
- Position a gate sticker on the front of the acetate to start building the scene, smoothing out any air bubbles.
- Continue decorating the front with various elements until you are satisfied with the look.
- Do some ink blending on the saved card stock strip. Use Distress Oxide inks in Tumbled Glass for the sky. Apply Shabby Shutters and a touch of Bundled Sage for the grass.
- Use a heat tool to ensure the ink is completely dry.
- Line up the coloured strip behind the acetate window on the card front and apply glue to it. Close the card front over the glued strip to place it perfectly.
- Decorate the inside strip with more stickers, starting with a mansion.
4. Finish the card.
- Stamp the front with a Happy Birthday Sentiment to complete the card front.
- You can also doodle some birds on the inside strip for added interest.
5. Decorate the envelope.
- Add some of the leftover stickers to the envelope to create a beautiful matching set.
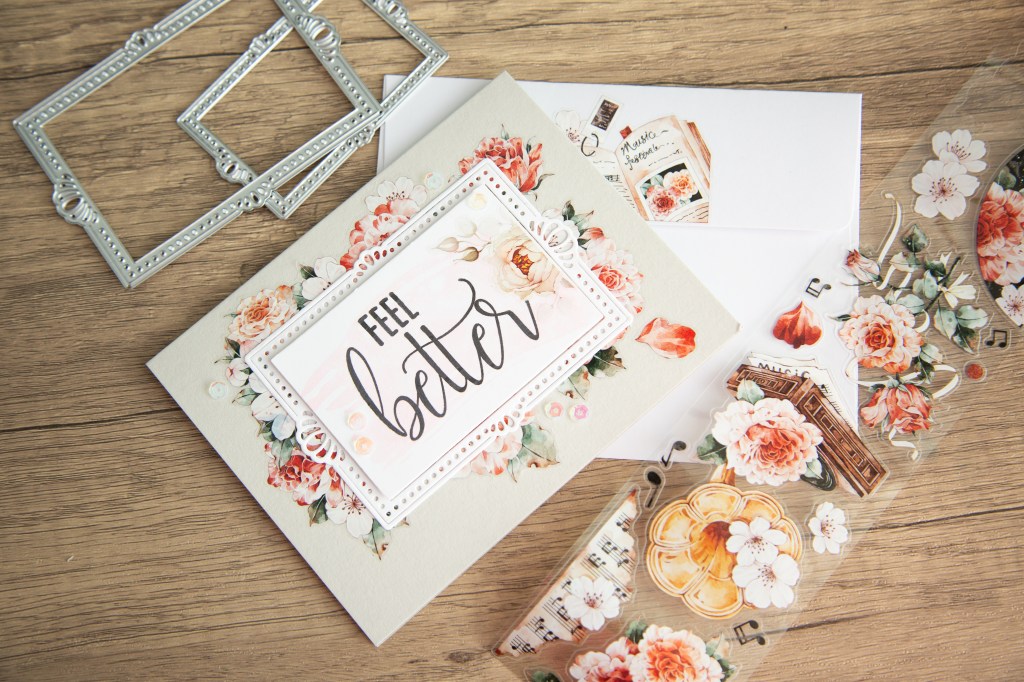
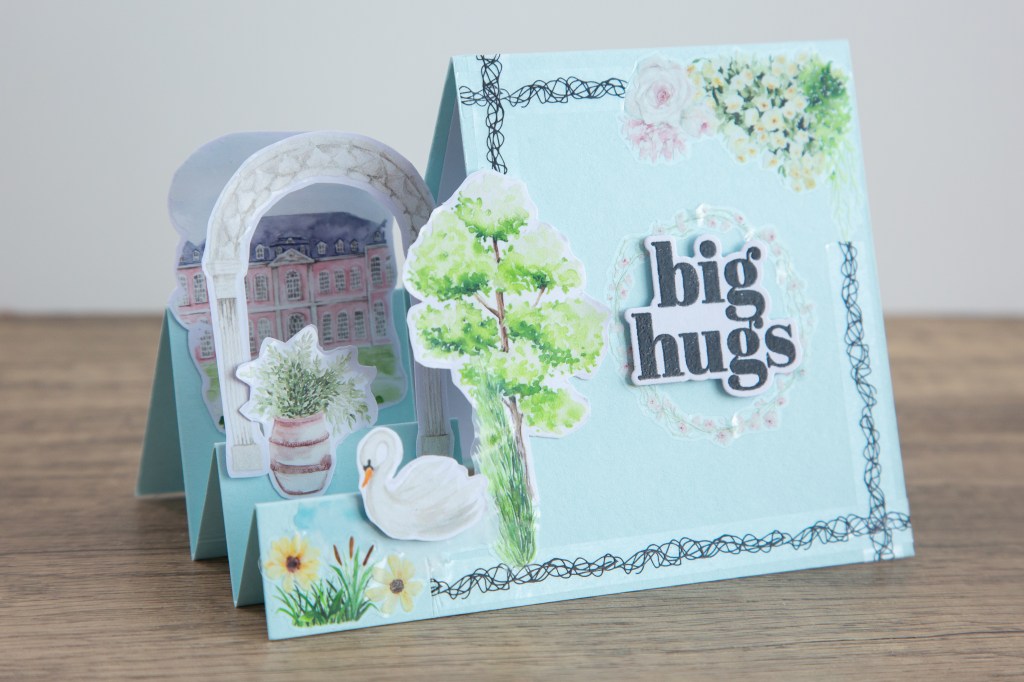
Card 2: Side Stepper Card
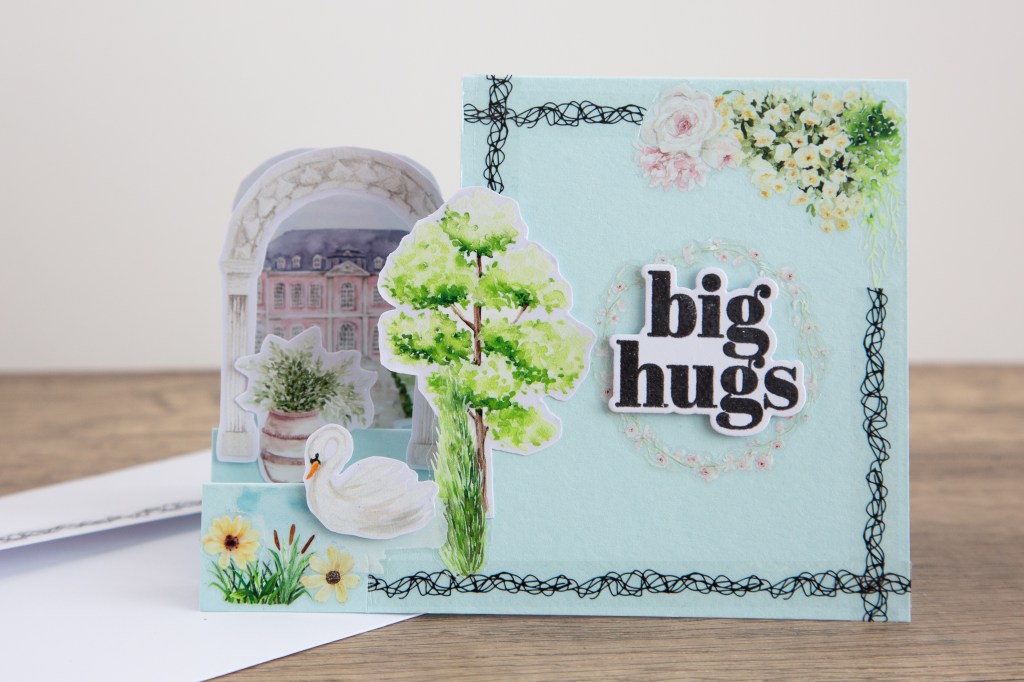
Create a multi-layered scene that stands up on its own using the Pre-cut French Courtyard PET tape.
- Prepare the card elements.
- Adhere your chosen PET stickers to lightweight white card stock.
- Fussy-cut them out to resemble die-cuts. This will allow them to stand up on the steps.
- Create a heat-embossed sentiment using a stamp and coordinating die. You can make two and keep one for your stash.
2. Create the card base.
- Start with a pre-made A2 card base, or a panel measuring 5 ½ in. x 8 ½ in.
- Position the panel in a trimmer at 3 ½ in. inches on the shorter side.
- Carefully lift the blade and move it down to the 1-inch mark.
- Cut from the 1-inch mark down to the 6 ½ inch mark.
- Use a sanding block to smooth out any frayed edges from the cut line.
3. Score and assemble.
- Score at the following marks, but only score down to the cut line: 1 inch, 2 inches, 3 ¼ in., 4 ½ in., and 6 ½ in.
- Fold along the scored lines to create the mountain and valley folds.
- Start building your scene with the stickers, layering them with glue or foam tape to add dimension. Add your sentiment to one of the layers.
- Use the “Big Hugs” sentiment from the Altenew Sunshine Flowers stamp set. Then, cut it out using the coordinating die. Add it to the front of the card.
4. Decorate the envelope.
- Add some of the leftover stickers to the envelope to create a beautiful matching set.
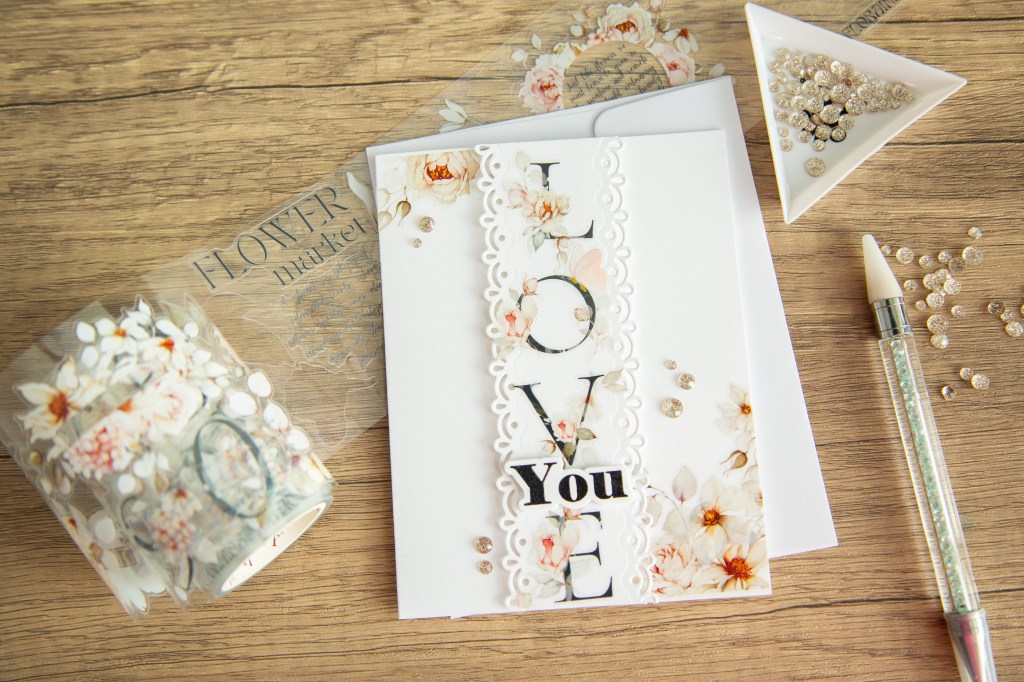
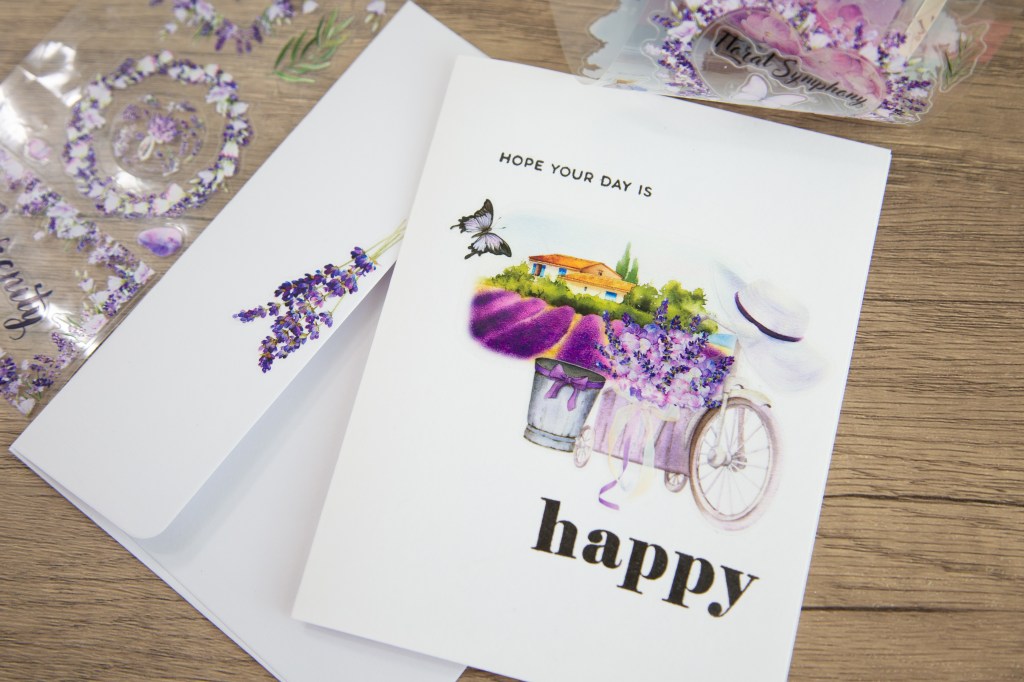
Card 3: Slimline Card
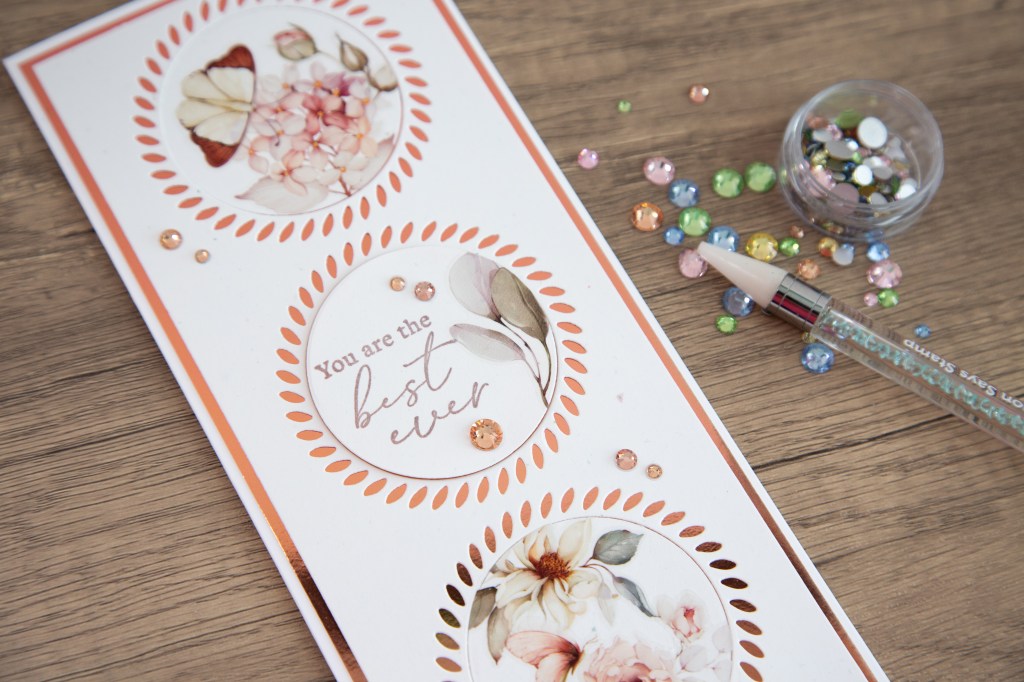
This project uses the Pre-cut Sweet Rosé PET tape to create a stunning, custom-sized slimline card.
- Cut the card base and mat.
- Cut a piece of card stock that is 8 in. wide by 3 ¼ in. tall.
- Score the long side at the 4-in. mark to create a slimline card base.
- Cut a mat layer that is slightly smaller than the card base. This will create a thin border around the top panel.
- Use the Slimline – Braided Circles to create the top panel and reserve the negative circular pieces.
2. Create the sentiment.
- Use a stamping tool and some metallic rose gold embossing powder to create a beautiful embossed sentiment.
- Use a coordinating die to cut it out.
3. Decorate the card front.
- Adhere your PET tape stickers to the card front using a tape runner.
- You can use the various floral and decorative elements to create a custom background.
4. Decorate the envelope.
- Add some of the leftover stickers to the envelope to create a beautiful matching set.
The PET stickers are so forgiving that you can even fix any mistakes you make!
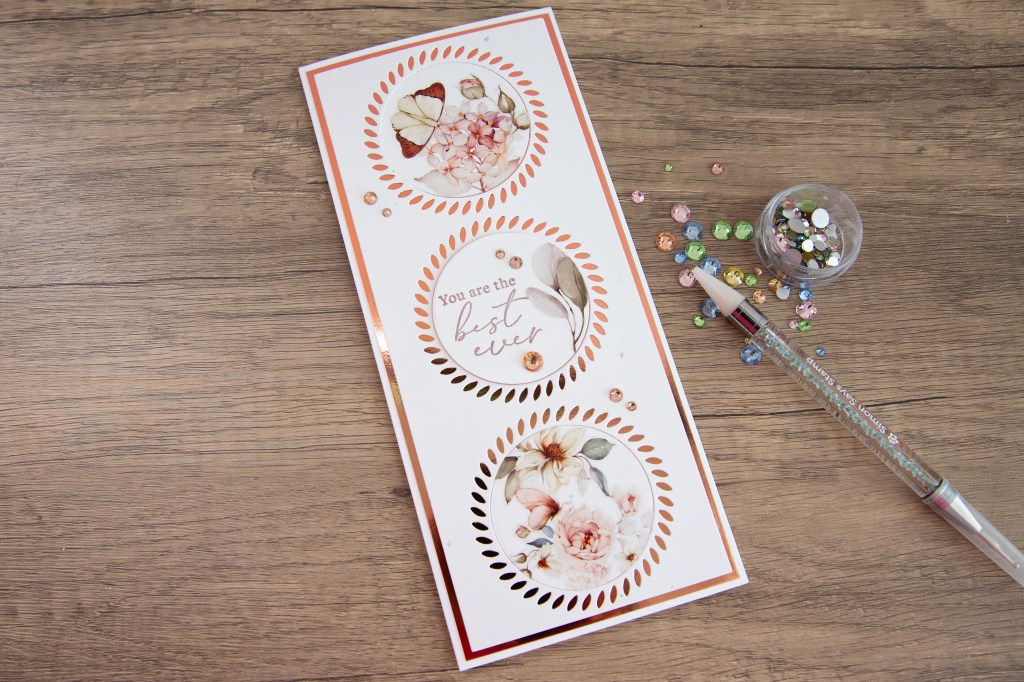
Card 4: Elegant Oval Card
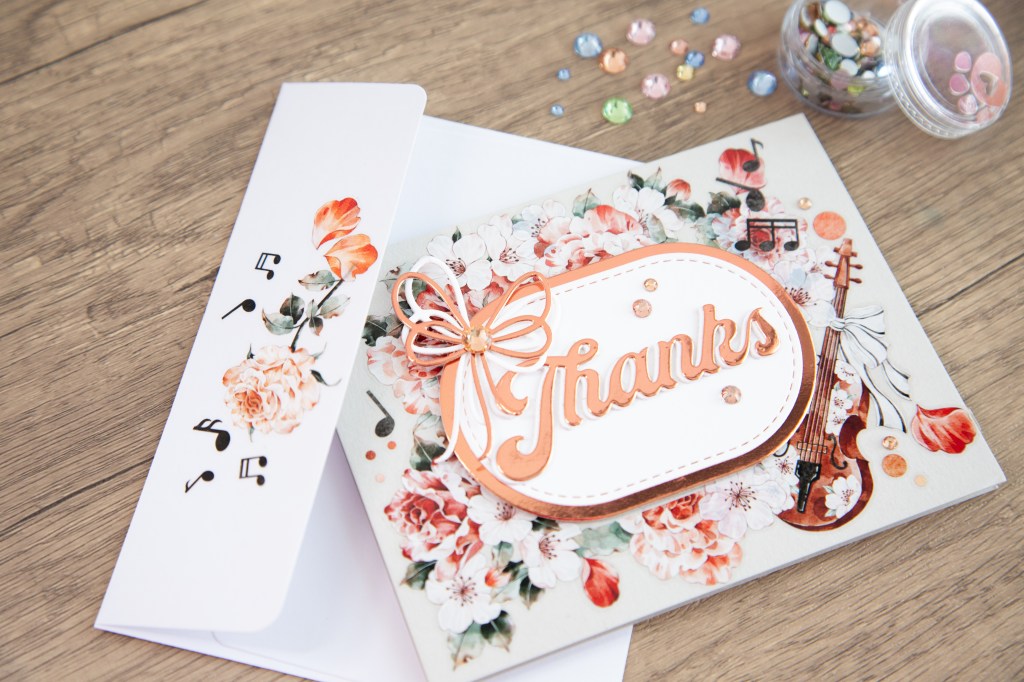
Use the Pre-cut Rose Sonata PET tape to create a stunning layered focal point with this easy oval card design. This project combines elegant die cuts, beautiful PET tape florals, and metallic accents for a polished, professional look—perfect for birthdays, thank-yous, or just-because cards.
- Die-cut your layers
- Use the large scalloped oval die to cut a copper mirror cardstock base.
- Use the smaller stitched oval die to cut a white cardstock layer.
- Die-cut the sentiment “Thanks” from the Thank You Sentiments III word die set.
- Layer the ovals
- Place the white stitched oval on nonstick or release paper to make gluing easier.
- Apply glue to the back and adhere it onto the copper scalloped oval, offsetting slightly so the copper peeks through.
- Glue the “hugs” sentiment on top.
- Add Floral PET Tape Accents
- Lightly trace the oval’s position on the card front for placement guidance.
- Cut a large floral PET sticker in half and position the halves so they radiate from behind the sentiment.
- Adhere the layered oval focal point to the card front using glue.
- Add Final Touches
- Embellish with music note stickers and gems for sparkle.
- Decorate the matching envelope with music notes and a few PET tape petals to tie the look together.
Pro Tip: PET tape’s transparent edges make layering effortless—no harsh sticker outlines, just seamless, professional-looking designs every time.
Additional Cards


Here’s the detailed list of supplies I used for the card:
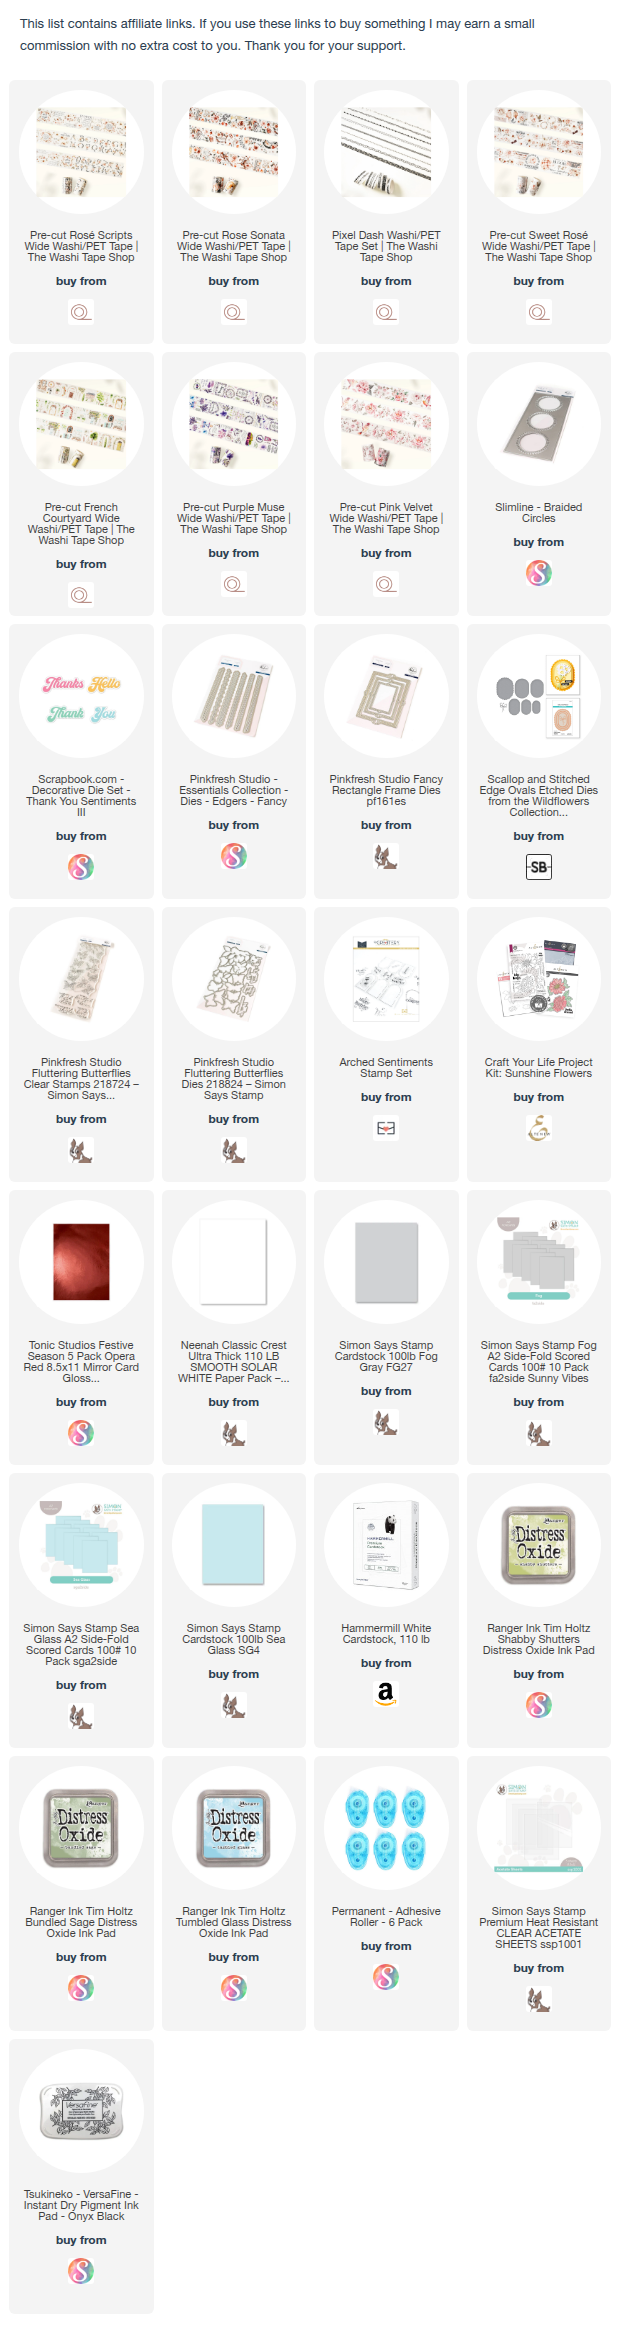
https://linkdeli.com/widget.js?id=f5e8378456858c916708
Here is a list of all the crafting tools I use on a regular basis to create my card projects: 


Leave a comment