If you love a fun fold card but struggle with measuring and scoring, a nesting die set can be a great solution. A versatile nesting die set can be used for more than just cutting layers and shapes; you can use it to create beautiful gate fold card bases, layered frames, shaker windows, and more.
You can use the code TONI25 for 25% OFF when you use my affiliate link: https://kokorosastudio.com/collections/handmade-cards-by-toni-k84947
You can watch the detailed YouTube tutorial here. I’ve also included a complete visual list of supplies at the end of the blog post for your convenience:
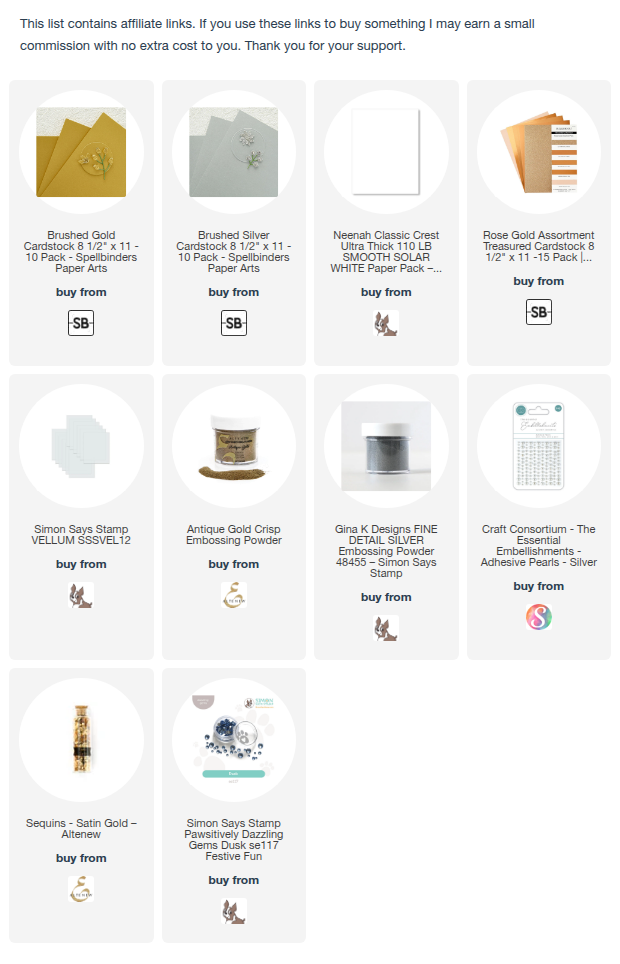
Supplies You’ll Need
Please check the visual supply list below in addition to the detailed list for each project:
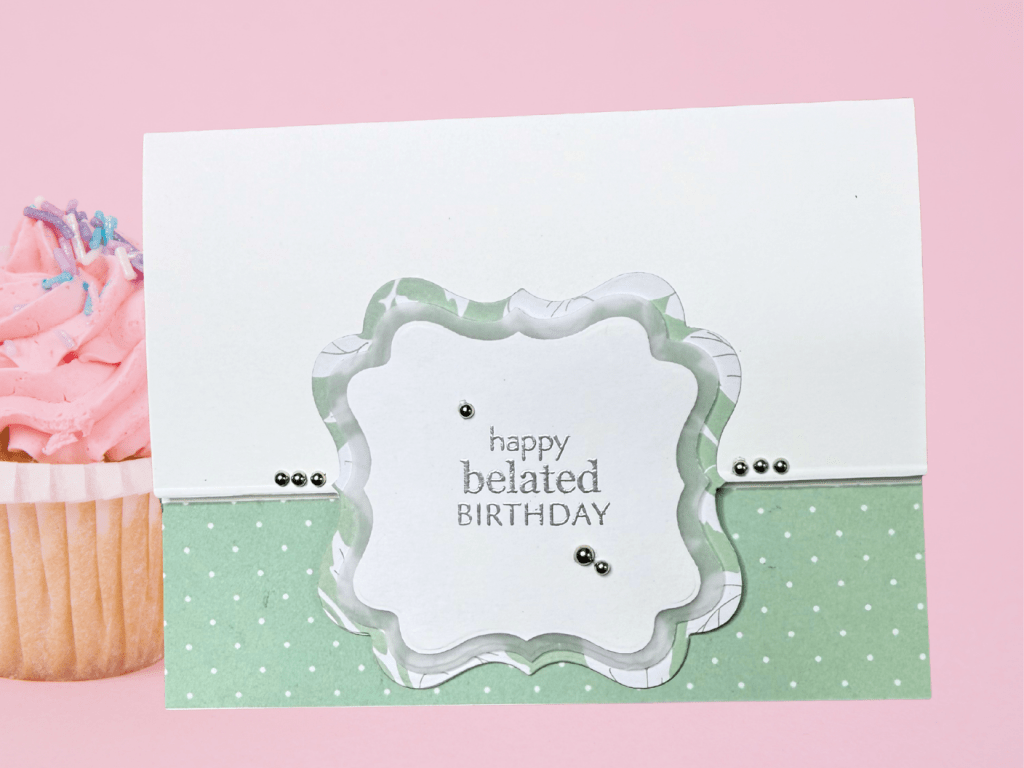
Card #1: Shaped Edge Card with Embossed Detail
This technique uses one gate fold die to create a shaped edge on a standard A2 card.
Supplies Needed:
- Kokorosa Studio nesting die set (for gate fold and label shapes)
- Papertrey Inks stamps (for sentiments)
- Card base (A2 size)
- Patterned paper scraps
- Vellum scraps (lightweight)
- Clear embossing ink
- Gina K designs Silver embossing powder
- Silver pearls
- Anti-static powder tool
- Fiskars trimmer with wire guide
- Scissors
- Scoreboard and scoring tool
Step-by-Step Instructions
- Cut the Shaped Edge:
- Find the centre of your A2 card base (2 ¾ inches along the 5 ½ inch edge).
- Line up one gate fold die along the centre line of the top panel and tape it down.
- Run it through your die-cutting machine.
- The die will cut the shaped edge.
- Finish the Cut:
- Use a trimmer with a wire guide (like the Fiskars trimmer) to complete the straight cut to detach the extra piece:
- Position the wire guide exactly over the line where the cut will happen.
- Slide the blade down carefully until you feel it meet the curve of the die-cut area.
- Tidy up any frayed or uneven edges with scissors.
- Use a trimmer with a wire guide (like the Fiskars trimmer) to complete the straight cut to detach the extra piece:
- Disguise Uneven Edges:
- Embossed Line: Place washi tape on your scoreboard as a guide. Butt the card’s edge against the tape and score a line close to the edge from the back of the card so the groove embosses outward. This hides unevenness and adds a design element.
- Paper Strip: Alternatively, adhere a narrow strip of coordinating paper, like gold foil, right over the uneven edge to completely cover imperfections.
- Assemble the Card:
- Burnish the fold nicely.
- Adhere a piece of patterned paper on the inside of the card, behind the flap.
- Use the two gate fold dies together to cut the centre piece base layer from patterned paper.
- Manually snip the straight edges of the centre piece base to mimic the curves created by the die.
- Cut additional layers, including a vellum layer and a heat-embossed sentiment layer, using the nesting dies.
- Adhere the layers to the centre piece base, using foam tape for dimension.
- Attach the centre piece to the card front and embellish.
- Tip: If you realize your sentiment is oriented incorrectly, you can rotate the A2 card base and make it a horizontal card if your patterned paper is non-directional.
Card #2: Traditional Gate Fold Card
This creates a true gate fold card where both sides open.

Supplies Needed:
- Kokorosa Studio nesting die set (for gate fold and label shapes)
- Papertrey Inks stamps (for sentiments)
- Card stock panel – 8 ½ in. x 4 ½ in.
- Patterned paper scraps
- Vellum scraps (lightweight)
- Clear embossing ink
- Gina K designs Silver embossing powder
- Silver pearls
- Coordinating ribbon
- Anti-static powder tool
- Scissors
- Scoreboard and scoring tool
Step-by-Step Instructions
- Create the Card Base:
- Cut card stock panel to 8 ½ by 4 ½ inches.
- Score the panel at 2 ⅛ inches from each end.
- Fold and burnish the creases to create a perfect gate fold.
- Die-Cut the Shaped Flaps:
- Place the two gate fold dies over the card base, aligning them carefully with the bottom edge of the card base and the edge of the flaps.
- Secure the dies with washi tape.
- Open up the folds so the dies only cut the front two flaps, not the entire card base.
- Run it through your die-cutting machine.
- Trim and Layer the Panels:
- Trim the card base down to the final size (4 ¼ by 4 ¼ inches).
- Cut the patterned paper layers for the flaps using the two gate fold dies.
- Adhere the patterned paper layers to the flaps using liquid glue to match the curved edges perfectly.
- Trim any overhangs using a trimmer or scissors, being careful not to cut the card base.
- Adhere the inner patterned paper layer.
- Finish the Card:
- Create a multi-layered label centre piece using the nesting dies, including a heat-embossed sentiment.
- Use foam tape on the back of the centre piece layers to create dimension and disguise any imperfections in the base layer.
- If you’re using a dark card base, attach a piece of white card stock to the back of the card base for writing a message.
- Tie a ribbon around the card to keep the flaps securely closed due to the card’s thickness. Tip: Use reverse tweezers as a third hand to hold the ribbon while you tie it.
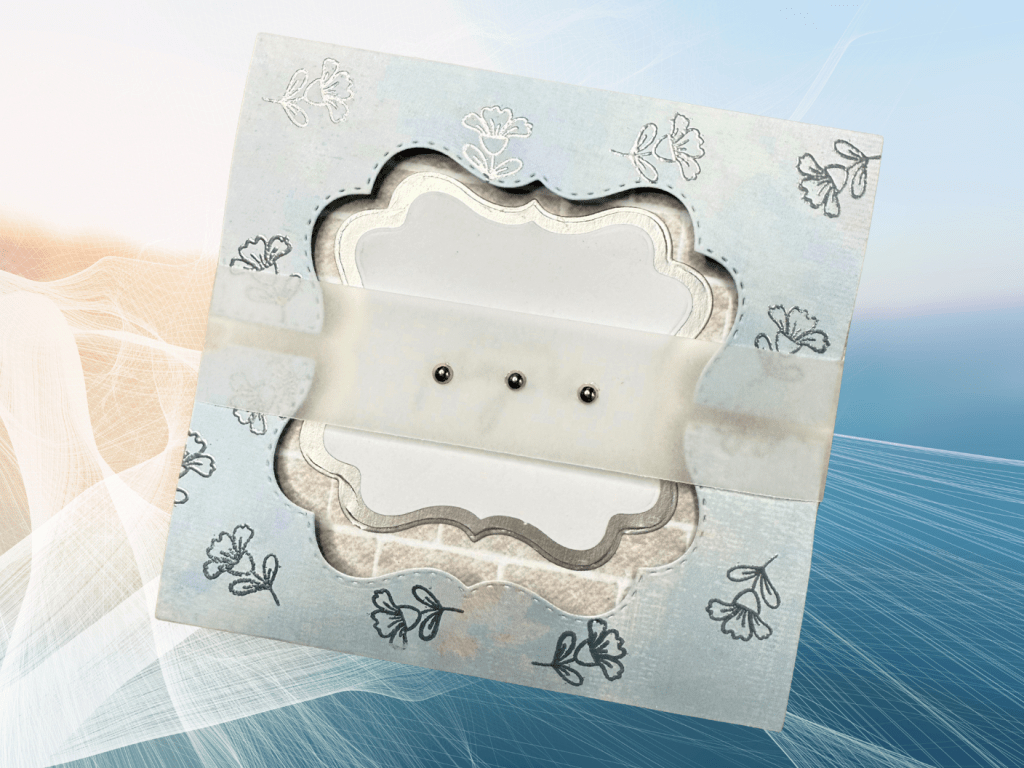
Card #3: Embellished Gate Fold with Belly Band
This technique uses double-sided patterned paper for easy layering and a vellum belly band for closure.
Supplies Needed:
- Kokorosa Studio nesting die set (for gate fold and label shapes)
- Papertrey Inks stamps (for sentiments)
- Small floral stamp for card front pattern
- Patterned paper panel – 8 ½ in. x 4 ½ in.
- Vellum strip: 1 in. x 11 in.
- Brushed silver card stock scrap
- Clear embossing ink
- Gina K designs Silver embossing powder
- Silver pearls
- Anti-static powder tool
- Scissors
- Scoreboard and scoring tool
Step-by-Step Instructions
- Prepare the Patterned Paper:
- Choose a double-sided patterned paper where the pattern is not too busy or bold.
- Cut the paper to 8 ½ by 4 ½ inches.
- Score the card at 2 ⅛ inches on both sides and create the folds.
- Die-cut the shaped flaps using the two gate fold dies.
- Enhance the Flaps with Heat Embossing:
- Use a small stamp to create a subtle pattern on the gate fold flaps with a clear embossing ink.
- Tip: If the small stamp rocks on the acrylic block, place another small stamp at the bottom of the block to stabilize it for a clean impression.
- Heat emboss the design using the silver metallic powder.
- Assemble the Centre Piece:
- Create a centre piece using the nested dies from patterned paper and brushed silver card stock.
- Use temporary glue to position the centre piece on the closed gate fold flaps for perfect alignment.
- Once aligned, slide liquid glue under the edges to secure it permanently.
- Create the Belly Band:
- Adhere a piece of square white card stock to the back of the card base for writing a message; use a corner rounder for a softer look.
- Cut a vellum strip (e.g., 1 inch by 11 inches) for the belly band.
- Wrap the vellum around the closed card and secure it in the centre back with a tiny amount of liquid glue, applied with a fingertip, to prevent a visible glue line.
- Embellish the belly band with a few large silver pearls to add visual interest.
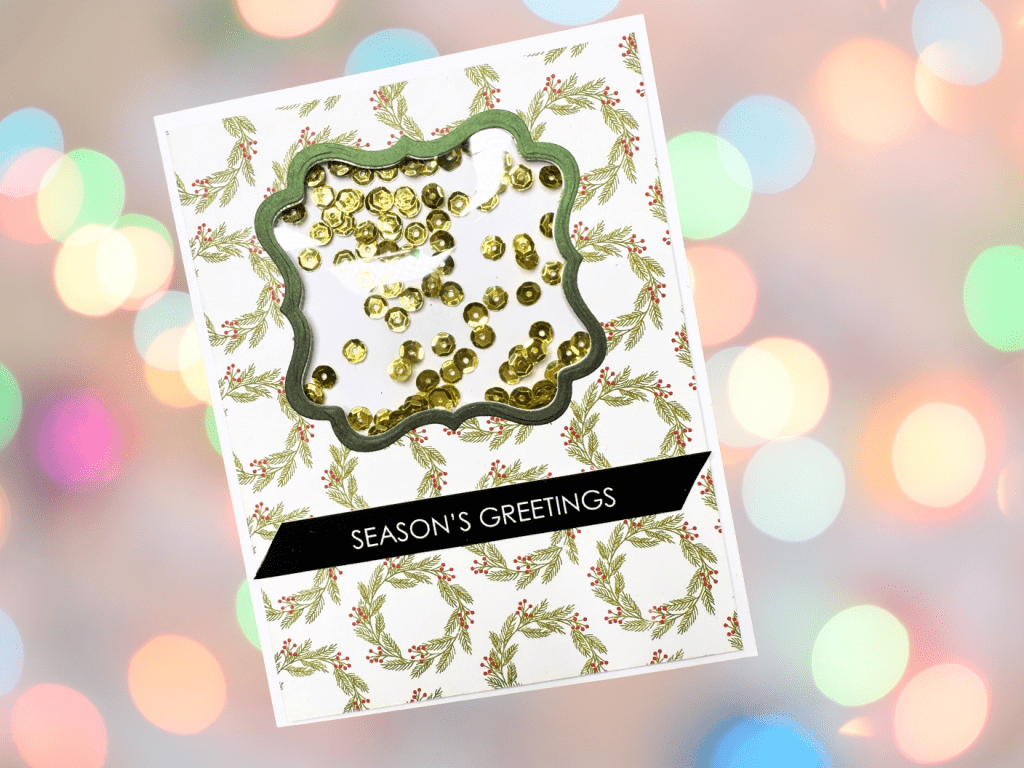
Card #4: Shaker Window with a Frame
Nesting dies are perfect for creating symmetrical shaker windows and frames.
Supplies Needed:
- Kokorosa Studio nesting die set (for shaker window & frame)
- Card base (A2 size)
- Patterned paper panel: 4 in. x 5 ¼ in.
- Vellum scraps (lightweight)
- Sentiment of your choice
- Acetate – small piece slightly larger than the shaker window
- Solid coloured card stock scrap for shaker window frame
- Shaker bits (I used gold sequins from AliExpress)
Step-by-Step Instructions
- Cut the Shaker Window:
- Cut a patterned paper panel to size (e.g., 4 by 5 ¼ inches).
- Use the smallest nesting die to cut a window near the top of the panel, leaving space for a sentiment at the bottom.
- Cut the Frame:
- Use a magnetic mat or sheet to perfectly align the two smallest nesting dies. Tip: The magnetic surface keeps the dies in place while you adjust the border symmetry.
- Secure the dies with a small piece of tape and run them through the die-cutting machine to cut the frame.
- Assemble the Shaker Element:
- Cut a piece of acetate slightly larger than the window.
- Remove the protective film from one side of the acetate and adhere it to the back of the patterned paper panel to cover the window.
- Apply narrow foam tape around the periphery of the window on the back of the panel to contain the shaker bits. Tip: Remove the release paper from the foam tape when going around curves to make application easier.
- Remove the remaining protective film from the acetate.
- Place a small pile of sequins or other shaker bits in the centre of the window.
- Remove the release paper from the foam tape (you can remove it partially for adjustment) and carefully adhere the entire panel to the card base, ensuring the shaker bits stay contained.
- Finish the Card:
- Adhere the die-cut frame around the shaker window to give it a polished look.
- Trim and attach a sentiment strip. Tip: To get the exact same angle on both ends, cut one end at an angle, then use the trimmed-off corner as a guide to line up your scissors for the second cut.
- Embellish with gems if desired.
Card #5: Simple Layering
This technique uses only the label dies for straightforward layering.

Supplies Needed:
- Kokorosa Studio nesting die set (for gate fold and label shapes)
- Sentiment of your choice
- 6 in. x 6 in. card base
- 5 ¼ in. x 5 ¼ in. patterned paper
- Brushed gold card stock scrap
- Scrap card stock for sentiment label
- Gold embossing powder
- Gold sequins
- Blue sparkling gems
Step-by-Step Instructions
- Use the different-sized label dies to cut nested layers from patterned paper and gold card stock scraps.
- Heat emboss a sentiment onto the smallest layer.
- Stack and adhere the layers, using foam tape for dimension if you wish.
- Adhere the completed layered piece to a card base.
- Embellish with sequins and gems to finish.
6. Shaped Gift Tags/Mini Cards
The nesting dies can be used to create small gift tags or mini shaped cards.


- Mini Shaped Card:
- Use one of the larger label dies to cut a shaped card base from folded card stock.
- Use the next smallest die and patterned paper scraps to create a layering panel.
- Heat emboss a sentiment and adhere the panel to the front of the shaped card base.
- Layered Gift Tag:
- Cut a layer from patterned paper and a base layer from a scrap of metallic card stock using two different-sized label dies.
- Stamp and emboss an image (like a cake) on the patterned paper layer.
- Stamp “To/From” on the back.
- Punch a hole and add a ribbon.
Here is a list of all the crafting tools I use on a regular basis to create my card projects:


Leave a comment