Do you love card making but cringe at the thought of spending a fortune on supplies? Whether you’re just starting out or you’ve been crafting for years, I have a fun challenge for you! Today, you’re going to create four beautiful, beginner-friendly cards using only supplies from the dollar store.
I’ll walk you through step-by-step how to transform simple, inexpensive items into professional-looking handmade cards. Beginners will love the easy techniques, while intermediate and advanced crafters will enjoy seeing how far you can stretch your creativity using budget-friendly finds. These projects are creative, affordable, and so much fun!
You can watch the detailed YouTube tutorial here. I’ve also included a complete visual list of supplies at the end of the blog post for your convenience:
🛒 Your Dollar Store Haul: Essential Supplies
You can find a surprising amount of craft materials at your local dollar store, whether it’s Dollar Tree or a Canadian store like Dollarama. Some items may not be top-tier quality, but they’re absolutely usable — and perfect for practicing techniques or trying new ideas.
Here’s what you’ll need for these projects:
Paper & Card Stock
- Patterned paper
- Card bases
- 6 in. x 6 in.
- A2 (4 ¼ in. x 5 ½ in.)
- Textured card stock (matte and pearlescent finishes)
- Foil paper pads (gold and silver)
- Lightweight coloured card stock
Adhesives & Dimensionals
- Mounting tape or foam tape
- Gold and silver adhesive sheets
- Tape runner
- Liquid glue
- Clear tape
- Foam dots and glue dots
Embellishments
- Twine or cord
- Paper flowers
- Ribbon and lace
- Alphabet stickers (gold and silver)
- Silver pearls or flat-back gems
Tools & Basics
- Sentiment stamp set
- Black Sharpie or marker
- Tweezers
- Press and Seal (or low-tack tape)
- Scissors
- Paper trimmer
Die-Cutting (Optional)
- Basic square and circle dies
- Die-cutting machine
Beginner Tip: Don’t have a die-cutting machine? No problem! Just trace your desired shapes around the stamped sentiment with a pencil and cut them out with scissors.
Step-by-Step Card Tutorials
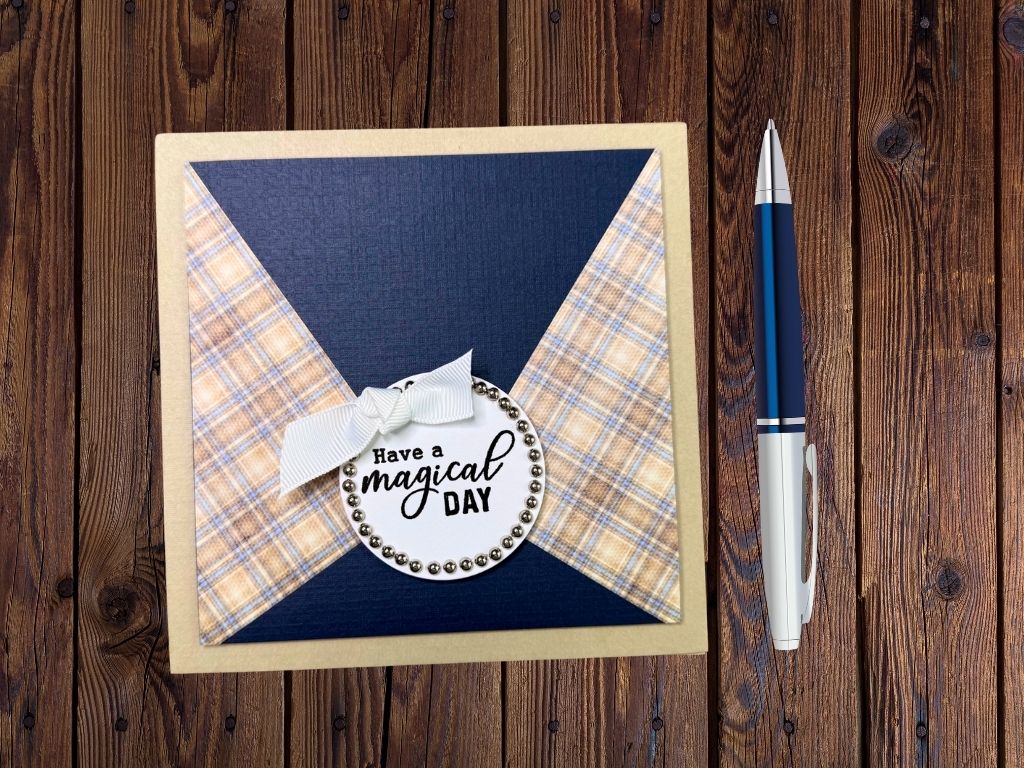
✂️ Card #1: Angled Plaid Masculine Card
This clean and simple design uses patterned paper placed at an angle for a dynamic, masculine look.
- Prep the Card Base and Panel
- Cut the card base to 6 in. x 6 in.
- Cut a piece of white card stock to 5 ½ in. x 5 ½ in. for the inside writing panel and round the corners.
- Adhere the inside panel using your tape runner.
- Create the Angled Design
- Place a 6 in. x 6 in. plaid paper on the navy panel at an angle.
- Use repositionable adhesive to hold it in place while trimming.
- Trim off overhanging paper, then use the first triangle as a guide for the second side.
- Adhere the Paper
- Glue both plaid triangles permanently to the panel.
- Trim any excess for a neat finish.
- Add Dimension and Sentiment
- Adhere a circle sentiment using foam dots for lift.
- The round sentiment softens the sharp plaid angles.
- Assemble the Card Panel
- Mount the finished panel onto a dark card base with foam tape.
- Colour the sides of the foam tape with a black Sharpie so it blends in.
- Add Embellishments
- Tie a small ribbon knot and secure it with glue dots for a simple finish.
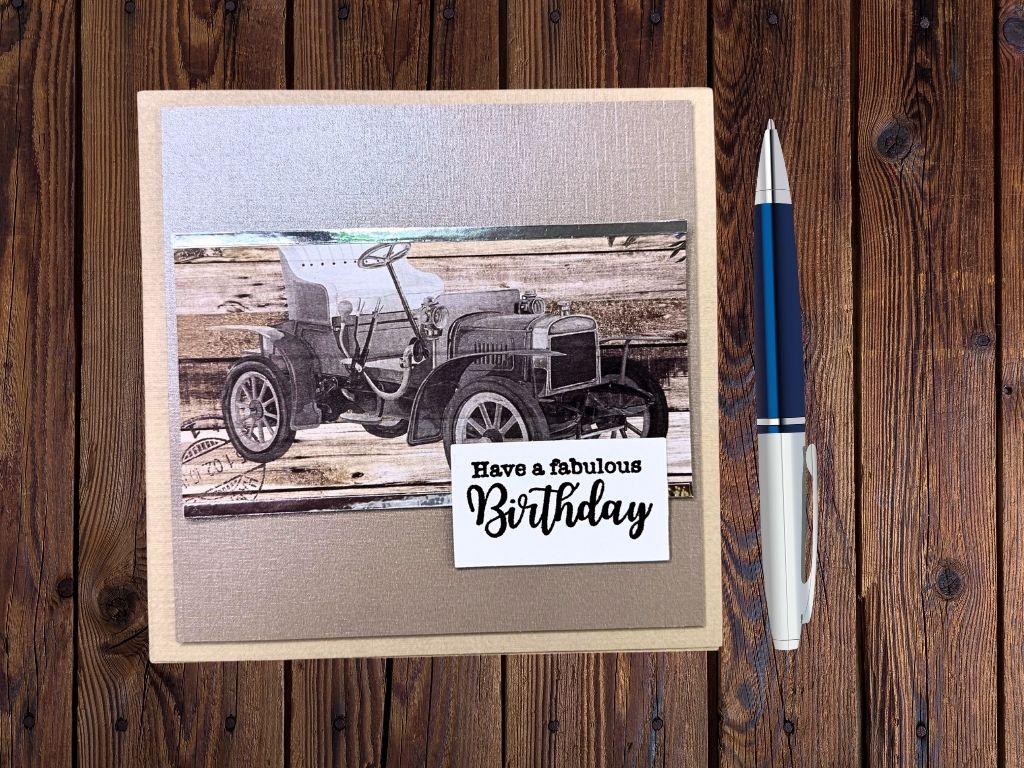
🚗 Card #2: Vintage Car Card with Custom Sentiment
This elegant card uses pearlescent paper and a clever trick for resizing die-cut sentiments.
- Prep the Card Base and Panel
- Cut the card base to 6in. x 6in.
- Cut a piece of white card stock to 5½” x 5½” for the inside writing panel and round the corners.
- Adhere the inside panel using your tape runner.
- Add Shine
- Cut two ⅛ in. strips of silver adhesive or foil paper.
- Glue them along the panel edges for a polished border.
- Use the bottom strip to hide any paper edge cuts or gaps.
- Custom-Size the Sentiment
- If your die-cut sentiment is too long, place your die over the section you want to keep and make sure the die-cut fits right into the die.
- Tape it down and run it through your machine.
- Repeat on the other side for a perfectly resized sentiment.
- Assemble
- Mount the focal image panel on foam tape for dimension.
- Stack leftover paper strips under the sentiment for extra support.
- Ensure the sentiment sits level and secure with glue.
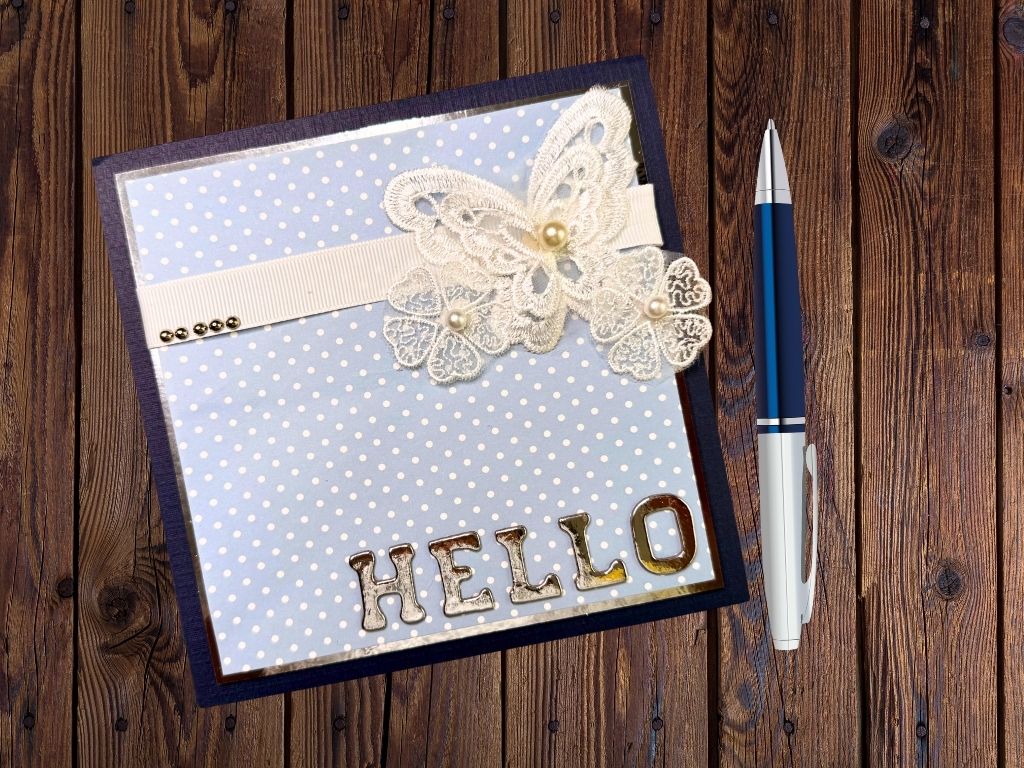
🦋 Card #3: Delicate Butterfly and Flower Card
This soft pastel design combines ribbon, flowers, and letter stickers for a pretty layered effect.
- Prep the Card Base and Panel
- Cut the card base to 6 in. x 6 in.
- Cut a piece of white card stock to 5 ½ in. x 5 ½ in. for the inside writing panel and round the corners.
- Adhere the inside panel using your tape runner.
- Prepare the Panel and Ribbon
- Round the corners of the inside panel and adhere it.
- Add a ribbon across the front panel before sticking it down.
- Secure the ribbon at the back with tape, and add glue dots to the front to keep it flat.
- Level the Panel
- Use foam tape above and below the ribbon area to keep the panel level.
- Embellish and Secure
- Use glue for attaching butterflies and flowers — foam dots from the package may not hold well.
- Create the Sentiment (Letter Sticker Technique)
- Arrange alphabet stickers on a T-square or ruler for even spacing.
- Pick up the aligned letters with Press and Seal or low-tack tape.
- Position them on the card, then press down firmly once satisfied.
- Use tweezers for micro-adjustments.
- Final Touches
- Add silver pearls in odd numbers for balance and visual interest.
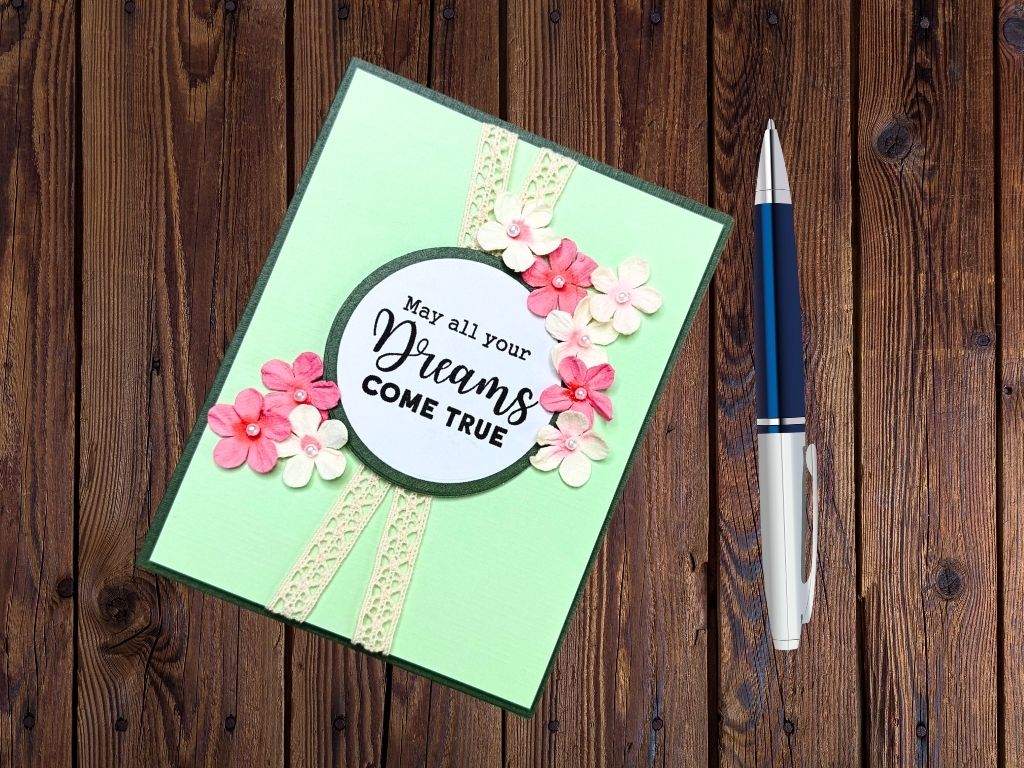
💐 Card #4: Quick and Elegant Lace Card
This easy, elegant design uses lace ribbon and paper flowers for a timeless look.
- Prepare Layers and Base
- Cut a mat slightly larger than your sentiment using a circle die.
- Adhere the sentiment to the mat.
- Prep the Card Base and Panel
- Cut a card stock panel to 8 ½ in. x 5 ½ in. and score at 4 ¼ in. x 5 ½ in. to create the card base.
- Cut a piece of white card stock to 4 in. x 5 ¼ in. for the inside writing panel and round the corners.
- Adhere the inside panel using your tape runner.
- Apply Lace
- Measure and cut lace to wrap vertically around the front panel.
- Glue and tape the lace at the back to hold it in place.
- Place Sentiment
- Position the sentiment label over the lace intersection.
- Add foam tape behind the sentiment label near the left and right edges for dimension. Use extra glue where it meets the lace.
- Embellish and Assemble
- Arrange small paper flowers around the sentiment.
- When adhering the panel to the card base, avoid placing foam tape directly over the lace.
- Add glue if the tape doesn’t stick securely.
🌟 Conclusion
Now you’ve got four beautiful handmade cards — all crafted with supplies from the dollar store! You’ve learned how to:
- Create custom-sized die-cut labels
- Use dollar store adhesives, lace, and embellishments creatively
- Combine ribbons, flowers, and stickers for polished, elegant results
From a masculine plaid design to soft pastels and lace, you’ve proven that beautiful cards don’t have to be expensive — just thoughtfully crafted with a creative eye and a dollar-store budget!
Here is a list of all the crafting tools I use on a regular basis to create my card projects:


Leave a comment