Think nesting die sets are just for cutting layers? Think again! These seemingly simple dies are incredibly versatile, and with a few clever tricks, you can use them to create a variety of stunning card designs.
In this post, you’ll learn how to transform one nesting die set into a custom gatefold card, an asymmetrical layered card, a scrap-busting design, and an aperture card.
If you’d like to avail of the 25% discount offered by Kokorosa Studio, please use code Toni25 with my affiliate link: https://kokorosastudio.com/collections/handmade-cards-by-toni-k84947
You can watch the detailed YouTube tutorial here. I’ve also included a complete visual list of supplies at the end of the blog post for your convenience:
Here’s the die set I’m using for my projects:
Please check the visual supply list below for the additional supplies. Please note that the Carta Bella Flora #3 paper pad I’m using in this tutorial is currently unavailable. You may use another paper pad of your choice.
https://linkdeli.com/widget.js?id=f5e8378456858c916708
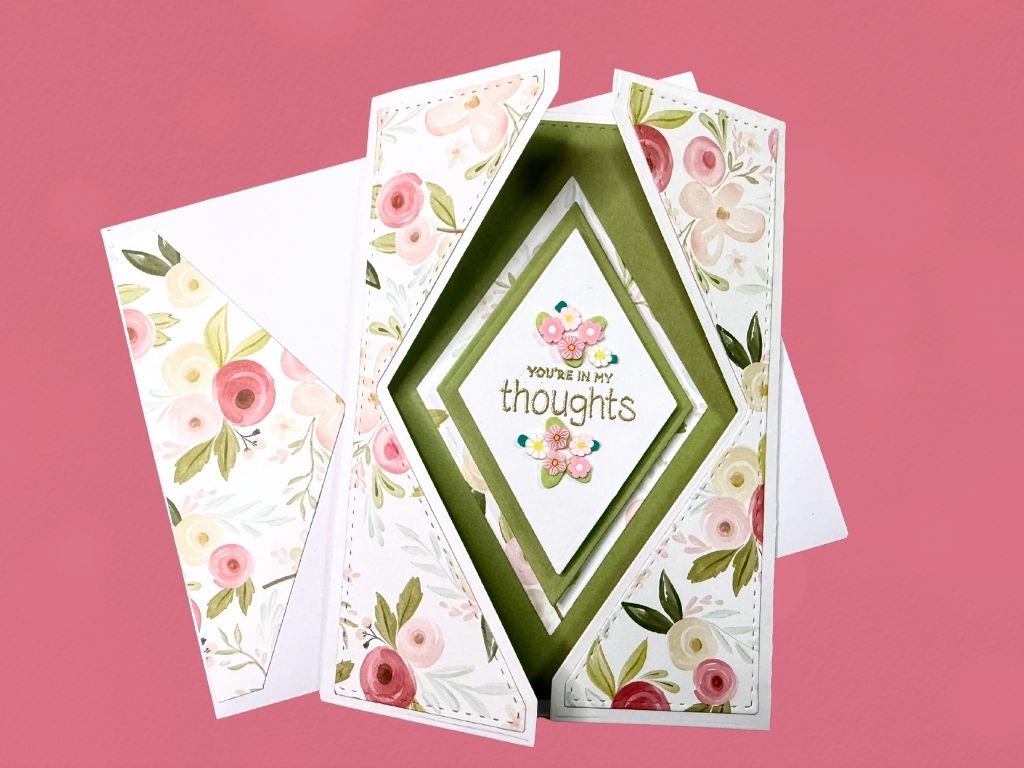
Card #1: Elegant Gatefold Card
This design uses the main die from the set, which cuts and scores a beautiful gatefold base.
Step 1: Prepare the Card Base
- Start with an A2 card panel (8½” x 5½”).
- Line up the largest nesting die on the cardstock and secure it with washi tape.
- Run it through your die-cutting machine. The finished card base will measure about 3¾” x 5½”.
- Reinforce the light, built-in score lines with a scoring tool.
- Fold along the score lines to create the gatefold base. (Tip: use a lighter-weight cardstock for the base—it’s easier to mail and the layers will add strength.)
Step 2: Create the Layered Panels
- Use the smaller dies to cut the front and inside decorative panels.
- Cut two 2-inch strips of patterned paper for the front panels.
- Cut one 2¾-inch piece for the large inside panel.
- Cut a small piece of white cardstock for the sentiment.
Step 3: Stamp and Emboss the Sentiment
- Stamp and heat emboss the sentiment before die-cutting for perfect alignment.
- Trim a piece of white cardstock and position it in your stamping tool with the sentiment die.
- Apply antistatic powder to the cardstock or vellum.
- Stamp the sentiment with embossing ink and apply embossing powder (Antique Gold looks lovely).
- Tap off the excess and heat set it.
- Once cool, line up the smallest diamond nesting die and cut it out.
Step 4: Assemble the Card
- Use a tape runner to align the layers—this lets you adjust before committing.
- Once everything’s aligned, secure the layers with liquid glue.
- Adhere the large inside panel first, then the two side panels.
- Keep the card closed while positioning the centrepiece so everything lines up evenly.
- Pop up the sentiment with foam dots, adding a touch of glue for extra hold.
- Add a decorative back panel for writing your message.
- Finish with shaker bits or gems on either side of the sentiment.
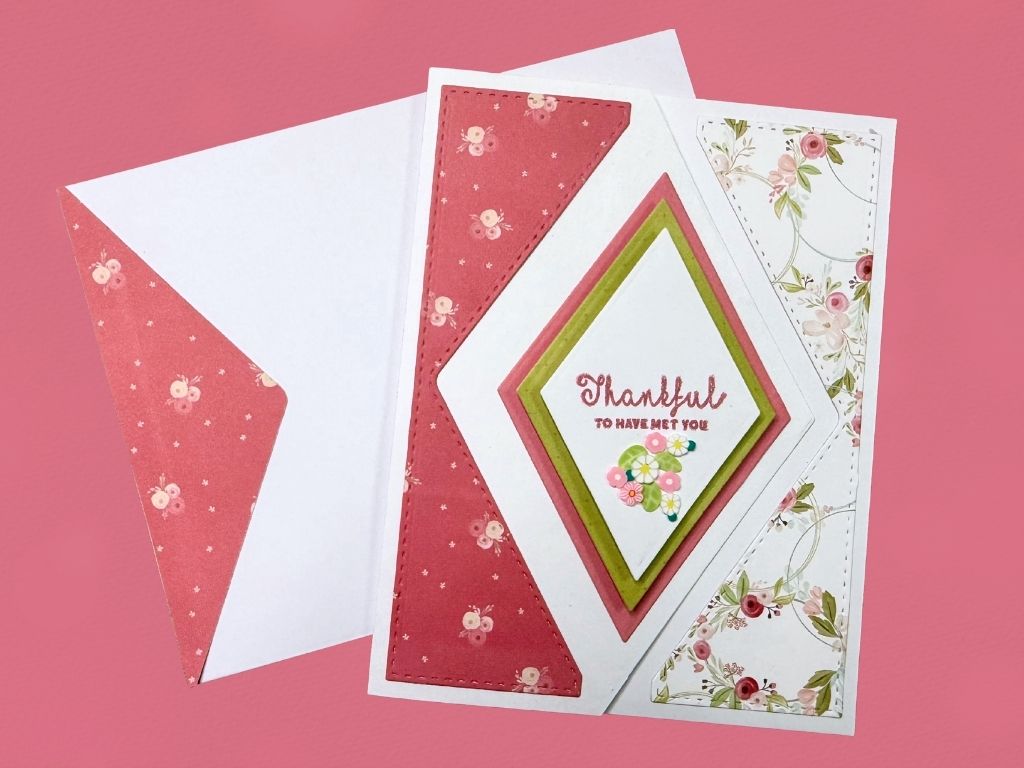
Cards #2 & #3: Shaped Edge Cards (Two Ways)
For these next two cards, you’ll use the main die differently to create an asymmetrical flap—a modern twist that looks striking.
Step 1: Create the Asymmetrical Card Base
- Start with two A2 card bases.
- Line up the main frame die along the edge of the card front and tape it in place.
- Tip: Make a partial cut. Only run the top part of the die through your machine so the design cuts the flap, not the entire panel.
- Remove the die to reveal a triangular flap.
- Score at 4¼” to create the fold line.
- Repeat with the second card panel. You now have two bases ready to decorate.
Step 2: Card #2 – Layered Asymmetrical Card
- Cut patterned paper layers to fit the front and inside panels.
- Stamp and emboss your sentiment on a white panel.
- Use a tape runner to align the panels evenly.
- Secure with liquid glue.
- Pop up the top layers with foam dots for dimension.
- Add a back panel to reinforce the base and provide a writing area.
- Embellish with gems or shaker bits.
Step 3: Card #3 – Scrap-Busting Design
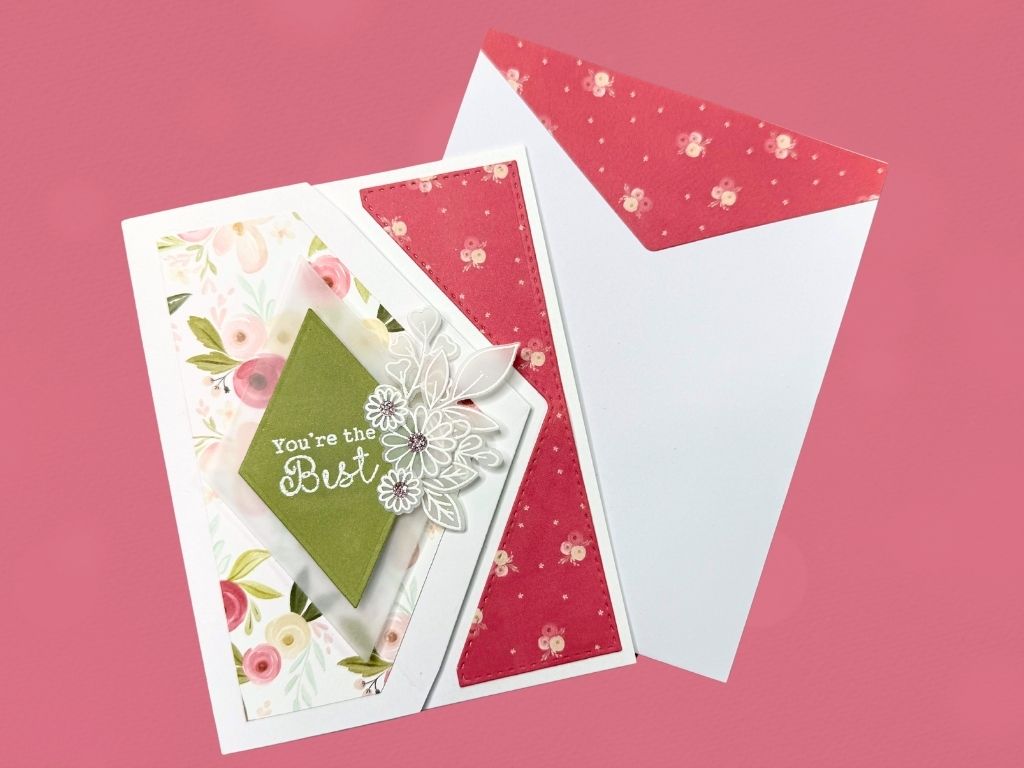
This card is perfect for using up scraps from the previous projects.
- Choose coordinating paper scraps and trim them evenly.
- Cut them into triangles or panels to fit your asymmetrical base, leaving a narrow margin.
- Lightly glue the first patterned scrap to the card front.
- Die-cut a vellum layer using the largest die and heat emboss the sentiment in white.
- Add a coordinating paper strip inside the card.
- Layer and glue all the scraps, then attach the vellum sentiment panel on top.
- Use foam tape and a small amount of glue for dimension and better adhesion.
- Arrange vellum flowers and leaves around the sentiment—offsetting the sentiment slightly gives more space.
- Tip: Use Press ’n Seal to lift the arrangement and transfer it easily.
- Apply glue only behind the flower centres so it won’t show through the vellum.
- Press the arrangement in place and finish with gems in the flower centres.
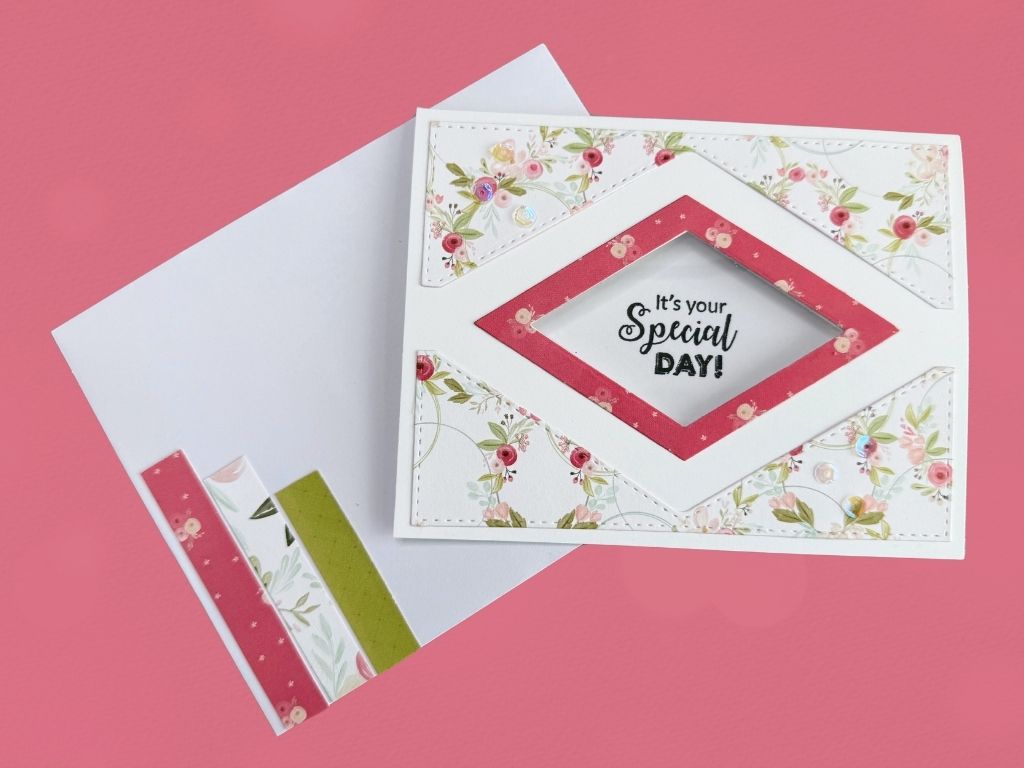
Card #4: Aperture Card with Frame
This final card uses nesting dies to create a window—or aperture—design.
Step 1: Create the Aperture
- Use the middle die in the set to create the window opening.
- Position the die in the centre of the card front using temporary adhesive.
- Open the card and run just the front panel through your die-cutting machine.
Step 2: Prepare the Acetate and Frame
- Create a frame using the largest and smallest dies together.
- Use the same middle die to cut a piece of acetate for the window.
- Remove the acetate’s protective film.
- Apply a thin line of glue to the frame and let it get tacky before attaching the acetate.
- Adhere the acetate to the back of the frame.
Step 3: Stamp and Assemble
- Choose a stamp that fits perfectly in the aperture.
- Tip: Check alignment by stamping on an acetate sheet first before stamping on the card.
- Stamp the sentiment on the card base.
- Once the frame-and-acetate is tacky, adhere it to the card front.
- Glue any side panels inside the card and burnish the fold line.
- Add a few iridescent sequins or gems for a final touch.
You now have four beautiful, unique cards that show just how versatile nesting dies can be. The best part? These dies often cut and score at the same time—making your crafting faster, easier, and more creative than ever!
Here is a list of all the crafting tools I use on a regular basis to create my card projects:


Leave a comment