Looking for easy holiday card making ideas with supplies you already own? In today’s video, I’m creating simple snowflake Christmas cards using older dies, hot foil plates, and card stock from my stash. These designs are quick, elegant, and perfect if you want to make beautiful handmade cards without buying new craft supplies.
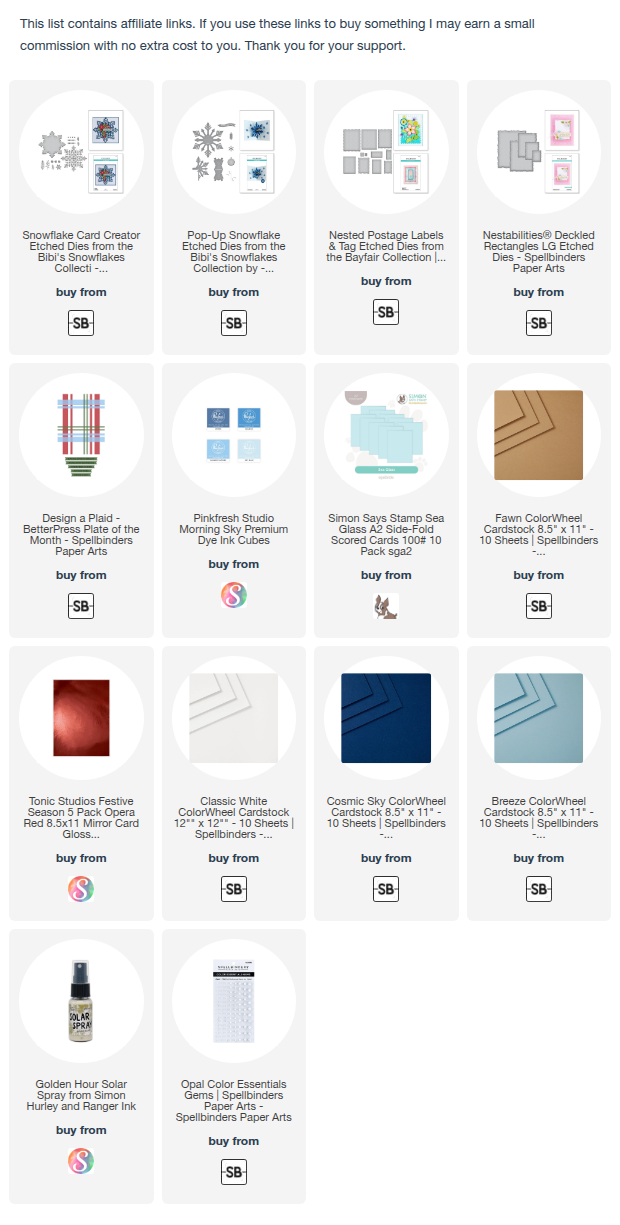
You can watch the detailed YouTube tutorial here. I’ve also included a complete visual list of the supplies that are currently available at the end of the blog post for your convenience:
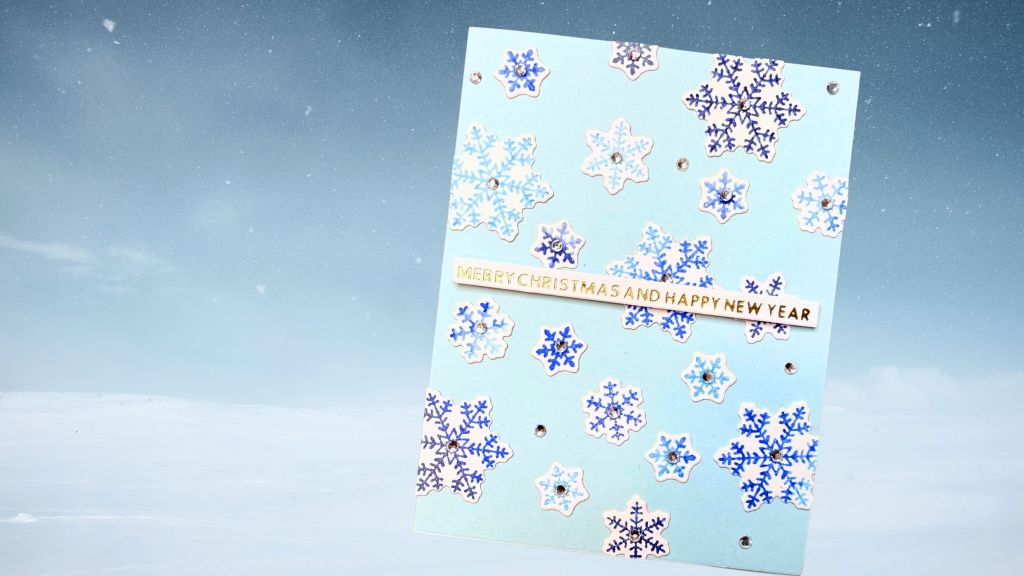
❄️ Card 1: Easy Gradient Snowflakes Holiday Card
Create beautiful snowy cards using hot foil plates, the BetterPress System, and simple stash-busting techniques.
If you’ve got snowflake hot foil plates or dies sitting in your older stash, this is the perfect project to bring them back to life. Today, you’ll learn how to press snowflake designs using your BetterPress system (yes—using hot foil plates!), blend smooth ink gradients, and assemble a clean and modern winter card with tons of sparkle.
✨ Supplies Used
Hot Foil Plates & Dies
- Spellbinders Glimmering Snowflakes Hot Foil Plate (currently unavailable)
- Coordinating die
Papers & Card Bases
- Watercolour paper (smooth side recommended)
- Simon Says Stamp pre-made A2 card base – Sea Glass
Adhesives
- Temporary adhesive (liquid glue or removable tape runner)
- Painter’s tape
- Bearly Art Liquid glue
- Narrow foam tape or foam strip
Inks
- Three coordinating dye inks in gradient colours (light, medium, dark)
- Pinkfresh Studio Dye Inks – Morning Sky
Embellishments
- Rhinestones or gems for the snowflake centres
❄️ Step-by-Step Instructions
1. Prepare Your Hot Foil Plate for BetterPress
Even though Spellbinders doesn’t recommend using hot foil plates in the BetterPress system, you can use them at your own discretion. With careful handling, they won’t damage your plate or system—but please proceed with caution.
Hot foil plates are much more slippery than BetterPress plates, so they tend to slide around. To prevent shifting:
- Apply a small amount of temporary glue on the back of the hot foil plate.
- Press it onto the BetterPress platform where you want your design centred.
- You can remove any leftover adhesive later using a glue eraser or rubbing alcohol.
Your plate should now stay in place much more securely.
2. Prepare the Watercolour Paper
- Add a few small dots of temporary adhesive to help it stay in place.
- Position the watercolour paper over the plate, making sure the design area is completely covered.
- Use painter’s tape on the corners to prevent shifting when stamping multiple times.
3. Ink Up the Snowflake Plate
Choose three coordinating ink colours (light, medium, dark) and apply them as follows:
- Start with the lightest ink on one end of the plate.
- Blend the medium ink next, slightly overlapping the first colour.
- Add the darkest ink at the opposite end.
- Overlap each colour slightly to create a smooth gradient.
Optional (for a textured impression):
Hold your spray bottle at a distance and mist the ink lightly with 1–2 sprays of water.
4. Press the Snowflake Background
- Run the BetterPress platform through your die-cutting machine.
- Your inked snowflakes should be beautifully pressed into the paper with both colour and indentation.
- If the impression looks light, ink it again and press without adding more water.
Use a heat tool to dry the paper before moving on.
5. Die-Cut the Snowflakes
- Line up the coordinating dies with each snowflake impression and die-cut.
- Repeat for all the snowflakes you pressed. You can make extra to use in future projects.
6. Arrange the Snowflakes on the Card Base
- Place your card base on your glass mat.
- Lay out the snowflakes in a random pattern across the card front.
- Mix sizes, colours, and gradients for visual interest.
- Allow some pieces to hang off the edges for a more organic look.
Once you’re happy with the placement:
- Cover the arrangement with Press-N-Seal and lift the whole layout in one piece.
7. Glue Everything Down
- Flip over the Press-N-Seal and apply liquid glue to the back of the snowflakes.
- Avoid getting glue on the very edges so they don’t accidentally glue to the back of the card.
- Press the snowflakes onto the card base all at once.
- Peel off the Press-N-Seal and glue down any pieces that need extra adhesive.
- Trim off the snowflakes hanging over the edges for a clean, finished look.
8. Add the Sentiment Strip
- Hot foil your sentiment in gold (or use a pre-made one).
- Add a few strips of narrow foam tape behind it for dimension.
- Centre it across the card, slightly overlapping some snowflakes.
9. Finish With Sparkle
Add rhinestones or gems to:
- The centres of the snowflakes
- Random spots around the card front
And your sparkling, stash-busting snowflake card is complete! ❄️✨
This technique is ideal for creating multiples and using up older supplies while getting a fresh, modern look.
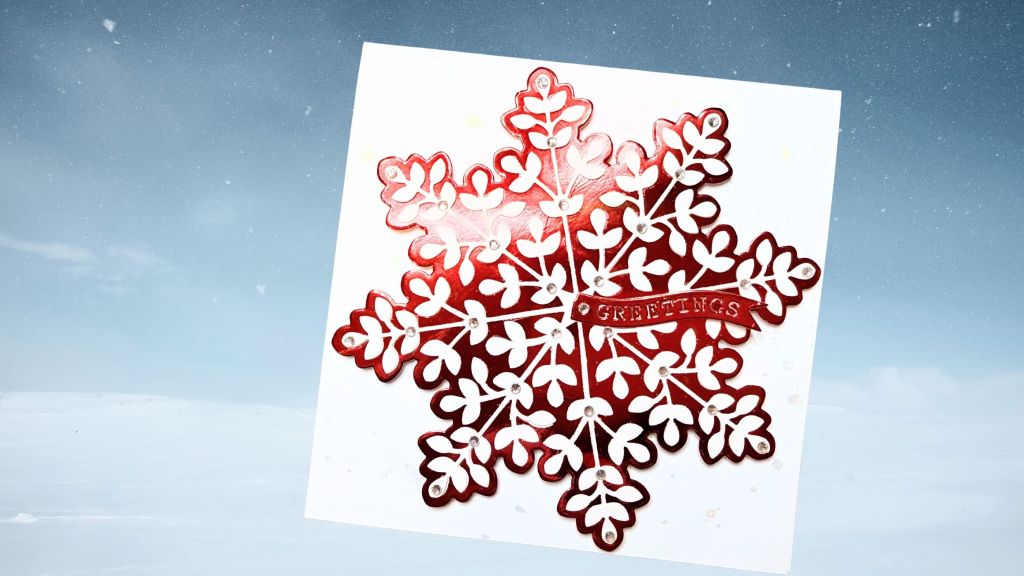
❄️ Card 2: Snowflake Focal-Point Holiday Card (6” × 6”)
Create a bold, elegant snowflake card using layered die cuts, shimmer spray, and foil cardstock.
If you love using older supplies in fresh new ways, this card is a great example of how to turn a single intricate die into a stunning focal point. This 6” × 6” snowflake card combines layered die cuts, subtle shimmer splatter, and a touch of holiday sparkle.
✨ Supplies Used
Cardstock & Paper
- Heavyweight white 6” × 6” card base ( Spellbinders Classic White 12×12 card stock or similar)
- White cardstock (for die cutting)
- Red foil card stock (for the shadow layer)
Dies
- Older Bibi Cameron Snowflake Die Set (includes detailed layer + shadow layer)
Adhesives
- Liquid glue
- Narrow foam tape
- Magnet (for holding the folded tab in place temporarily)
Embellishments
- Rhinestones or gems
- Simon Hurley Solar Spray (for pearlescent splatters)
❄️ Step-by-Step Instructions
1. Prepare Your 6” × 6” Card Base
- Cut your 12” × 12” Classic White cardstock into a 6” × 6” top-fold or side-fold card base.
- Set it aside while you work on the snowflake elements.
2. Die-Cut the Snowflake Layers
- Use the detailed snowflake die to cut the main shape from white card stock.
- Die-cut the main snowflake twice more so you can create a stacked, dimensional focal point.
- Cut the coordinating shadow layer and included sentiment from red foil card stock.
3. Assemble the Intricate Snowflake
This step takes patience, but the results are worth it.
- Layer the two white snowflake die cuts together with liquid glue.
- Work slowly, gluing one section at a time since the design is very intricate.
- You may be tempted to use double-sided adhesive sheets, but removing the backing can make accurate alignment harder on such a large design.
- Using liquid glue gives much more control—especially if sections shift slightly.
- If you notice any areas that didn’t line up perfectly, fix what you can now. Small imperfections will be hidden later.
4. Add Shimmer Splatters to the Card Base
Before attaching your snowflake, add a soft shimmery background.
- Place a rag or cloth underneath your card base to protect your surface.
- Gently swirl or roll the Simon Hurley Solar Spray in your palms (avoid shaking up and down, just in case there’s mica that could clog the sprayer).
- Tap the nozzle to create fine splatters around the edges of the card base.
- If you accidentally create a larger droplet, lean into it—add a few bigger splatters so it looks intentional.
- Concentrate the splatter around the perimeter since the snowflake will sit in the centre.
- Let the panel dry for several minutes.
5. Adhere the Snowflake to the Shadow Layer
- Once the card base is drying, begin attaching the white snowflake stack onto the red foil shadow layer.
- Start by gluing down one end and slowly work your way around.
- Use small drops of glue—enough for adhesion but not so much that it oozes out, especially on foil.
- If certain sections fall naturally into place, follow that flow.
- Continue gluing the detailed areas until the entire snowflake is secured.
- Set it aside to dry fully.
6. Glue the Snowflake to the Card Base
- Angle the snowflake slightly so it looks balanced but not perfectly vertical.Fold this tab inward.
- Glue the sentiment on the card front by folding in the tab and adding a dot of glue to the inside and outside of the tab.
- If it shifts, place a small magnet on top for a couple of minutes to keep it still while drying.
7. Add Rhinestones for Sparkle
- Decorate the branches of the snowflake with rhinestones or gems.
- Use small, medium, or mixed sizes to add shine and visual interest.
- Once the glue sets, remove the magnet and check the overall alignment.
Between the layered die cuts, subtle shimmer splatter, and sparkling gems, this card delivers a beautifully festive holiday look—perfect for sending or gifting.
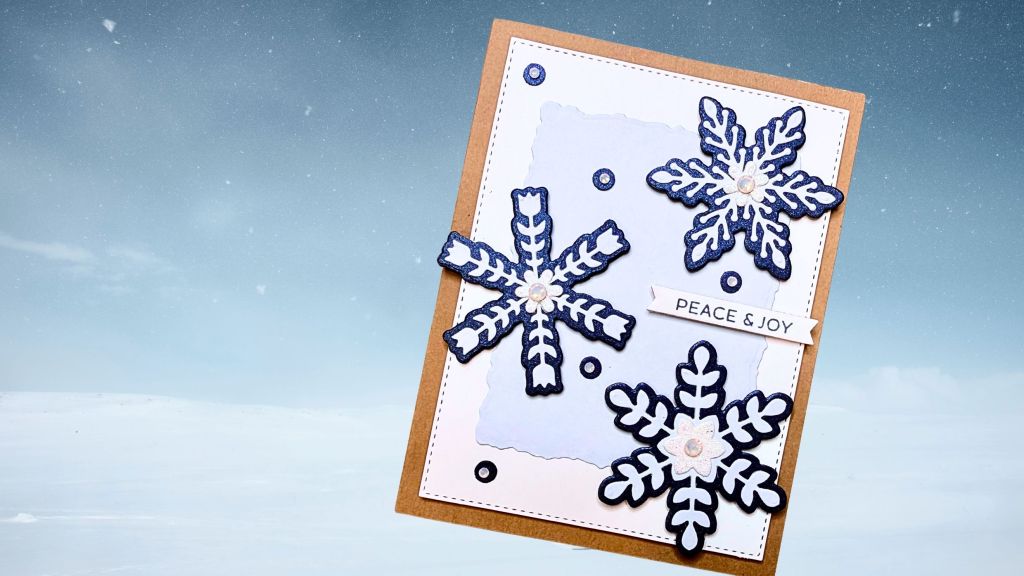
❄️ Card 3: Layered Snowflakes
Featuring stitched edges, deckled layers, and dimensional snowflakes
For this card, I combined three different die sets to create a layered winter design with stitched detail, soft blues, glittery accents, and a clean sentiment. This project is perfect if you want to make a card that looks intricate but is actually easy to assemble once your die-cutting is done.
✨ Supplies Used
Cardstock & Paper
- White card stock card panel – 3 ¾ inches x 5 inches
- Dark blue card stock (snowflake shadow layers)
- Light blue card stock (background layer) – 3 inches x 3 ½ inches
- White glitter cardstock (snowflake centres)
- Craft A2 card base
Dies & Plates
- Postage Label Die Set (stitched die for base panel)
- Deckled Rectangle Die Set (largest size for top layer)
- Snowflake Die Set (with shadow + detailed layers + multiple centre options – currently unavailable)
- BetterPress sentiment plate (prints all sentiments at once)
Adhesives
- Bearly Art Liquid glue
- Foam tape (narrow strips + small foam bits)
Embellishments
- Small blue circles (punched from scraps)
- Spellbinders Opal Gems (for snowflakes and embellishing)
❄️ Step-by-Step Instructions
1. Prepare the Base Layers
- Prepare the A2 card base from craft card stock.
- Die-cut the stitched Postage Label panel using the from white card stock.
- Die-cut the largest deckled rectangle from light blue cardstock to create the top panel.
2. Die-Cut the Snowflakes
You’ll need three layers for each snowflake:
- Shadow layer: dark blue
- Detailed layer: light blue
- Centre: white glitter
- Cut all snowflake pieces from the appropriate colours.
- Punch a few small blue circles from scrap cardstock using a hole punch—these will act as additional embellishments.
- Set all pieces aside in groups to keep things organized.
3. Create the Sentiments
- Use the BetterPress plate to print all the sentiments at once on white cardstock.
- Trim them apart.
- Keep your options nearby—you’ll choose your favourite at the end.
4. Assemble the Snowflakes
- Lay a piece of non-stick paper on your work surface to prevent glue marks.
- Keep the small die-cut centres inside the detailed snowflake layer—this gives you more surface area for gluing.
- Apply liquid glue to the back of the detailed snowflake.
- If you get glue globs, use a scrap piece of cardstock to wipe off the excess (a great trick from Bibi Cameron!).
- Adhere the detailed layer onto the dark blue shadow layer.
- Glue the white glitter centre on top.
- Allow the layers to dry fully before adding dimension.
5. Add a Writable Panel to the Inside
Since the card base is dark:
- Cut a white cardstock rectangle.
- Adhere it inside the card so you can write your message clearly.
6. Add Dimension to the Snowflakes
- Add small foam bits to the backs of each snowflake.
- Remove all the foam backings first.
- Add a light layer of glue on top of the foam—this gives you some wiggle room for repositioning.
- Place the centre snowflake first.
- Add the remaining snowflakes around it, spacing them evenly and adjusting as needed.
7. Attach the Sentiment
- “Peace and Joy” is beautifully balanced for this layout.
- Add a narrow foam strip behind the sentiment.
- Apply it straight across the panel.
8. Add Final Embellishments
- Glue the small blue punched circles around the snowflakes for added colour and interest.
- Place Spellbinders Opal Gems onto:
- The centres of each snowflake
- The blue circles
- This adds sparkle, shine, and a touch of holiday shimmer.
This design combines soft winter colours, stitched detail, glitter accents, and dimensional elements for a clean and elegant holiday card that’s easy to recreate with dies you already have in your stash.
https://linkdeli.com/widget.js?id=f5e8378456858c916708
Here is a list of all the crafting tools I use to create my card projects:


Leave a comment