Sometimes simple cards can feel… well, too simple. The easiest way to elevate them without adding bulk or complicated layers? Vellum.
In this post, I’m walking you through three different cards that show how vellum can instantly add elegance, softness, and a professional finish — even on quick, easy designs. I’ll also share plenty of vellum-specific tips so you get beautiful results every time, without cracking, curling, or visible glue.
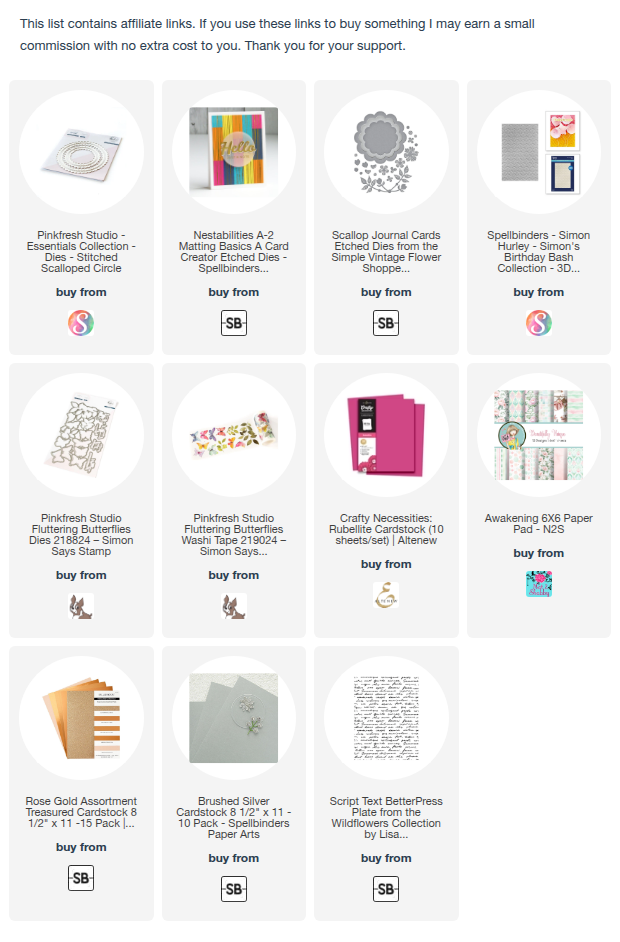
You can watch the detailed YouTube tutorial here. I’ve also included a complete visual list of the supplies that are currently available at the end of the blog post for your convenience:
Card #1: Embossed Vellum Band on a Fancy Fold Card
This first card is all about keeping things simple while letting vellum do the heavy lifting. I’m using a lightweight vellum embossed into a delicate panel and turning it into a translucent accent band across the card front.

✂️ Supplies Used
- Cardstock & Paper
- A2 tent-fold card base (heavyweight white cardstock)
- Lightweight vellum
- Coordinating patterned paper (optional)
- Scrap cardstock (for backing vellum during embossing and finishing the back of the card)
- Substitutions & Options
- No vellum? Try translucent acetate or tracing paper (results will be less soft but still pretty).
- No patterned paper? Skip it entirely — this design works beautifully with just vellum and white cardstock.
- Don’t have heavyweight cardstock? Double up two lighter layers for the card base.
- Dies & Embossing
- Embossing folder (A2-sized or larger)
- Butterfly die
- Sentiment dies or pre-foiled sentiments
- Substitutions & Options
- Any embossing folder will work — even simple textures like dots or linen look elegant on vellum.
- Swap die-cut butterflies for stamped images or small floral dies.
- Pre-printed sentiment strips work just as well as die-cut or foiled sentiments.
- Tools
- Die-cutting machine (Spellbinders Platinum 6)
- Paper trimmer
- Bone folder
- Pencil
- Adhesives
- Liquid glue with fine-tip nozzle
- Foam tape
- Substitutions & Options
- If glue shows through, use tiny dots of strong tape hidden behind embellishments.
- Embellishments
- Washi tape die cuts (Pinkfresh Studio or similar)
- Sequins or small embellishments
- Substitutions & Options
- Use stamped florals or ephemera instead of washi tape die cuts.
- Pearls, gems, or enamel dots can replace sequins.
📝 Step-by-Step Instructions
- Emboss the vellum: Place a piece of cardstock directly behind the vellum before embossing. Think of the cardstock as a helper — it reduces pressure and helps prevent cracking, especially when using 3D embossing folders.
- Tip: Do not mist vellum before embossing. Moisture will cause vellum to curl.
- Trim the embossed panel: Cut the embossed vellum into a narrow band. Save the offcuts — they’re perfect for future projects or for finishing the back of the card.
- Create the opening: Trim sections from the card front to create a gap where the vellum will sit. The vellum panel should be slightly larger than the opening so you have room to apply adhesive.
- Adhere the vellum neatly: Apply a very thin line of glue along the edges only.
- Clean up the back: Use narrow cardstock strips to finish the back of the card and hide the vellum edges with the adhesive. This small step makes a big difference in how polished the card looks.
- Prevent messages showing through: Add a small cardstock panel to the inside of the card, positioned behind the vellum band. This keeps handwritten messages from showing through the front.
- Finish the front: Add die-cut florals, a gold-foiled sentiment, and a butterfly. Use foam tape for dimension, curling the wings slightly for a natural look.
- Tip: Avoid gluing the parts of the die cuts that are on the vellum as the glue will be visible through the vellum. Anchor only the areas where adhesive won’t show.
This card comes together incredibly quickly and looks far more detailed than it actually is.
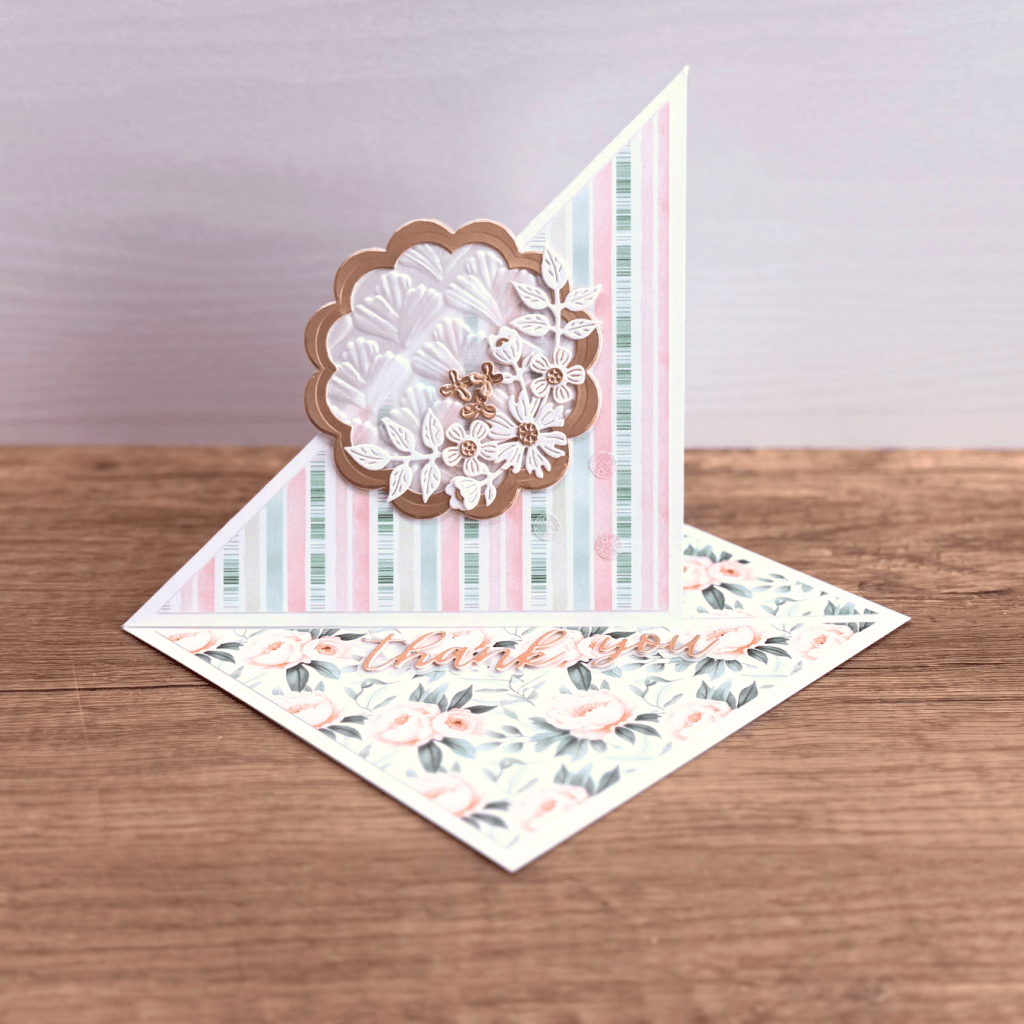
Card #2: Corner-Fold Easel Card with Embossed Vellum Frame
For the second card, I committed to patterned paper and paired it with vellum to create a corner-fold easel card that stands beautifully for display.
✂️ Supplies Used
- Cardstock & Paper
- 5½” x 11” heavyweight cardstock scored at 5 ½” along the long edge (for 5½” square card base)
- Brushed Rose Gold metallic cardstock
- Lightweight vellum
- Coordinating patterned paper
- Scrap cardstock (for backing vellum, stacking layers)
- Substitutions & Options
- You can turn this into an A2 easel card if you don’t like working with square cards but this works best with squares.
- Use plain cardstock instead of patterned paper and let the vellum frame be the star.
- Save cereal-box weight cardstock for stacking layers — it works perfectly.
- Dies & Embossing
- Embossing folder (same as Card #1)
- Frame die set
- Coordinating floral die set
- Sentiment die set
- Substitutions & Options
- No frame dies? Create a faux frame by trimming rectangles with a paper trimmer. You can also use two consecutive sizes of nesting dies of any shape.
- Floral dies can be replaced with stamped and fussy-cut images.
- Use alphabet dies or sentiment strips if you don’t have sentiment dies.
- Tools
- Die-cutting machine
- Large scoring board
- Bone folder
- Paper trimmer
- Magnetic sheet (for aligning frame dies)
- Painter’s tape
- Non-stick craft sheet
- Glue eraser
- Substitutions & Options
- No magnetic sheet? Use low-tack tape and extra patience when lining up dies.
- A smaller scoring board works — rotate the cardstock as needed.
- Adhesives
- Liquid glue with fine-tip nozzle
- Foam tape (used sparingly)
- Embellishments
- Die-cut florals (cardstock and metallic cardstock)
- Sequins or rhinestones
- Substitutions & Options
- Skip metallic cardstock and use ink blending for interest instead.
- Flat embellishments work best if you’re mailing the card.
📝 Step-by-Step Instructions
- Score and prepare the card base: Score thick cardstock from both sides to break down the fibres. This makes folding much easier and prevents cracking.
- Create the corner fold Score diagonally from corner to corner, using light pressure at first. Flip the cardstock and score again to reinforce the fold.
- Tip: Score thick cardstock from both sides to break down the fibres. This makes folding much easier and prevents cracking.
- Prepare the vellum panel Cut the vellum before embossing to avoid flattening the design later.
- Tip: Always cut vellum first, then emboss.
- Create a symmetrical frame Use a magnetic sheet to hold nesting dies in place when preparing the frame. This keeps everything perfectly aligned and prevents shifting.
- Assemble the frame: Cut both frames with the Rose Gold metallic cardstock or optionally one with regular white card stock, so the vellum looks finished from both the front and the back. Stack layers for strength and dimension.
- Add patterned paper panels: Cut 5″ x 5″ panels for both the interior and exterior to create a clean border. The little gap between the two panels act as the easel stopper.
- Finish with florals and sentiment Stack die-cut sentiments for dimension and use vellum shadow layers to soften busy backgrounds. Adhere the sentiment along the edge of the bottom panel on the inside of the card to act as an additional stopper.
- Tip: Use vellum to diffuse patterned paper so sentiments stand out more clearly.
This card folds flat for mailing but stands up beautifully as a display piece.
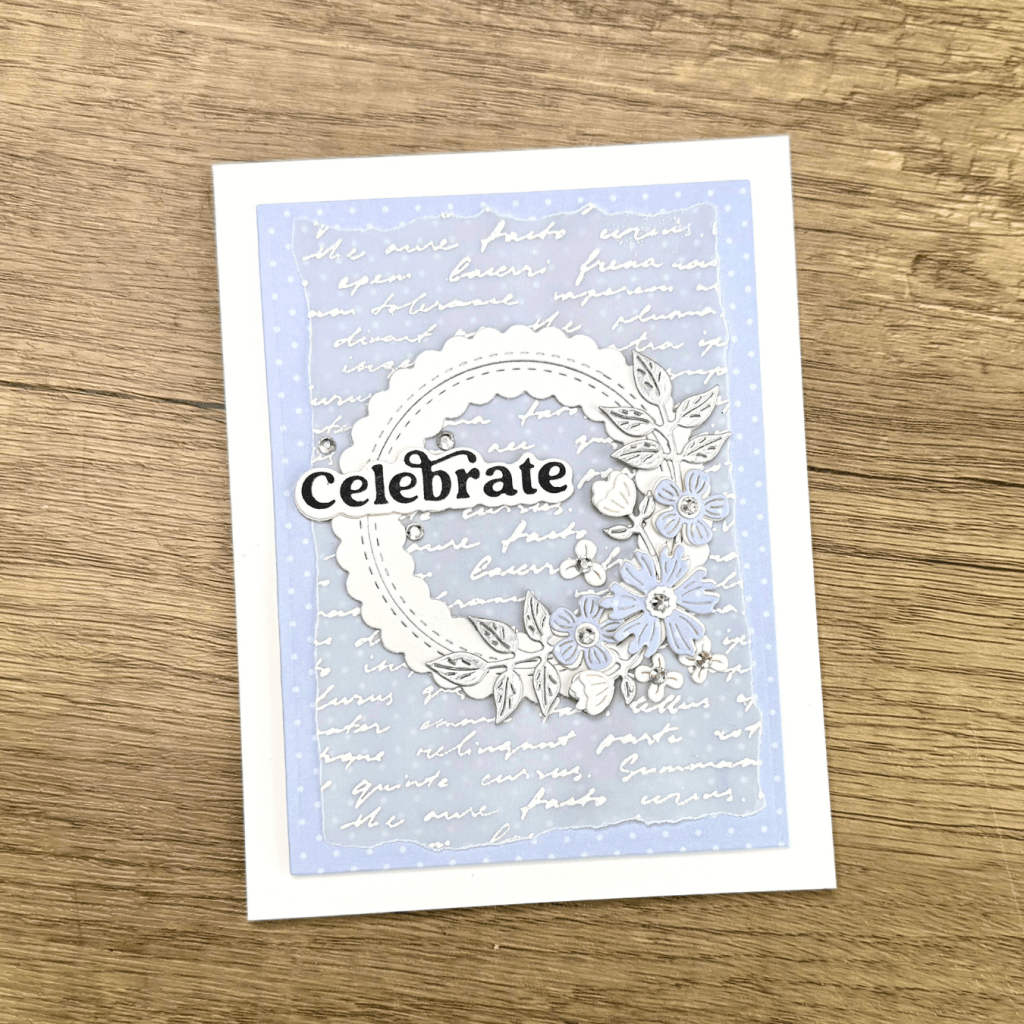
Card #3: Heat-Embossed Vellum with BetterPress Plate
The final card uses heavyweight vellum and a BetterPress plate to create a soft, shabby chic/vintage-inspired design.
✂️ Supplies Used
- Cardstock & Paper
- A2 card base (heavyweight cardstock)
- Heavyweight vellum (for heat embossing)
- Subtle patterned paper
- Scrap cardstock (for frame, sentiment and layering)
- Substitutions & Options
- If you only have lightweight vellum, use smaller designs that won’t require extensive heating — or skip heat embossing and layer instead.
- Plain cardstock ink-blended softly can replace patterned paper.
- Dies & Press Plates
- BetterPress plate (background design)
- A2 matting die
- Frame die set (Pinkfresh Studio Essential Stitch Scallop or similar)
- Floral dies
- Sentiment dies
- Substitutions & Options
- No BetterPress system? Use background stamps or patterned paper under vellum.
- A stitched rectangle die can replace a specialty frame die.
- Pre-made sentiments work just fine here.
- Tools
- Die-cutting / BetterPress-compatible machine
- Heat tool
- Anti-static powder tool
- Magnetic glass mat
- Paper trimmer
- Bone folder
- Substitutions & Options
- A craft mat or ceramic tile can replace a glass mat for heat embossing.
- Baby powder in a cloth pouch works in a pinch as anti-static powder.
- Inks, Powders & Adhesives
- White pigment ink
- White embossing powder
- Liquid glue with fine-tip nozzle
- Foam tape (for mounting card panel)
- Substitutions & Options
- Clear embossing powder over white ink gives a similar look.
- Double-sided adhesive sheets can replace liquid glue behind frames.
- Embellishments
- Rhinestones or crystals
- Metallic cardstock (silver or similar)
- Substitutions & Options
- Pearls or clear gems work beautifully with soft, vintage designs.
- Skip embellishments entirely for a very clean, minimalist finish.
📝 Step-by-Step Instructions
- Choose the right vellum: Lightweight vellum is great for layering, but for heat embossing, always use heavyweight vellum to minimize warping.
- Prep for embossing: Apply anti-static powder and use a white pigment ink and white embossing powder to get crisp, bright embossing.
- Heat emboss carefully: Warm up your heat tool before bringing it to the vellum. This reduces the amount of time heat is applied and helps prevent warping.
- Tear the vellum edges: Tearing instead of cutting adds softness and texture, especially for vintage-style cards.
- Add the frame: Create frames from white card stock and adhere the frame first so all adhesive is hidden behind it.
- Tip: Apply glue to the card panel, not the vellum, to avoid visible adhesive.
- Level the panel: Use thin cardstock shims instead of foam tape to keep everything balanced and flat.
- Finish with florals and subtle sparkle: Layer die cuts slightly offset for dimension without bulk and add rhinestones sparingly for a refined finish.
This card shows how vellum can add texture and interest without overwhelming a design.
Final Thoughts
Vellum is one of those materials that looks intimidating but is actually incredibly forgiving once you know a few key tricks. Whether you’re embossing it, heat embossing on it, or simply layering it for softness, vellum can instantly elevate even the simplest card designs.
If you’d like more ideas, be sure to check out my vellum playlist — it’s packed with techniques, tips, and inspiration to help you get the most out of this beautiful material.
Beginner-Friendly Swaps (Quick Reference)
💡 No fancy tools? No problem. Use this section as a confidence booster — these swaps work beautifully and keep your cards just as elegant.
- No vellum? Try tracing paper or translucent acetate (expect a crisper look with acetate).
- No die-cutting machine? Use stamped images, pre-printed ephemera, or hand-cut shapes.
- No embossing folders? Use textured cardstock or dry-emboss with a stylus and stencil.
- No BetterPress system? Background stamps, subtle patterned paper, or tone-on-tone ink blending work perfectly.
- No foam tape? Stack scrap cardstock layers for controlled, mail-friendly dimension.
You can mix and match techniques depending on what you have — vellum is forgiving and very flexible.
Vellum Cheat Sheet: Save This for Later
If vellum has ever frustrated you, this quick checklist will save you time and paper:
- Emboss dry. Never mist vellum — moisture causes curling.
- Back it up. Always place cardstock behind vellum when embossing.
- Cut first, emboss second. Especially important if you’ll die cut vellum.
- Use the right weight. Lightweight for layering, heavyweight for heat embossing.
- Hide the glue. Apply adhesive behind frames, embellishments, or stacked layers.
- Warm your heat tool. Less heat time = less warping.
- Diffuse busy backgrounds. Vellum softens patterns without adding bulk.
Bookmark this section or screenshot it — it applies to almost every vellum project.
More Ways to Use Vellum
If you enjoyed these cards, vellum is a technique worth revisiting again and again. You can use it to:
- Create elegant overlays on simple card bases
- Soften bold or busy patterned paper
- Add texture without thickness for easy mailing
- Highlight sentiments without competing with backgrounds
I’ve shared many more vellum techniques in my vellum playlist, including folds, layering tricks, and storage tips. It’s a great place to explore once you’re comfortable with the basics shown here.
Final Tip
If you’re ever unsure whether to add one more layer — stop and add vellum instead. It’s often the perfect finishing touch without overcomplicating the design.
✂️ Want to craft along with me? Members get perks like monthly live Q&A sessions, badges, shout-outs, and Foiled Florals craft-along livestreams. Join the membership here: https://www.youtube.com/channel/UCDKhctb1ss7hbxVHivhT5YQ/join
https://linkdeli.com/widget.js?id=f5e8378456858c916708
Here is a list of all the crafting tools I use on a regular basis to create my card projects:


Leave a comment