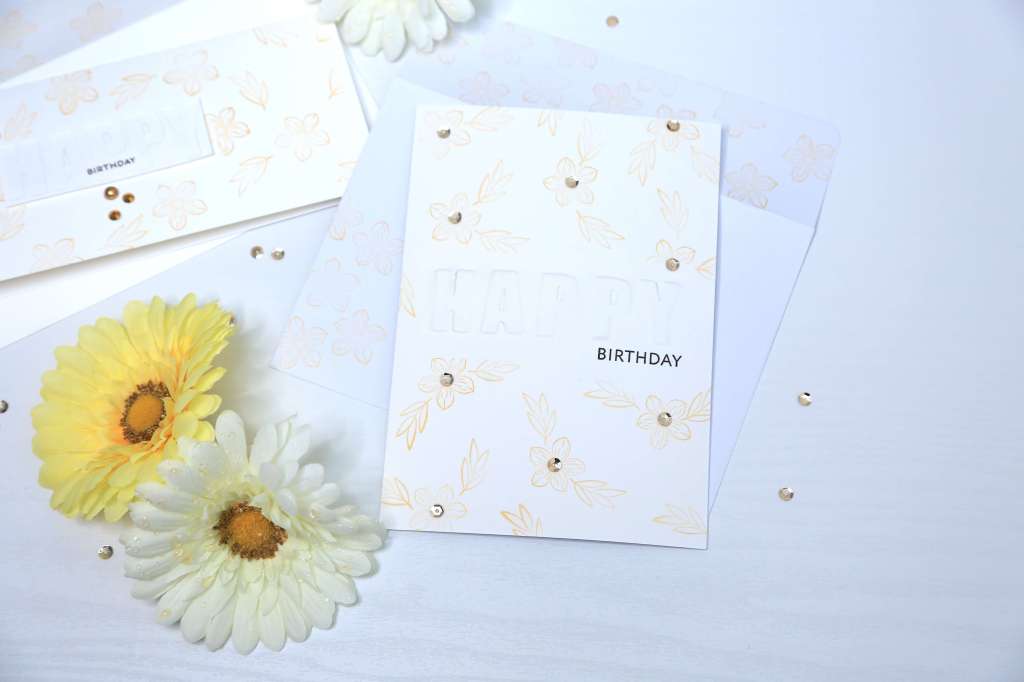
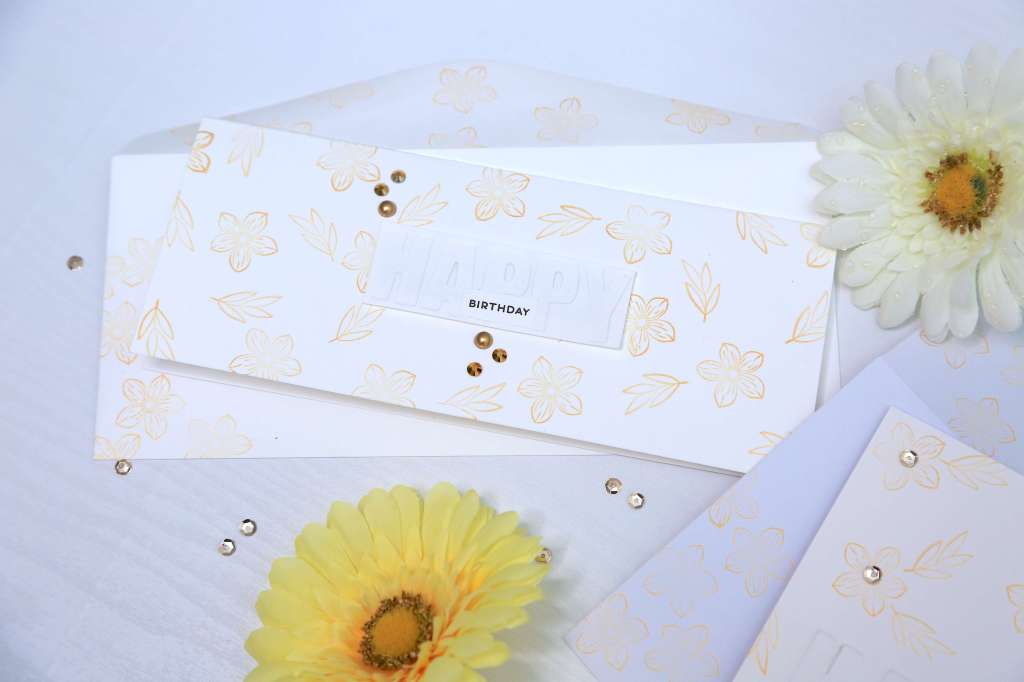
Look no further if you need a last-minute birthday card that still exudes elegance and charm! In this DIY tutorial, I’ll guide you through creating a stunning handmade birthday card using just a few supplies and simple techniques. I made two different variations: a 5×7 card and a slimline. I used the same supplies and techniques for both cards, except for how I used the sentiment — I embossed the sentiment on the 5×7 card and debossed it on the slimline one.
I recorded the entire card making process, which basically ended up being over 1.5 hours and then realized that the video was completely out-of-focus! 😦 I have no idea how that happened, because I’d wanted to share the process of embossing and debossing, in case you needed a visual reference. I suppose the photos will have to do for this time.
TIP: If you’re using a slightly thicker card stock for embossing/debossing, like mixed media paper, spray a thin mist of water over your card stock to prevent it from cracking. Even though I did spray my card panel, I still found a bit of cracking but that wasn’t very visible in the final card.
Here are the supplies I used for the 5×7 card project:
- Ohuhu pre-made 5×7 card base
- Mixed media paper measuring 5×7
- Card stock (or any scrap paper) measuring 1 ½ in. x 4 in.
- Card stock for die cutting the sentiment
- Large sentiment die of your choice – I chose HAPPY
- Altenew Floral Wreath Builder stamp set (or any stamp of your choice)
- Altenew Botanical Line Art stamp set
- Altenew Antique Gold ink pad (or another ink in your preferred colour)
- Altenew Jet Black Ink
- Sentiment die (e.g., “Happy Birthday”)
- Die cutting machine
- Embossing sandwich (cutting plate, cardstock, die, embossing mat)
- Acrylic block for stamping
- Liquid glue
- Stamp positioning tool (optional)
Step 1: Stamp Your Design
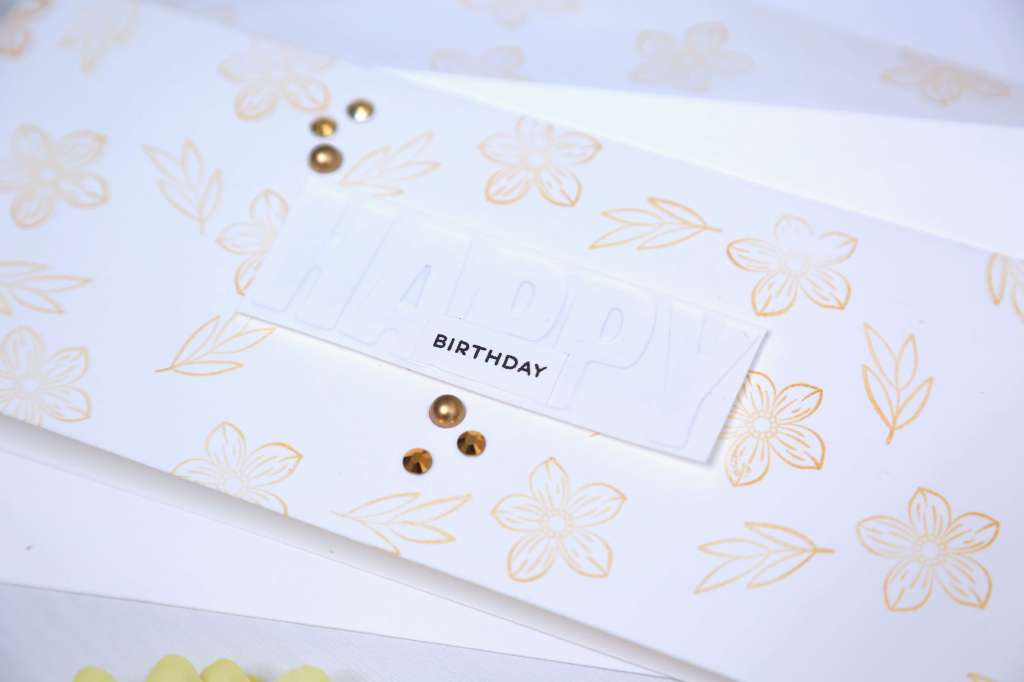
- Adhere the 1 ½ in. x 4 in. piece of card stock or scrap paper at the centre of the card panel with a tiny amount of temporary glue, like a tape runner. The area covered by this piece creates a little block that’s free of stamped images, which is ideal for your sentiment.
- Select your floral stamp and and mount it on an acrylic block. I used the acrylic block to allow me the freedom to turn my stamp in different directions.
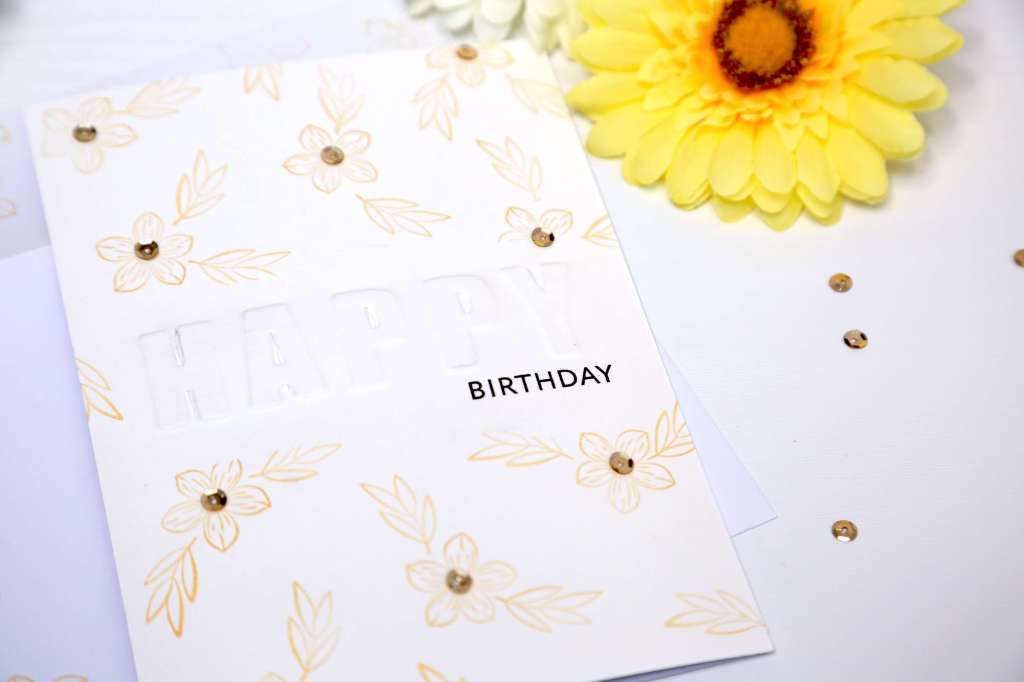
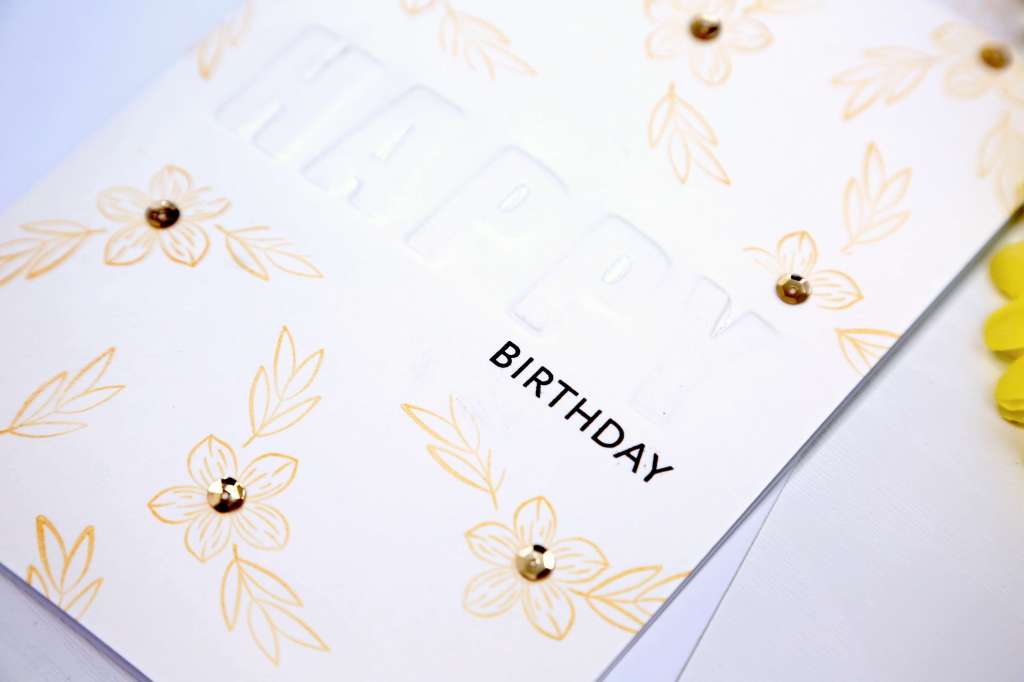
- Stamp your chosen design onto the card panel using ink pads in complementary colours. Don’t worry about perfection – a slightly imperfect look adds to the charm! I used Altenew Antique Gold ink for this. It’s a beautiful gold colour and adds a touch of elegance to this simple card. TIP: Keep turning your card panel as you stamp. This ensures that the background doesn’t look uniform and boring.
- Repeat with the leaf stamp.
- Remove the scrap paper carefully and ensure there’s no trace of glue left on the card panel.
Step 2: Prepare Your Die Cut Sentiment
- Take your sentiment die (e.g., “Happy Birthday”) and cut it out three times.
- Stack the die cuts and glue them on top of each other to create a thicker, more dimensional sentiment.
Step 3: Prepare to Emboss the Sentiment
- Place your die cut and stacked sentiment backwards (flip it horizontally). Since the sentiment I used were all separate letters (not a composite die), I lined them up backwards on my grid mat to ensure they were spaced uniformly. I used some washi tape to hold them in place so they wouldn’t get misaligned.
- Place the stacked die cuts behind the card panel making sure the embossed word shows up with the correct orientation. If you’re using a single die cut word, then inverting the sentiment laterally when putting the word behind the card panel will take care of the orientation.
- Ensure the word is centred and positioned where you want it to appear on the final card. Secure it in place with a small piece of removable tape.
Step 4: Emboss the Sentiment
- Spritz the card panel very lightly with some water.
- Prepare the embossing sandwich that’s recommended for your die cutting machine.
- Run it through the machine as you would for regular die cutting.
- Carefully remove the stacked die cuts from behind the card panel.
- If the card feels moist, you can dry it off with a heat tool if you have one. A hair dryer would also work very well for this.
Step 5: Stamp the Sub-Sentiment
- If you’re using a sub-sentiment, stamp it now.
- My sentiment had both the words Happy and Birthday on it. However, since I’d already embossed the word Happy onto the card panel, I only needed to stamp the word Birthday to complete the sentiment. This is what I did:
- I placed a piece of card stock in my MISTI stamp positioning tool and positioned the Happy Birthday stamp.
- I closed the door of the MISTI and picked up the stamp ready for inking.
- I then covered the word Happy with a bit of clear tape making sure the word Birthday was uncovered.
- I swiped the ink pad on the stamp and then carefully removed the clear tape. This ensured that I only had ink on the word Birthday and nothing else would be stamped.
- I repeated the process a couple more times making sure I didn’t leave the inky clear tape on the stamp before stamping it down.
- Once the impression was stamped clearly, I trimmed the Birthday sentiment down to my desired size.
Step 6: Assemble the Card
Now that you have all the necessary pieces created, assemble the card:
- Adhere the sub-sentiment to the front of the card panel.
- Adhere the card panel to your card base making sure the edges are perfectly aligned.
- Embellish with a few gems or sequins to give the card a little sparkle and shine.
I created a second project with a slim line card but I debossed the word HAPPY on a separate piece of card stock instead of embossing the sentiment directly on the card panel. I adhered the debossed sentiment piece directly to the front of the slim line card base without a card panel unlike the 5×7 card.
Creating your own birthday cards doesn’t have to be complicated or time-consuming. With just a few supplies and a little creativity, you can craft a card that’s both beautiful and heartfelt. So, the next time you find yourself in need of a special greeting, why not try your hand at this quick and easy DIY? Your loved ones are sure to appreciate the thought and effort you put into creating something truly unique. Happy crafting!


Leave a comment