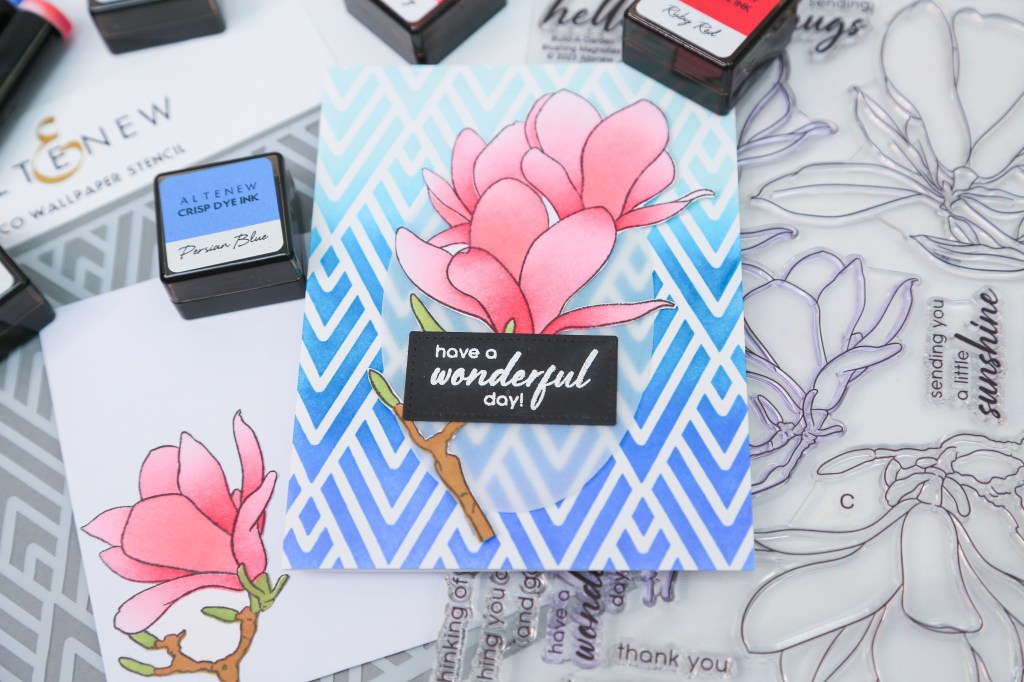
Learn to create an ink blended a card panel with texture using a stencil for both colouring and embossing the background.

If you have a few basic inks, some stencils with a geometric design (any other design will also work), a die cutting machine that can also emboss, you can get this stunning card make in no time!
Let’s get started
Step 1: Gather Your Materials
You can use any stamp, stencil or inks that you like, but here’s a list of supplies I used for your reference:
- Paper
- Card base: Neenah Solar White Crest 110 lbs (8 ½ in. X 5 ½ in. Scored at 4 ¼ in. on the longer side
- Card panel: Hammermill smooth white card stock 110 lbs 4 ¼ in. X 5 ½ in. – 2 panels
- Vellum
- Black card stock – 1 ½ in. X 1 in.
- Altenew Build-a-Garden set: Blushing Magnolias (add-on die set is available for this set)
- Altenew stencil: Deco Wallpaper
- Altenew Crisp Dye Inks:
- Dewdrops
- Galactic Stream
- Persian Blue
- Ruby Red
- Coral Berry
- Frayed Leaf
- Paper Bag
- Jet Black
- Hero Arts Pigment Ink: Unicorn
- Altenew Pure White Embossing Powder
- WOW Clear Embossing Powder
- Cutting dies – oval & small stitched rectangle
- MISTI stamping tool
- Liquid adhesive
- Dimensional foam tape
- Die cutting machine with embossing option
- Fussy-cutting scissors
- Stamp/stencil cleaner (use baby wipes or plain water)
Step 2: Create the Card Background
- Place the stencil on the card panel and secure it to your work surface by either using a grip mat or a low-tack adhesive tape (wash, masking, etc.)
- Blend your inks over the stencils to achieve the patterned background.
- Clean the stencil between each ink to avoid contaminating your ink pads.
Step 3: Emboss the Background with the Stencil
- Once the ink dries, add some low tack tape to hold the stencil down on the card panel.
- Flip the card panel over making sure the stencil doesn’t shift on the card panel.
- Tape the card panel down on to the stencil to attach it and remove the tapes from the front of the panel. If you forget to remove the tape, the pressure from the embossing process will create an impression of the tape onto your beautifully ink-blended panel.
- Find the correct die-cutting sandwich for embossing using your die-cutting machine as this differs for each brand.
- Run the ink-blended panel in the embossing sandwich through your die-cutting machine.
Caution: Adhesive tapes become stickier when put through the die-cutting machine and can cause damage to your paper. Remove the tape at an angle to avoid ripping.
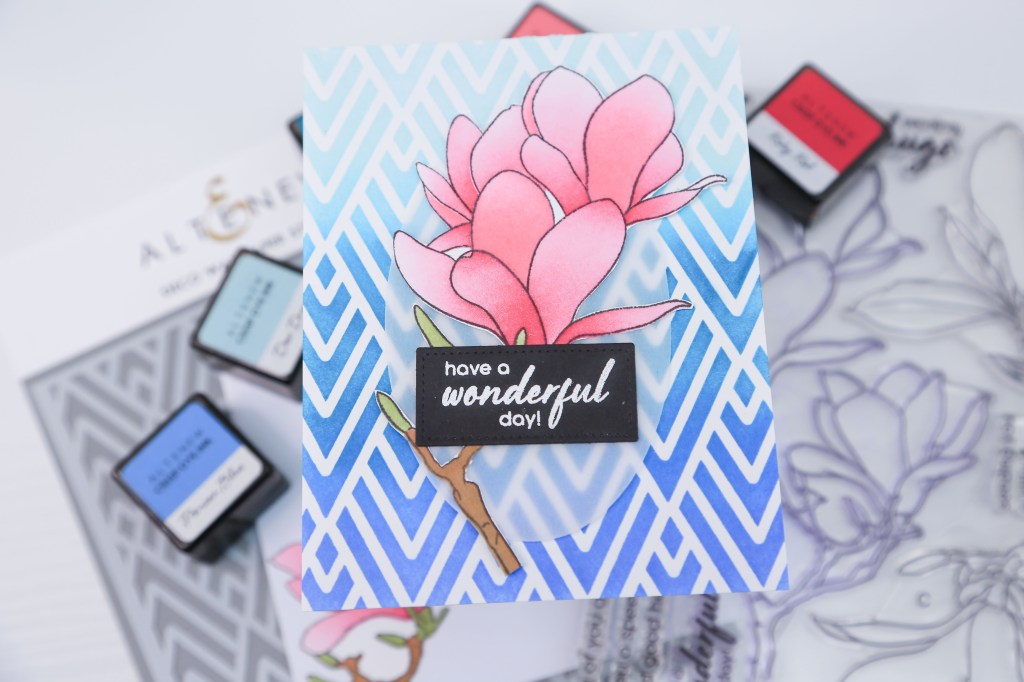
Your ink-blended panel should now have a subtle texture from the embossing process.
Step 4: Prepare the Image & Sentiment
- Place the second card panel in your MISTI stamping tool. Position the Blushing Magnolia stamp on the card panel and lift the stamp up with the MISTI door.
- Ink up the stamp with Altenew Jet Black ink and create a crisp impression.
- Clean and remove the floral stamp and replace the stamped panel with the black card stock to stamp your sentiment.
- Choose your sentiment, position the stamp on the black card stock and pick up the stamp with the MISTI door.
- Treat the black card stock with an antistatic powder to prep it for heat embossing and then use the Hero Arts white pigment ink to stamp the sentiment. Apply the Altenew Pure White embossing powder and heat set it.
- Fussy cut out the Blushing Magnolias floral image and use the small rectangle die (or any other die) to cut out the sentiment.
- Ink blend the Blushing Magnolia image with the coordinating stencils with the Ruby Red, Coral Berry and Frayed Leaf inks. Ink blend the stems with Paper Bag and then Frayed Leaf to get a deep brown colour, or use any brown ink that you have in your stash.
Step 5: Assemble the Card
- Snip off the large flower from the stem and preserve the small flower.
- Cut out an oval piece of vellum and arrange the floral image on it keeping the design balanced. Take a small piece of press-n-seal paper and stick it down on your arrangement to hold all the pieces in place.
- Flip the vellum over and glue the floral design to the vellum making sure not to apply glue to the areas that aren’t covered by the floral image.
- Adhere foam tape to the back of the floral arrangement but not on the vellum. Make sure the foam tape isn’t visible through the vellum.
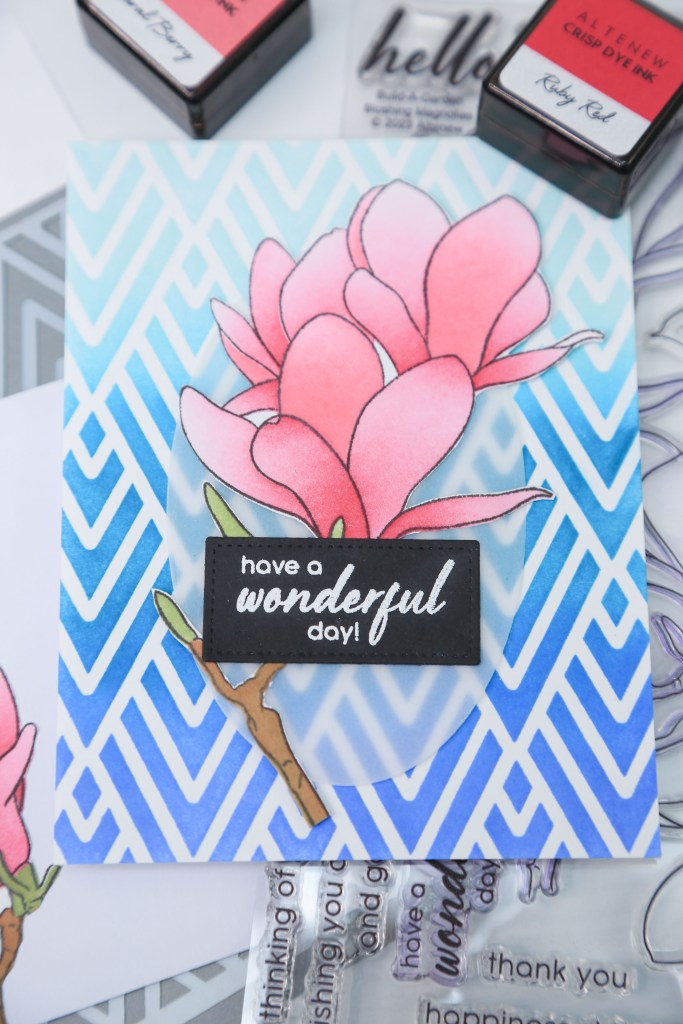
- Adhere the floral arrangement on the ink-blended and embossed card panel making sure the design is centred.
- Add the sentiment to the front with some liquid glue and add a small piece of foam tape behind the sentiment where it hangs off the floral arrangement.
- Add strips of foam tape to the back on the prepared card panel and adhere it to the card base.
- Use a little bit of liquid glue to adhere the small flower to the front of an A2 sized envelope to create a matching set.
You can choose to embellish the card with sequins or enamel dots if you like. I kept mine pretty plain and allowed the colours and texture to take centre stage.
You can also follow along with the video tutorial on my YouTube channel!
I’d love to connect with you on Instagram: https://www.instagram.com/handmadecardsbytoni/


Leave a comment