
Create simple yet stylish birthday cards for men using patterned paper and a simple motif. It’s so easy and quick, perfect for when you need to make a card quickly or for batch creating multiple cards.
Before We Start: Four Principles of Masculine Cards
Before we dive into the actual card-making, I’d like to share four principles I always keep in mind when making masculine cards. Check out the graphic below for a summary of the four principles:

Materials You’ll Need
- Paper
- Card base: Ohuhu heavyweight white card stock 5 in. X 7 in.
- Card background: Green layering weight card stock 4 ½ in. X 6 ½ in.
- Black mat: Layering weight card stock 6 ¾ in. X 4 ¾ in
- Altenew Dynamic Duo: Hanging Houseplants
- Craft Your Life Project Kit: Tropical Vibes
- Altenew Patterned Paper
- Altenew Crisp Dye Inks:
- WOW Clear Embossing Powder
- Cutting dies – nested hexagons
- Liquid adhesive
- Dimensional foam tape
Step 1: Choose Your Patterned Paper
- One of the biggest challenges in making masculine cards is striking the perfect balance between simplicity and style.
- Choose patterned papers that are simple yet striking from the Altenew Patterned Paper. You can use any other patterned paper in neutral colours.
Step 2: Select Your Color Palette
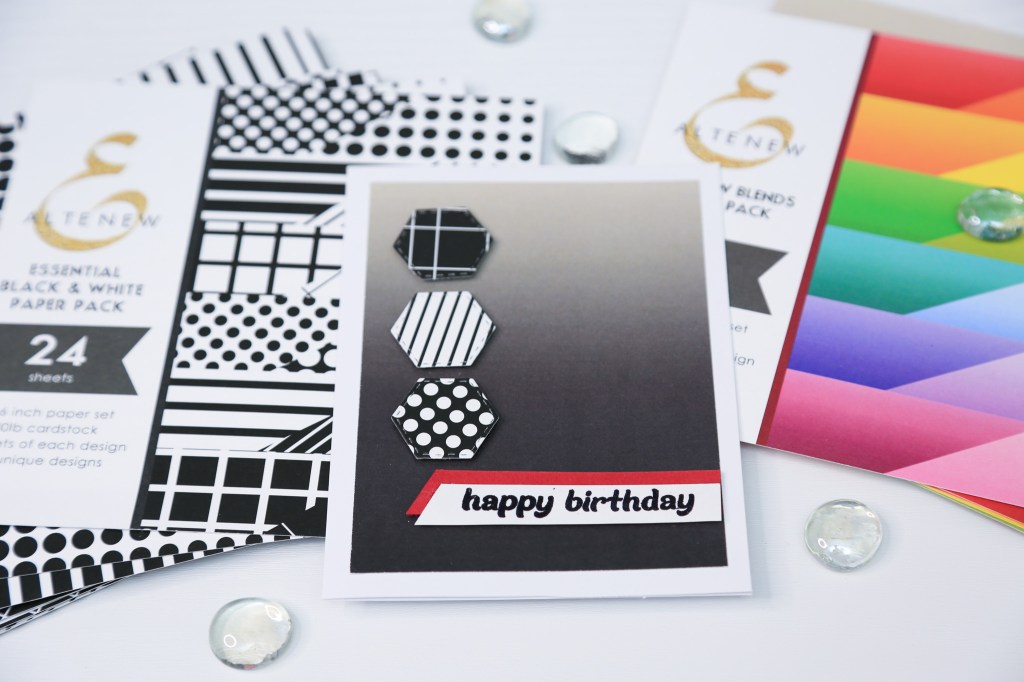
The second principle is about choosing the right color palette. Men typically prefer more subdued or neutral colours. Sticking to earth tones, blues, greens, and grays is a safe bet. I also like to add a pop of red or dark cherry maroon to create interest.
While my backgrounds are mostly black and white, I added a green background to one of the cards, and a pop of red to the other more monochromatic cards.
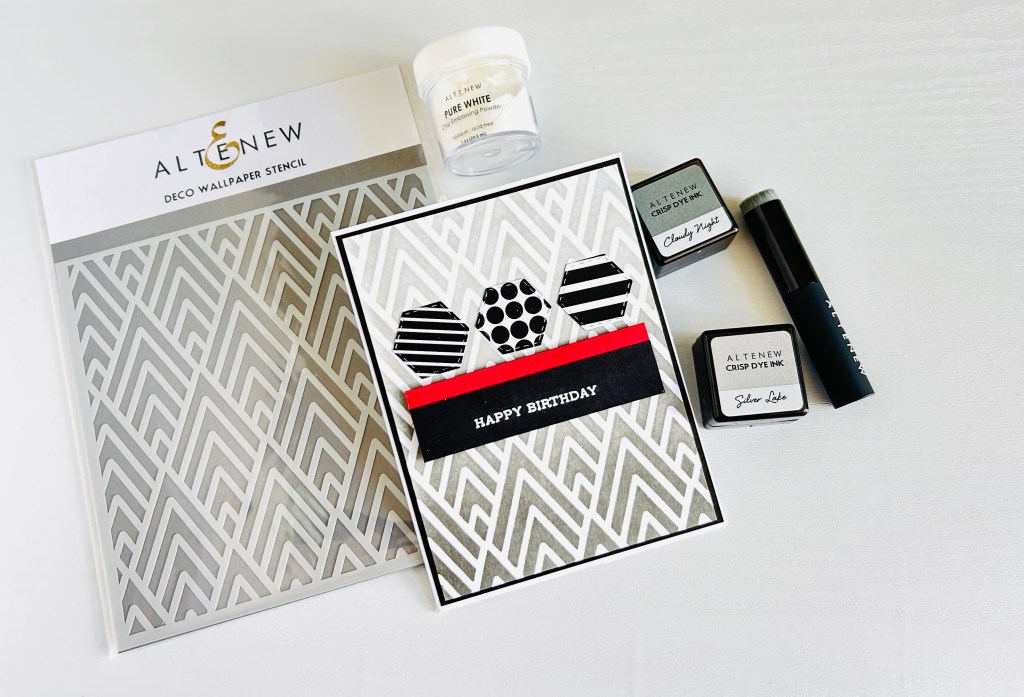
Step 3: Prepare Your Inks, Stencils and Stamps
I’ll be using Altenew inks for this project: Jet Black for stamping outlines.
For my planters, I chose Ruby Red, Teal Cave and Paper Bag. Note that I ended up using the one coloured in with Paper Bag on the final card project. However, you can use any colours you have; they don’t have to be exact.
Step 4: Create Your Planters
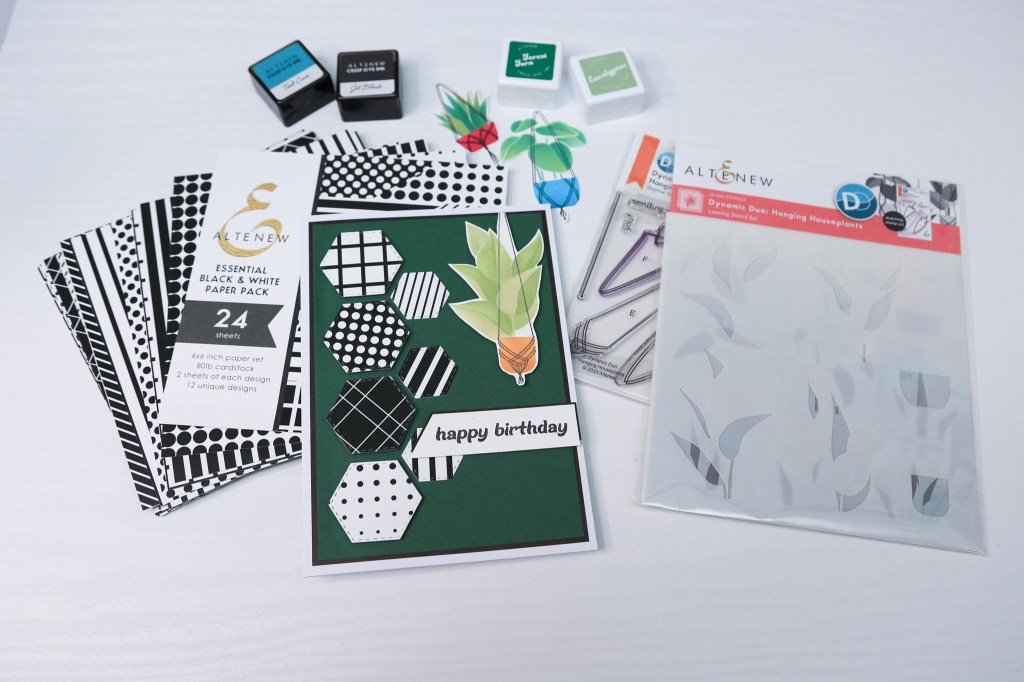
- Use the Altenew Dynamic Duo: Hanging Houseplants layering stencils to create the planters and the foliage.
- The stencils have etchings that can help guide you to position your stencil correctly when creating the foliage.
- Use Frayed Leaf, Forest Glades and Forest Fern for the foliage. Use a heavier hand when ink blending to create a shadow at the base of the planters as well as the leaves. A lighter hand towards the top will create the highlights, which will create the contrast.
- Use the coordinating stamp set and Jet Black ink to add the details on the planters. You can use a stamp positioning tool to make it easier if you like. I found that using the stamp on an acrylic block was fairly easy.
Step 5: Fussy Cutting
Since there are no coordinating dies, I used scissors to fussy cut the planter. It takes a bit longer, but it’s worth it for a clean finish.
Step 6: Prepare the Sentiment
- Pick a sentiment you’d like to use on your card. For this one, I used the “Happy Birthday” sentiment from the stamp set included in the Craft Your Life Project Kit: Tropical Vibes. It’s a nice and bold sentiment that’s great for masculine cards.
- I treated a scrap piece of white card stock with antistatic powder and then used the Jet Black ink and clear embossing powder to coat the sentiment.
- I then heated the embossing powder to melt it and created the black embossed sentiment strip.
- Next, I used a banner die can to create the sentiment strip and but the right edge of the sentiment in a straight line so I can align it with the right side of the card panel.
- I added a strip of black card stock behind the sentiment die cut piece, and offset it slightly to create it like a shadow.
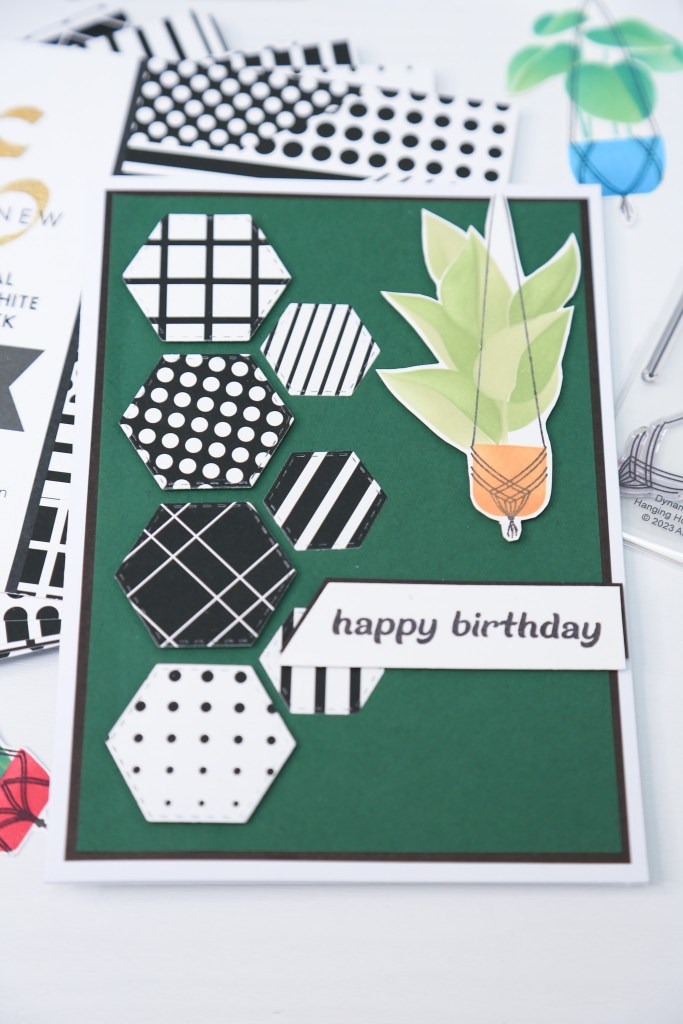
Step 7: Create the Shaped Elements
Cut out a set of seven hexagons with the hexagon nested dies. Use a size that’s appropriate for your card. I used a mix of four large and three small hexagons for this card.
Step 8: Create the Card Base
- I used green cardstock for the background (4 ½ in. X 6 ½ in.).
- Adhere the green card panel on the black card mat (6 ¾ in. X 4 ¾ in) using a tape runner or any other adhesive of your choice.
- Adhere the assembled card panel to your card base. black border behind it. This creates a nice frame for the card.
Here’s a trick for nailing your card composition: lay out your pieces on the card and take a picture with your phone. This gives you a bird’s eye view to see if you like the arrangement. Adjust as necessary.
Step 9: Arrange Your Elements
- Arrange the hexagons, planter and sentiment on your card front.
- Use dimensional foam for the larger hexagons to give them some height.
- Glue the smaller hexagons flat to the card panel.
- Next, add foam tape to the planter or planters (if you’re using all three) and adhere them to the card front.
- Adhere the sentiment with foam strips.
By following these steps, you can create stylish and masculine birthday cards quickly and easily. Happy crafting!
Here are a couple more cards from the series:

Disclosure: Some supplies listed in this blog post may contain affiliate links which means if you make a purchase I receive a small commission at no extra cost to you. Additionally, as an Amazon Associate, I earn from qualifying purchases. Thank you so much for your support!


Leave a comment