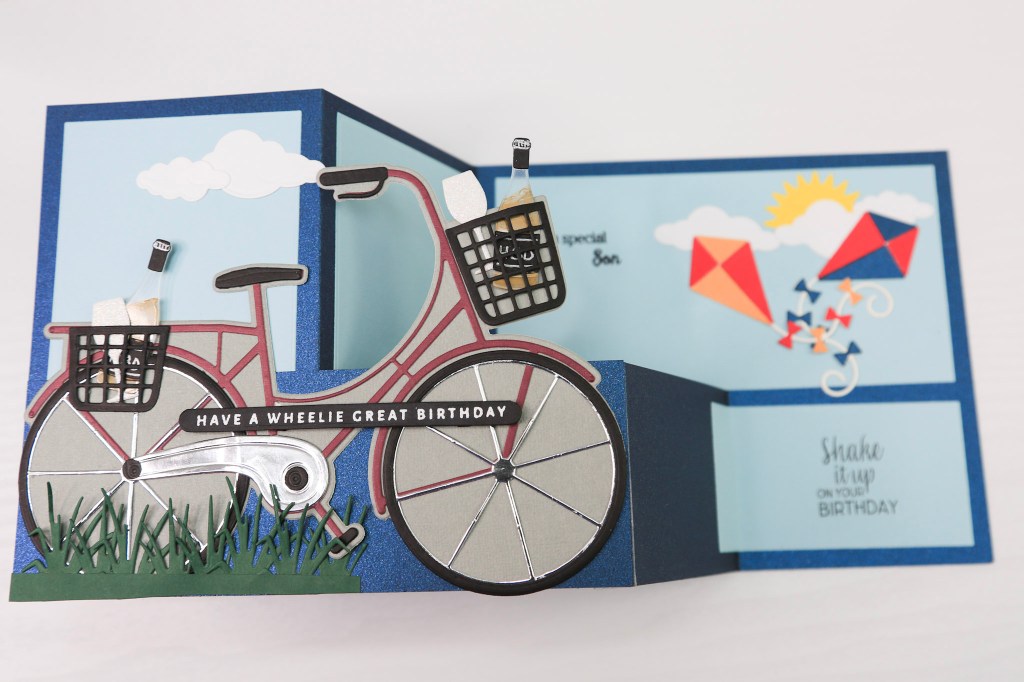
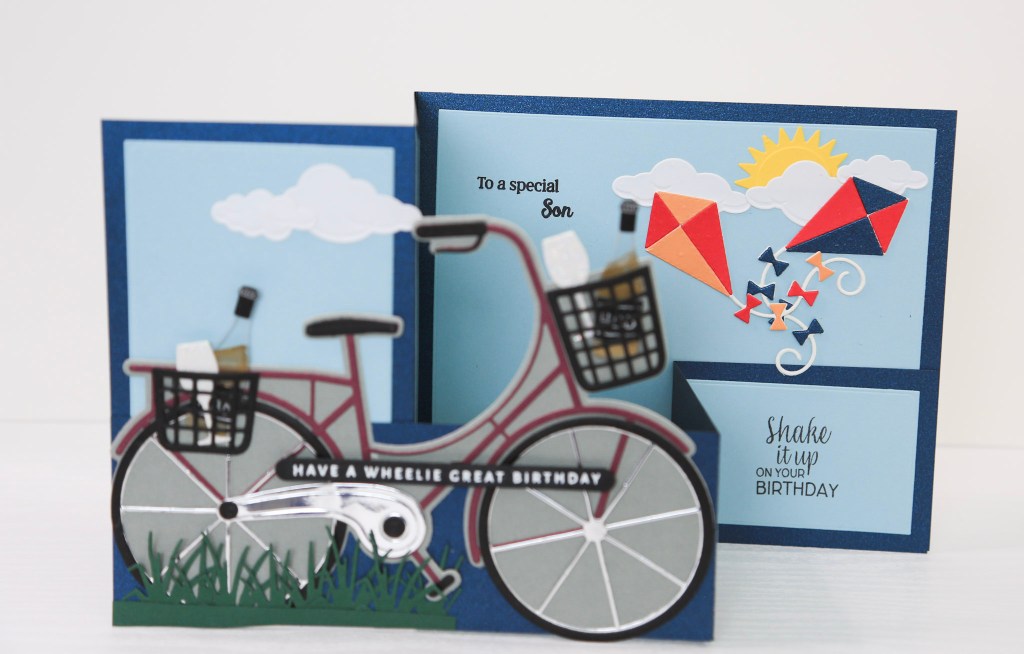
Learn how to create this fun double Z-fold card that can be displayed on the mantle and used with any decorations on the card front. I’ve used Spellbinders Big Bicycle Etched Dies designed by the most talented Bibi Cameron. I’ve used a few additional dies as well to create this fun picnic scene.
Follow this step-by-step tutorial to create this one of a kind birthday card for men using a few simple fold. Watch the accompanying video, where I share how to cut and score the card stock to create the double Z-fold.
Step 1: Gather Your Materials
You can use any decorations on the card front. Here’s a list of supplies I used for your reference:
Paper
- Card base: Dark blue pearlescent card stock:
- 7 ½ in. X 6 in. Scored at ½ in. and 3 ½ in.
- 7 in. X 6 in.
- 7 ½ in. X 2 ½ in. – Scored at ½ in., 3 ½ in.
- 7 in. X 2 ½ in.
- Card background: Light blue card stock
- 3 in. X 5 in. X 2 pcs
- 4 ½ in. X 6 ½ in.
- 2 in. X 4 in.
- Card back: Hammermill Smooth White card stock 6 ½ x 5 ½ in.
- Bicycle background: Grey heavy weight card stock 5 in. X 7 in.
- Bicycle body: Maroon heavy weight card stock 5 in. X 7 in.
- Scraps of silver, black and other coloured card stock for additional details
- Hero Arts White Pigment Ink
- WOW Clear Embossing Powder
- Spellbinders Cutting dies –
- Liquid adhesive – Bearly Art
- Double-sided tape
- Dimensional foam tape
- Paper trimmer
- Scissors
- Scoring Board
- Die cutting machine
Step 2: Prepare the Card Base
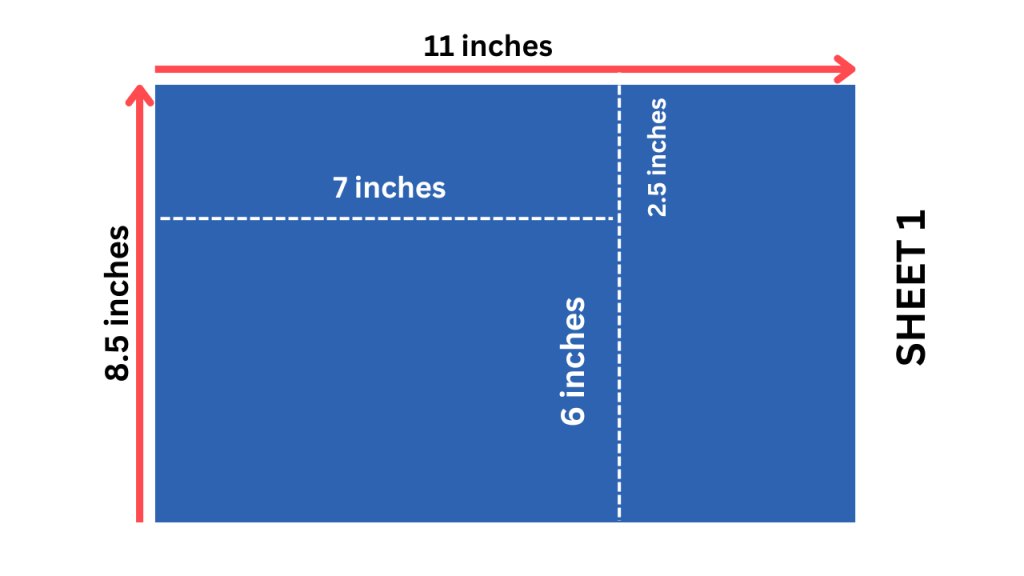
- Follow the cutting guide below to cut two pieces of dark blue card stock: one panel measuring 7 ½ in. x 6 in. (score at ½ in. and 3 ½ in.) and another panel 7 in. x 6 in. (no scoring required).
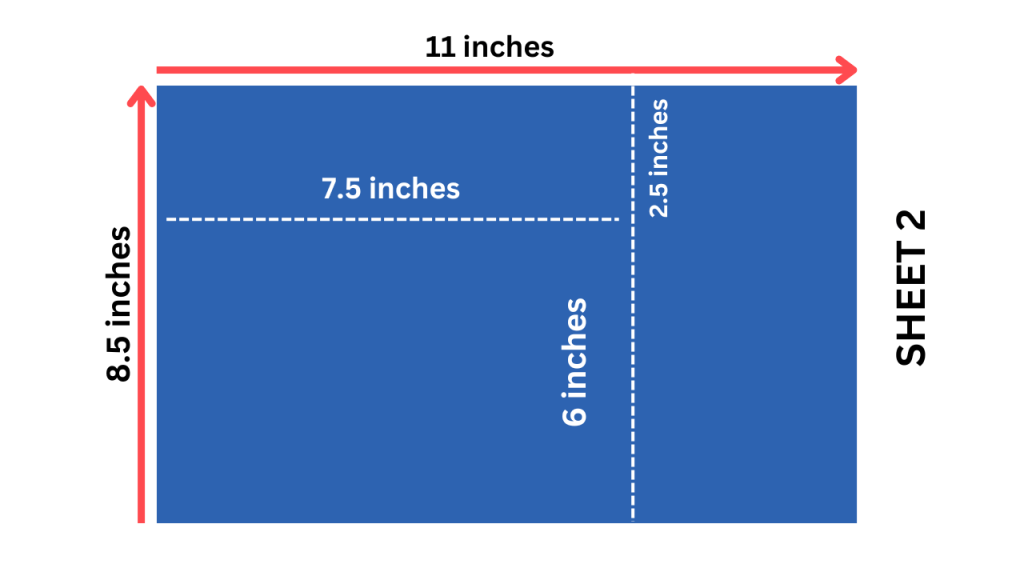
- Cut two more pieces measuring 7 ½ in. x 2 ½ in. (score at ½ in. and 3 ½ in.) 7 in. x 2 ½ in. (no scoring required).
- Fold along the ½ in. score line, so that the folded portion is facing back.
- Adhere the 4 ½ in. x 6 ½ in. piece of light blue card stock to the 7 x 6 in. dark blue card panel.
- Fold along the 3 ½ in. score line line to create a v-fold.
- Cut two pieces of light blue card stock each measuring 4 ½ in. x 6 ½ in., and 2 in. x 4 in.
- Cut two more pieces each measuring 3 in. x 5 in.
- Adhere the two pieces of light blue card stock measuring 3 in. x 5 in. to either side of the v-folded card panel.
- Using some double-sided tape, attach the v-folded panel to the base panel as shown in the photo on the left.
- Score the 7 ½ in. X 2 ½ in. panel at ½ in. and 3 ½ in.
- Adhere the narrow bands exactly like you did the larger panels.
- Adhere the 2 in. x 4 in. light blue card stock to the right most panel on the band.
- Attach the band to the base, keeping the flat portion on the front, and the z-fold inside.
Step 3: Die Cut
- Cut out the big bicycle and other elements from the Big Bicycle die set and assemble them.
- Cut out the clouds and the sun using the Tunnel Clouds die set and adhere them to the card base.
- Cut out the kites and tails using the Fly Away Etched Dies and adhere them against the clouds ensuring the bike doesn’t block them from view.
- Cut out the other detail pieces like the wine glasses and bottles. I used scraps of glitter white card stock for the wine glasses, clear acetate for the wine bottles and black card stock for the bottle label and stopper. I drew details on the label and bottle stopper with glitter pen and coloured the acetate bottle with a gold Sharpie pen to resemble champagne.
Step 4: Create the Sentiments
- Heat emboss the sentiment you’d like to use on the card front.
- Stamp more greetings and sentiments inside the card to create an additional element of surprise when the recipient opens up the card.
Enjoy the crafty process and make sure you use whatever supplies you have to create your own unique handmade card. If you have any questions, please feel free to leave them in the comments and I’ll be sure to respond.
If you’d like to watch me create the card, please watch this card tutorial on YouTube.
The first video shows the detailed die cutting process.
The second video shows you how to assemble the double Z-fold card:


Leave a comment