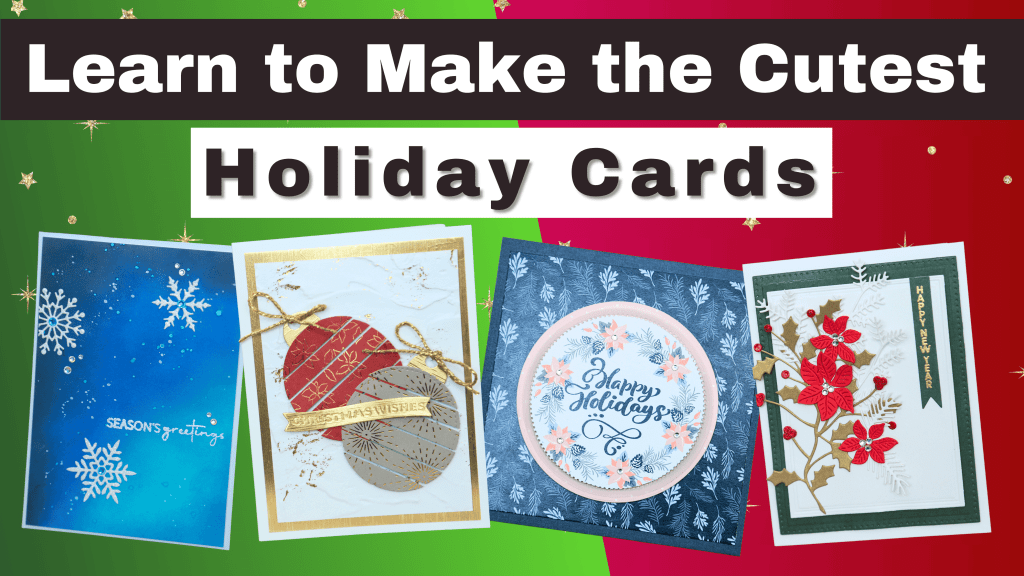
Looking for cute Christmas/Holiday card ideas? Look no further! Here are 4 really quick and easy card ideas that you can create with minimal supplies. If you have patterned paper still sitting in their packaging, it’s time to get them open and put to good use!
Card Idea #1:
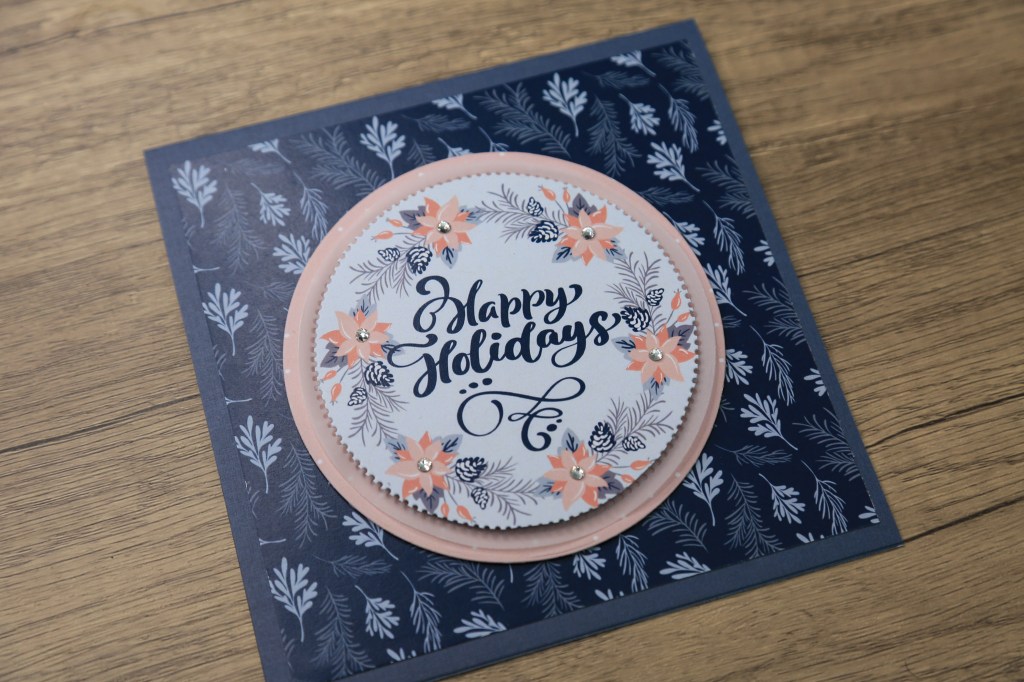
Quick & Easy with Cut-Apart Centrepiece
How to Create a Minimalist “Happy Holidays” Card with Non-Traditional Colors
If you’re a fan of non-traditional holiday colours and simple yet elegant designs, this project is for you. Using double-sided patterned paper and minimal supplies, we’ll create a 6×6 square card with a touch of layering and sparkle. Follow this step-by-step guide to make your own festive card that’s perfect for the season.
Supplies Needed:
- Double-Sided Patterned Paper – I used Paper Rose papers in non-traditional Christmas colours (or any patterned paper with a festive vibe).
- 6×6 Card Base – Use cardstock in a coordinating colour (I used a blue-grey cardstock from Dollarama).
- White Cardstock – For the inside greeting panel (cut to 5½x5½ inches).
- Vellum – For creating soft, delicate layers. Lightweight cardstock will work fine.
- Dotted Circle Die – To cut and add texture to the vellum layer.
- Nested Circle Dies – To cut the layers. Use any shape depending on your design.
- Craft Mat – To protect your work surface.
- Craft Knife or Precision Blade – For cutting out paper elements like the greeting.
- Bone Folder – To score and burnish the card base for crisp folds.
- Die-Cutting Machine – To cut shapes and layers (e.g., Sizzix or similar).
- Bearly Art Liquid Glue – For adhering layers precisely.
- Foam Tape – To add dimension to the card.
- Stamps for Sentiments – I used a holiday-themed stamp set from AliExpress.
- Acrylic Block or Stamping Platform – For accurate stamping.
- Corner Rounder (Optinal) – To smooth edges for a polished look.
- Tape Runner – For adhering layers quickly.
- Decorative Gems or Beads – To add sparkle (mine are from Michaels).
- Paper Trimmer – For cutting and trimming paper to size.
Step 1: Create the Card Base
- Cut your coloured card stock to 6×12 inches.
- Score at the 6-inch mark with a bone folder to create a square card.
- Fold along the score line and burnish the fold for a crisp edge.
Step 2: Cut and Prepare the Patterned Paper
- Select your double-sided patterned paper. Cut a 6×6-inch square for the card front.
- If the edges are rough, trim them down for a clean fit.
- Using the patterned side with the heart design, cut out the “Happy Holidays” greeting using a craft knife. Set this aside.
Step 3: Add Layers with Vellum
- Cut a piece of vellum slightly smaller than the patterned paper layer.
- Die-cut a pierced circle from the vellum for added texture. If the first attempt isn’t perfect, adjust and try again—you can always use creative fixes!
- Layer the vellum behind the greeting for a soft, frosted effect.
Step 4: Assemble the Card Front
- Adhere the patterned paper to the card base using a tape runner or liquid glue.
- Center the vellum circle and adhere it with liquid glue.
- Use foam tape to add the “Happy Holidays” greeting over the vellum, creating dimension.
Step 5: Add the Inside Greeting
- Cut a 5½x5½-inch white cardstock panel for the inside.
- Use your stamps to add a coordinating sentiment. Test alignment with an acetate sheet before stamping.
- Lightly condition the stamp with your fingers for a cleaner impression.
- Stamp the sentiment using an acrylic block or stamping platform.
- Adhere the white panel inside the card using a tape runner.
Step 6: Finishing Touches
- Cut a 5½x5½-inch white cardstock panel for the inside.
- Use your stamps to add a coordinating sentiment. Test alignment with an acetate sheet before stamping.
- Lightly condition the stamp with your fingers for a cleaner impression.
- Stamp the sentiment using an acrylic block or stamping platform.
- Adhere the white panel inside the card using a tape runner.

Some Handy Tips
• Stretch Your Supplies: Save any leftover pieces or scraps for future projects. The inner parts of cutouts, like the heart and circle, can be reused creatively.
• Layering with Vellum: Vellum adds elegance but can be tricky to adhere. Use liquid glue sparingly or hide adhesive under other elements.
• Test Your Stamps: Always test new stamps on scrap paper or acetate before committing to your card.
This “Happy Holidays” card combines non-traditional colors, layered textures, and a minimalist design to create a festive and unique greeting. It’s perfect for using up patterned paper while keeping your supplies minimal. Get ready to craft your own.
Here are the supplies I used for this card:
https://linkdeli.com/widget.js?id=f5e8378456858c916708
Card Idea #2:
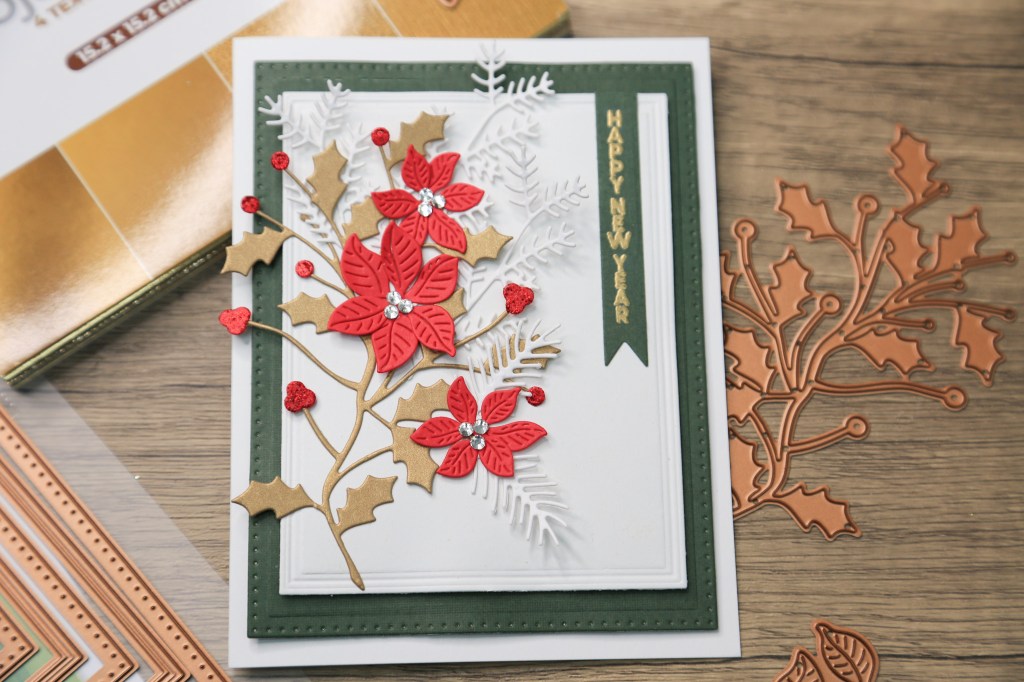
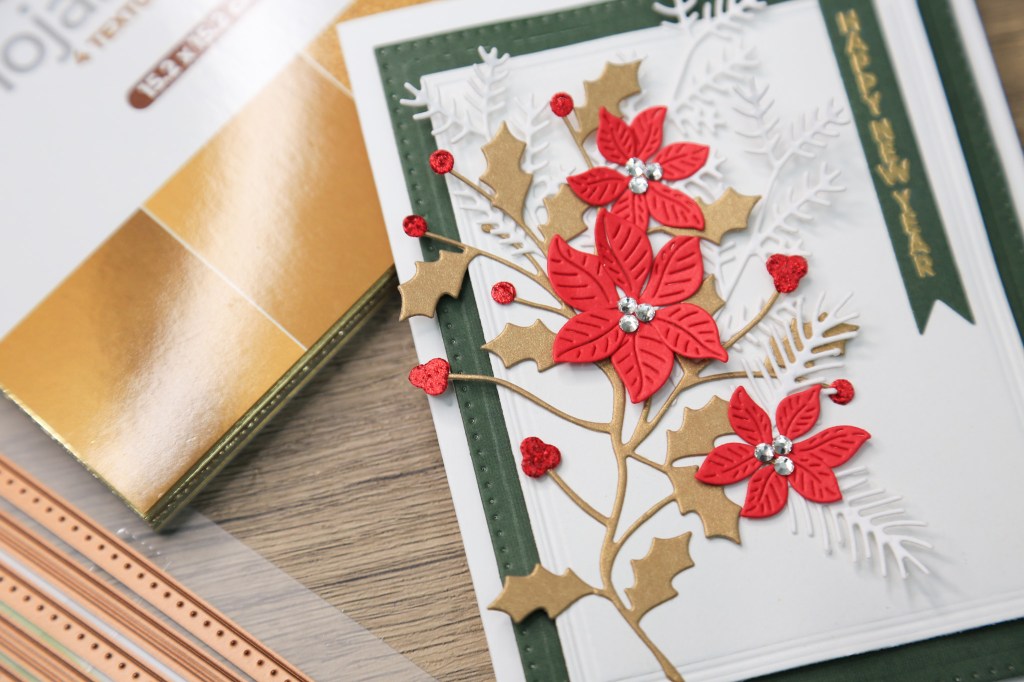
Elegant Red & Gold New Year Card
How to Create an Elegant A2 Card with Layers and Poinsettia Embellishments
Crafting an A2-sized card with intricate die cuts and a touch of sparkle is both fun and rewarding. Here’s a step-by-step guide to assembling a beautifully layered card featuring poinsettias, foliage, and a heat-embossed sentiment.
Supplies Needed:
- White Card Stock: 4 in. x 5 1/4 in. Hammermill card stock 110 lbs – Used for the second layer.
- Green Card Stock: 3 ½ in. x 4 ½ in. – From a local dollar store paper pad (Dollarama).
- Pre-Scored Blank White Cards: 4 ¼ x 5 ½ in. card for the card base.
- Scrap Green Card Stock: For sentiment.
- Red Card Stock: Memory Box card stock for poinsettia flowers
- Burnished Gold Card Stock: Used for cutting out the foliage.
- Red Glitter Card Stock: Scrap piece for creating glitter berries. Or, use red card stock with Astro Paste in Roar.
- Spellbinders Scored and Pierced Rectangles Dies: For layering panels.
- Spellbinders Poinsettia Spray Etched Dies: For poinsettia flowers and foliage.
- Spellbinders Delivering Joy Sleigh Etched Dies: For additional pine leaves.
- Gina K. Master Layouts 3 Banner Die: To cut the sentiment.
- Sizzix Sidekick Die Cutting Machine: For cutting smaller elements.
- Waffle Flower “Happy New Year” Stamp: Vertical sentiment design. This is no longer available.
- Altenew Antique Gold Embossing Powder: For heat embossing.
- Antistatic Embossing Powder: To remove static from the card stock.
- Clear Embossing Ink: For stamping the sentiment on card stock.
- Foam Tape – To add dimension to the card.
- Heat Tool: To set embossing powder.
- White Rhinestones: For flower centres, from Michaels.
Step-by-Step Instructions:
Step 1: Prepare the Card Panels
Cut green and white card stock using the Spellbinders scored and pierced rectangle dies to create layers. These panels form the foundation of your card.
Step 2: Die-Cut the Elements
- Poinsettias: Use the Spellbinders Poinsettia Spray dies to cut both large and small poinsettia flowers.
- Foliage: Die cut leaves from burnished gold card stock for added elegance.
- Berries: Use red card stock and Astro Paste to create a custom glitter texture, then die cut the berry shapes.
Step 3: Create the Sentiment
- Heat emboss the vertical “Happy New Year” sentiment using Altenew’s Antique Gold embossing powder.
- Use Gina K.’s banner die to cut out the embossed sentiment for a polished look.
Step 4: Assemble the Card Base
- Layer the green and white panels using liquid glue. Align carefully to ensure clean edges.
- Adhere the sentiment to the card panel first to position it prominently.
Step 5: Add the Florals and Foliage
- Arrange the poinsettias, foliage, and berries on the card panel.
- Glue them directly onto the panel to avoid excessive bulk, making sure the arrangement is balanced and cohesive.
Step 6: Add Embellishments
Place white rhinestones (or other embellishment of your choice) in the centre of each poinsettia for a touch of sparkle.
This layered card is perfect for sending warm wishes during the holiday season. Its combination of intricate details, metallic accents, and festive florals makes it an elegant choice. Don’t forget to check your local dollar store for budget-friendly supplies—you’ll be amazed at the treasures you can find!
Here are the supplies I used for this card:
https://linkdeli.com/widget.js?id=f5e8378456858c916708
Card Idea #3:
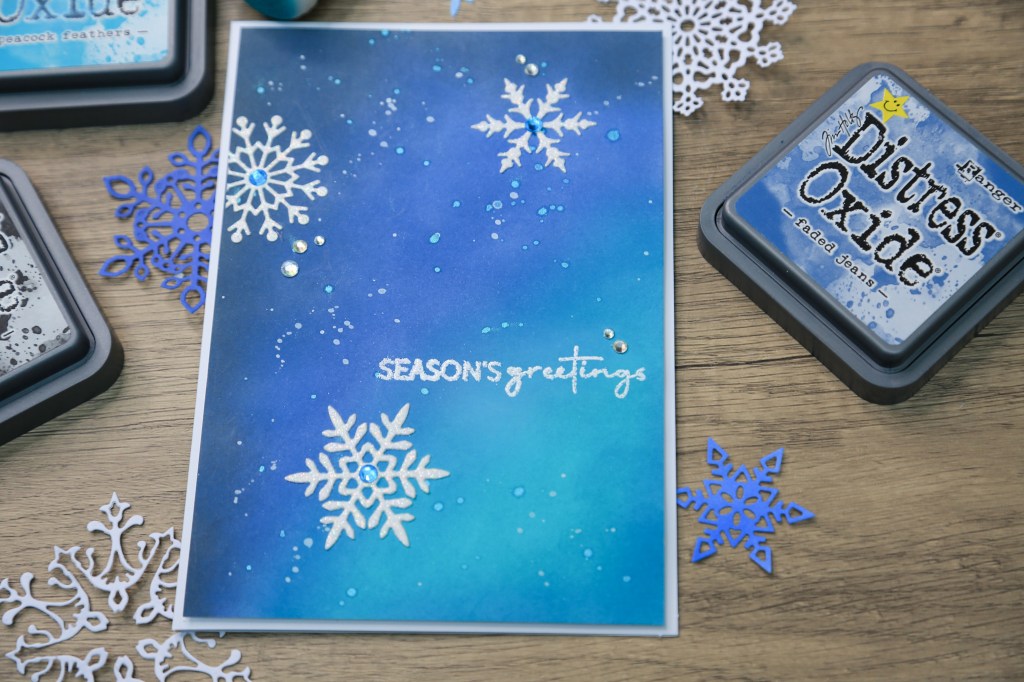
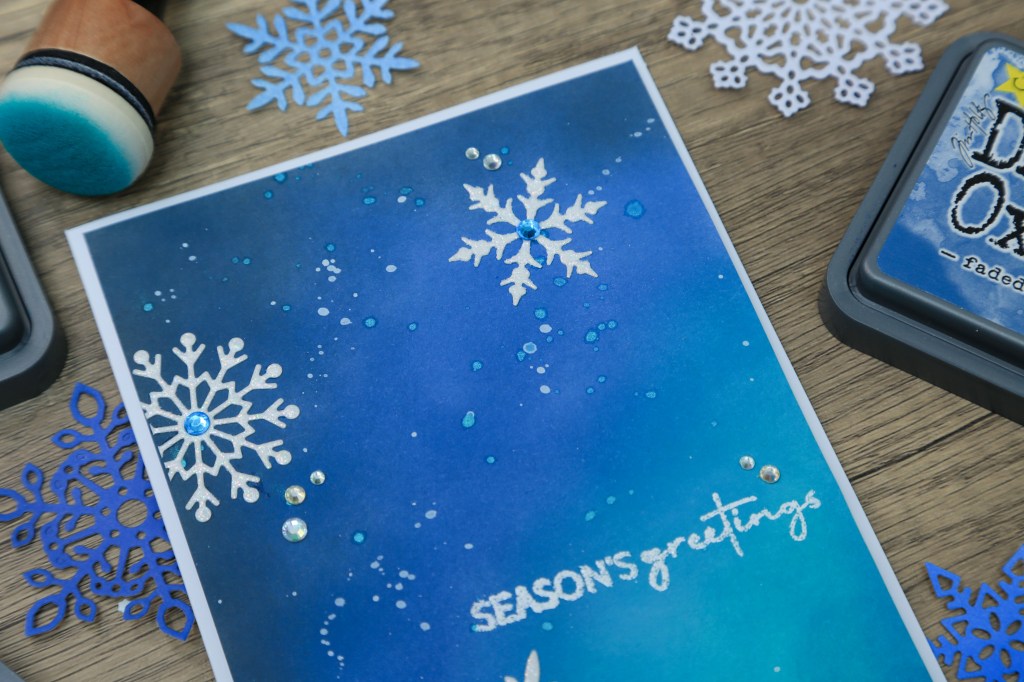
Snowflakes in the Night Holiday Card
This part will walk you through creating a 5×7 holiday card featuring a stunning ink-blended night sky. The process is straightforward, and the results are magical. Below is the detailed supply list and instructions.
Supplies Needed
- Neenah Solar White 110lb Cardstock: For the card panel.
- White Glitter Cardstock: For the snowflake embellishments.
- Pre-Scored Blank White Cards: 5×7 card for the card base.
- Distress Oxides: Peacock Feathers, Faded Jeans, and Black Soot.
- White Paint: From Spellbinders, diluted for spatters.
- Distress Mica Spritz: Shiny Bauble for added shimmer.
- Altenew White Embossing Powder: For the sentiment.
- Light Blue and White Rhinestones: For embellishing snowflakes and the background.
- Paper Trimmer: For cutting the card panel to size.
- Foam Tape – To add dimension to the card.
- Altenew Sticky Mat: To hold the card panel while ink blending.
- Heat Tool: For quick drying of inks and embossing.
- Blending Tools or Sponges: For applying Distress Oxides.
- Snowflake Dies or Pre-Made Die-Cuts: For the snowflake motif.
Step-by-Step Instructions:
Step 1: Prepare the Card Panel
- Cut a 5×7 panel from Neenah Solar White 110 lb. card stock using a guillotine trimmer.
- Set the panel aside and save any scraps for future projects.
Step 2. Ink Blend the Background
- Secure the card panel onto the Altenew Sticky Mat to keep it in place.
- Blend Peacock Feathers Distress Oxide:
- Start with light pressure using a blending sponge or tool.
- Work the ink until the coverage is smooth; initial blotches will settle as the ink dries.
- Add Faded Jeans Distress Oxide:
- Apply with light pressure, blending into the Peacock Feathers.
- Reapply ink to lighter areas for a seamless gradient.
- Layer Black Soot Distress Oxide:
- Darken the edges lightly to create a night-sky effect.
- Add uneven patches for a natural, celestial look.
- Trim down the card panel to
Step 3: Add Spatters and Shimmer
- Dilute a small amount of Spellbinders White Paint with water.
- Use a brush to flick tiny droplets across the panel for a starry effect.
- Apply drops (do not spray) of Distress Mica Spritz using the applicator’s tube for added shimmer and shine.
- Dry the panel using a heat tool to prevent smudging.
Step 4: Add the Sentiment
- Use Altenew White Embossing Powder for the sentiment.
- Stamp your chosen sentiment onto the panel and heat emboss.
Note: Minor imperfections in the embossing powder melt are acceptable for handmade designs!
Step 5: Adhere Snowflake Embellishments
- Use the snowflake dies and a piece of white glitter cards stock to create the snowflake die-cuts.
- Adhere one side of a snowflake to extend slightly over the card edge while keeping others intact. Trim off the overhanging bit.
- Adhere the snowflakes to the panel.
Step 6: Finishing the Card
- Place light blue rhinestones at the centres of the snowflakes for a pop of colour.
- Scatter white rhinestones around the panel to enhance the glittery night-sky effect.
- Mount the completed panel onto a 5×7 card base using your preferred adhesive. I used Bearly Art liquid glue.
- Check the alignment to ensure clean edges and a polished finish.
This 5×7 holiday card is a perfect blend of creativity and simplicity. The ink-blended night sky and glittery accents make it a beautiful, handmade piece of art. Remember, minor imperfections add charm to your card, so embrace the handmade look and enjoy the process!
Here are the supplies I used for this card:

https://linkdeli.com/widget.js?id=f5e8378456858c916708
Card Idea #4:
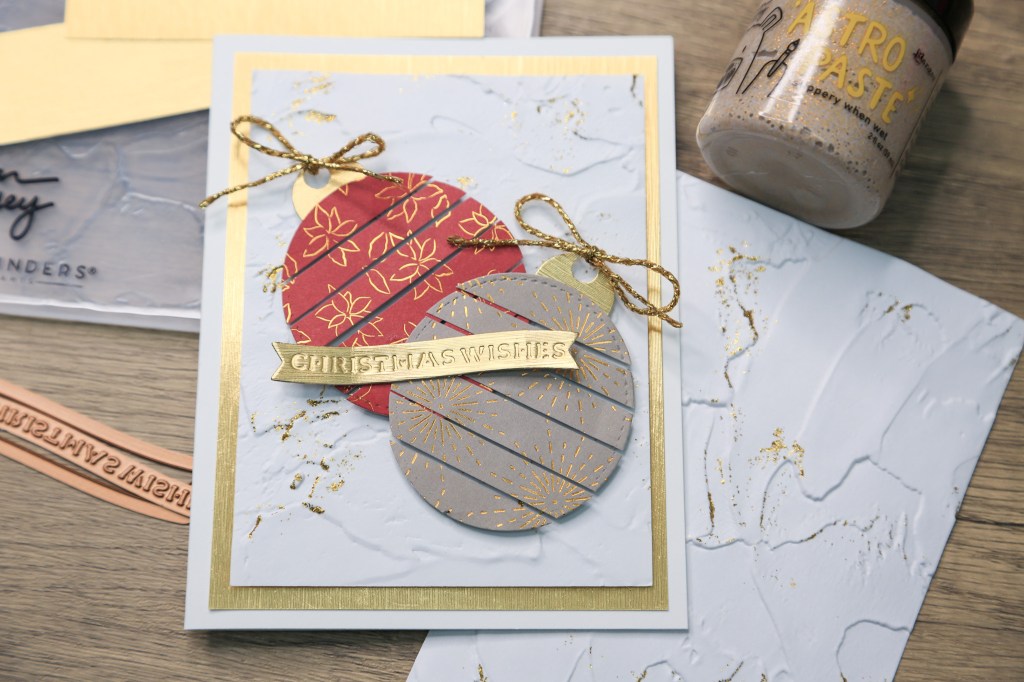
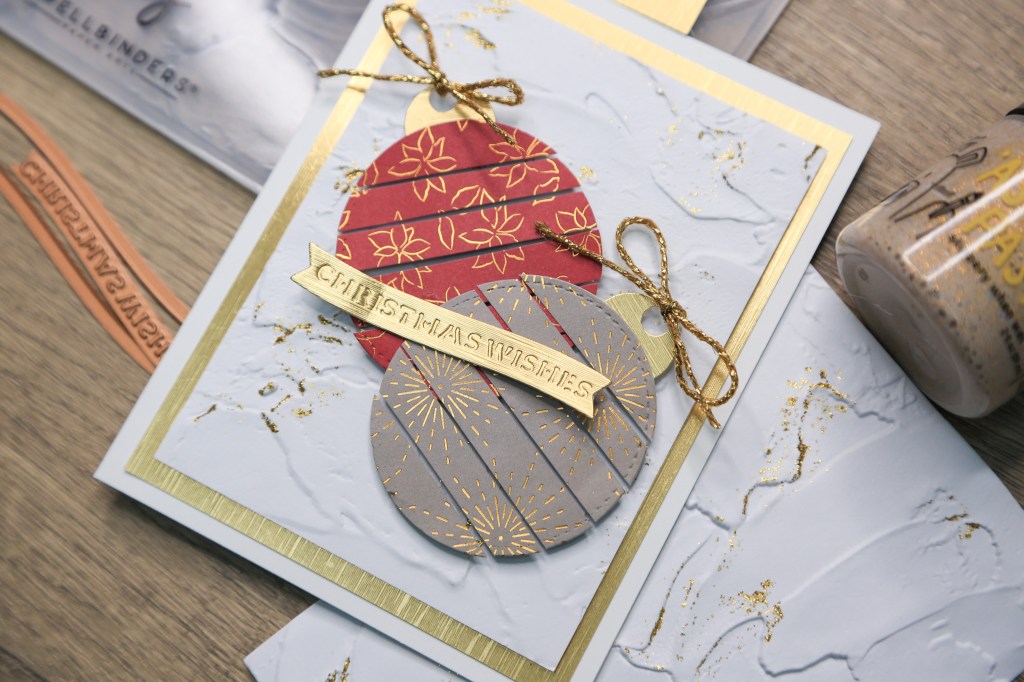
Cute Christmas Ornaments
I hope you have fun creating this A2 card featuring two elegant Christmas ornaments crafted from gold-accented patterned paper, and set against a textured, glitter-enhanced background created with an embossing folder and Simon Hurley Astro Paste.
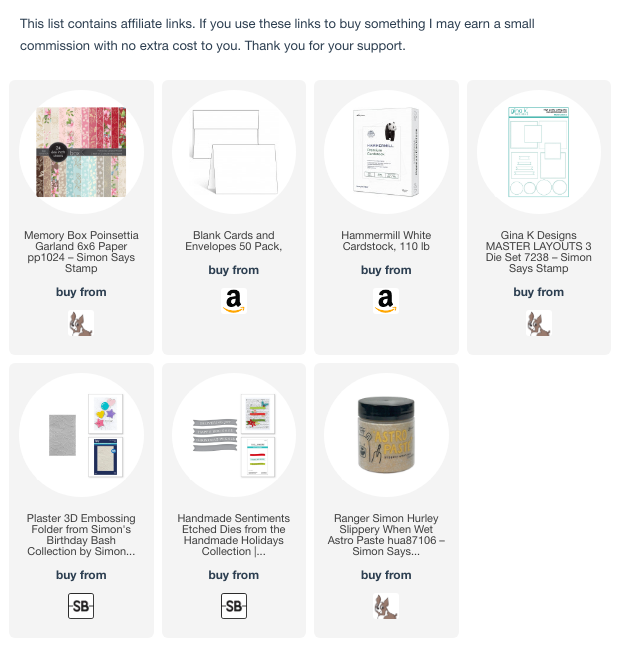
Supplies Needed
- Memory Box 6×6-Inch Paper Pad: For patterned paper with gold detailing.
- Gina K Designs Master Layouts 3 Die Set: For creating stitched circle ornaments.
- Dollarama Gold Paper Pad: Metallic paper for ornament toppers.
- Simon Hurley Embossing Folder: To create the textured background.
- Neenah Index 110lb Cardstock: For the embossed panel.
- Simon Hurley Astro Paste: For glittery texture on the background.
- Foam Tape and Foam Strips: For dimension on ornaments and sentiment.
- Small Circle Die: For improvising ornament toppers.
- Small Paper Trimmer: For cutting narrow strips.
- Punch Tool: For adding holes for string.
- Glue and Adhesive: For assembling the card.
- String (Gold): For ornament hangers.
Step-by-Step Instructions
Step 1: Prepare the Card Base and Ornaments
Choose a patterned paper from the Memory Box 6×6-inch paper pad. Cut two 2.5-inch square pieces and use the stitched circle die from the Master Layouts 3 Die Set to create ornaments. Cut small strips of metallic paper from the Dollarama Gold Paper Pad for ornament toppers, improvising with a small circle die.
Step 2: Create the Textured Background
Emboss a full panel of Neenah Index 110lb cardstock using the Simon Hurley embossing folder. Lightly spritz the cardstock with water before embossing to prevent cracks and enhance detail. Add a glittery finish to the embossed texture by applying Simon Hurley Astro Paste in random spots. Clean tools immediately to prevent the paste from hardening.
Step 3: Assemble the Card Layers
Trim the embossed panel to size, leaving room for a mat layer. Cut the gold paper from the Dollarama Gold Paper Pad to create a mat for the background. Save unused sections of the gold paper for die-cutting. Layer the embossed background onto the mat and adhere it to the card base.
Step 4: Add Ornament Details
Cut the patterned paper into narrow strips to create pieced ornaments. Leave the top sections wide enough to attach the toppers. Punch a small hole in each topper for the string. Assemble the ornaments by aligning the strips carefully. Use foam strips for added dimension. Attach the toppers and string to complete the ornaments.
Step 5: Arrange and Attach the Elements
Place the ornaments on the textured background, adjusting for even spacing. Adhere the ornaments with foam tape for dimension. Secure any loose sections with glue to ensure stability.
Step 6: Add the Sentiment and Final Touches
Curve a sentiment banner slightly for a wavy effect. Use foam squares and glue to attach the banner securely. Finish the card by threading gold string through the punched holes on the ornaments. Choose a thicker gold string for a bolder look.
The card is now complete! This design is versatile and easy to adapt to other occasions by changing the colors, patterns, or sentiment. If you enjoyed this tutorial, consider supporting my channel by using the affiliate links in the supply list on my blog. Thank you for creating with me today!
Here are the supplies I used for this card:
 https://linkdeli.com/widget.js?id=f5e8378456858c916708


Leave a comment