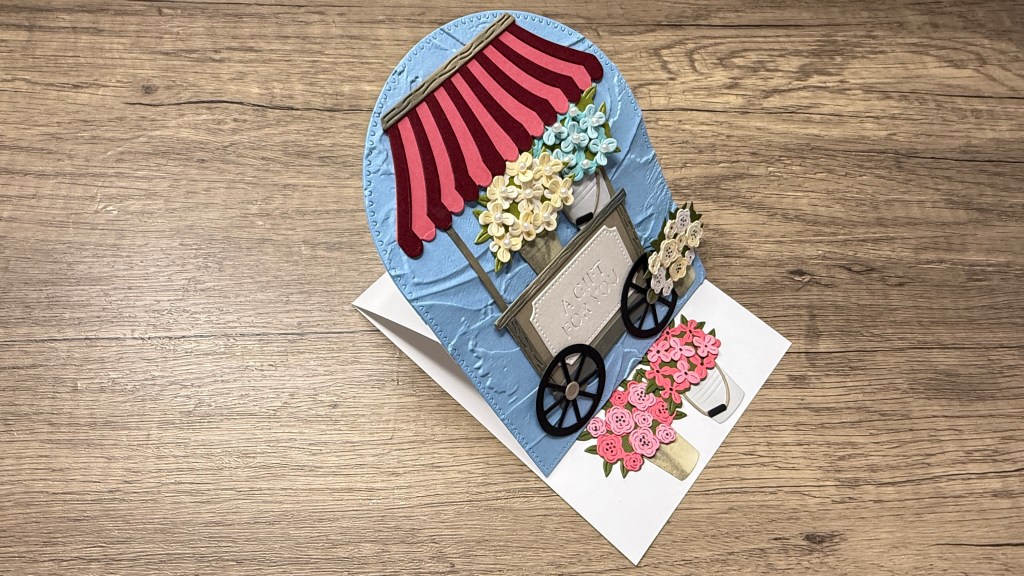
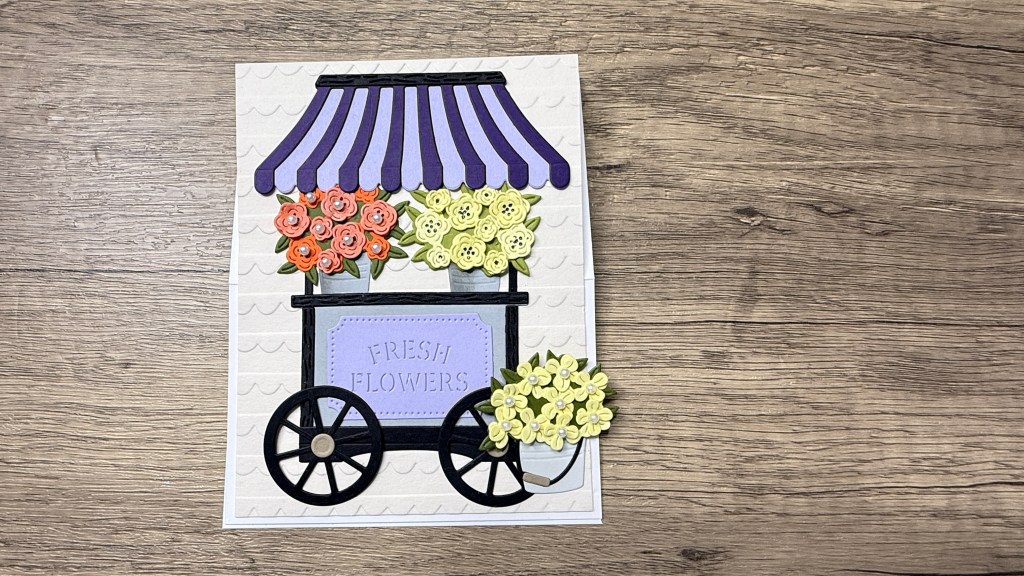
What’s better than a beautiful handmade card? A card that stands up and steals the show! Today, I’m creating a couple of stunning easel cards using the most charming flower cart as the centrepiece. It’s elegant, dimensional, and guaranteed to wow anyone who receives it.
But here’s the best part—it looks fancy without being complicated! I’ll walk you through each step, sharing tips to make your details pop and your design come together effortlessly. If you don’t have this specific die set, don’t worry. You just need something you can use as a centrepiece. Let’s get started and create a show-stopping card!
If you’d like to jump straight to the video tutorial, you can watch it here:
Supplies Used
- Spellbinders Flower Cart Etched Dies
- Embossing Folders: (both are unavailable on the Spellbinders website; use any folder of your choice)
- Plaster
- Scalloped
- Card Stock (Various Colours)
- Spellbinders Chiffon Card Stock
- Neenah Classic Crest Ultra Thick – 4 ¼ in. x 11 in. scored at 2 ¾ in and 5 ½ in.
- Lightweight White Card Stock for Stability – I used Hammermill
- Inks (Buttercream, Cloudy Night, White Ink)
- Paper Pouncer
- Simon Says Stamp Place and Score Tool
- Tweezers
- Scoring Tool
- Bearly Art Liquid Glue
- Black Gel Pen
- Pearls for Embellishment
Step-by-Step Instructions
Step 1: Prepare the Card Base
Start with a top-folding A2 card base (5 ½ inches by 4 ¼ inches). Score the front panel at 2 ¾ inches to create the easel fold. Score both sides for a crisp fold, especially if using thick card stock.
Step 2: Create the Background Panel
Emboss a piece of card stock using an embossing folder. If using lightweight paper, adhere it to a piece of white card stock for extra stability. Decide whether to use the embossed or debossed side before adhering.
Step 3: Die-Cutting the Pieces
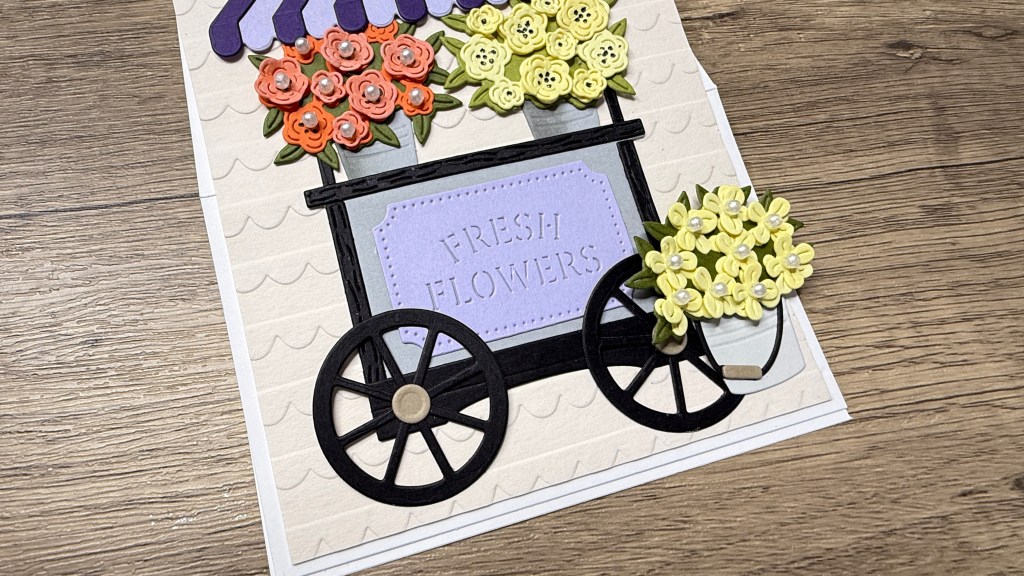
Use a variety of coloured card stock scraps to cut out all the die pieces. This includes the flower cart, buckets, flowers, foliage, and decorative elements. Set aside the larger flowers for later use.
Step 4: Ink Blending for Depth
Use a paper pouncer to add white ink to orange flowers for contrast. Apply Buttercream ink to the yellow flowers. Use Cloudy Night ink on the sides of the buckets for shadows. Ink the inside of the buckets for added realism.
Step 5: Assembling the Flower Buckets
Glue the individual bucket pieces together, including the handles for the larger buckets. Arrange the inner parts, even though they will be hidden by flower clusters, to ensure a polished look.
Step 6: Shaping the Flowers
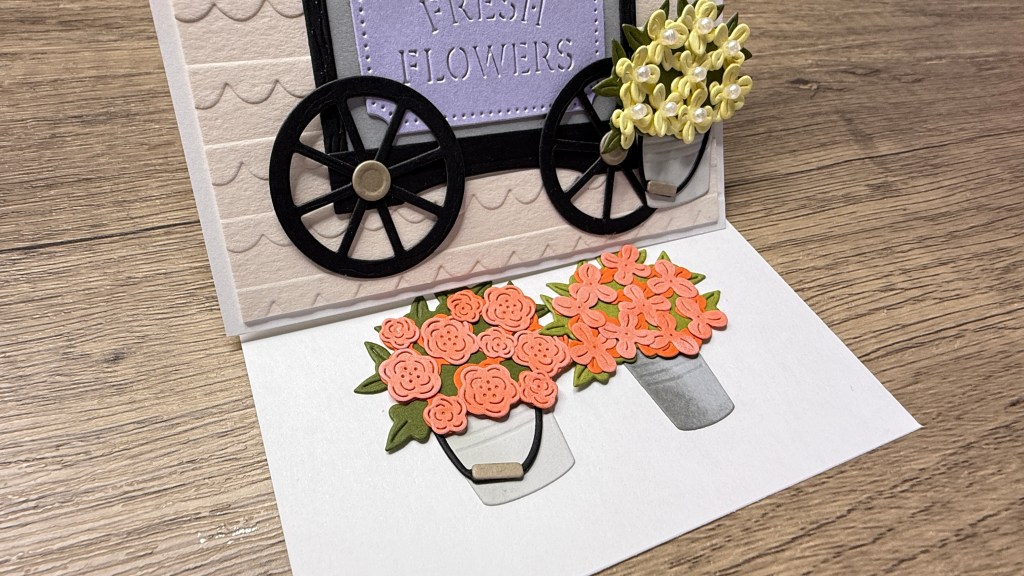
Use the stylus end of a jewel picker and a foam pad to shape the flowers that will go on the card front to add dimension. The flowers inside the card will remain flat to ensure the card closes properly.
Step 7: Arranging the Floral Clusters
Prepare five floral clusters—three for the card front and two for the inside. Use a mix of three-petal and four-petal flowers, slightly offsetting them for depth. Leave some spaces for contrast.
Step 8: Constructing the Cart
Assemble the flower cart, ensuring all small details like wheels, frame and decorative elements are securely glued. Decide on label placement by testing different colour options before finalizing.
Step 9: Final Assembly
Glue the floral clusters onto the buckets and position them on the cart. Attach the awning over the cart and attach the completed cart to the embossed background panel, ensuring stability. Allow glue to dry completely.
Optional: You can trim the embossed card panel down to 4 in. x 5 ¼ in. to allow for a narrow white border to show around the front panel.
Step 10: Adding the Finishing Touches
Use a black gel pen to add dots in the flower centres. Adhere tiny pearls for extra embellishment but avoid overloading the design.
Step 11: Ensuring the Easel Mechanism Works
Fold the card back and confirm it stands upright properly. Adjust any elements if necessary for balance. The card can be displayed at different angles, making it a versatile and eye-catching piece.
And that’s it! Your stunning easel card is complete. Have you ever made an easel card? Do you have a favourite fun fold design you use often? Let me know in the comments!


Leave a comment