Need a cute way to give a gift card that doesn’t scream ‘I forgot to shop’? We’ve got you covered! In this tutorial, you’ll learn how to make two stunning floral gift card holders using super simple techniques – seriously, they look like they came from a fancy boutique, but they’re way easier than you’d think.
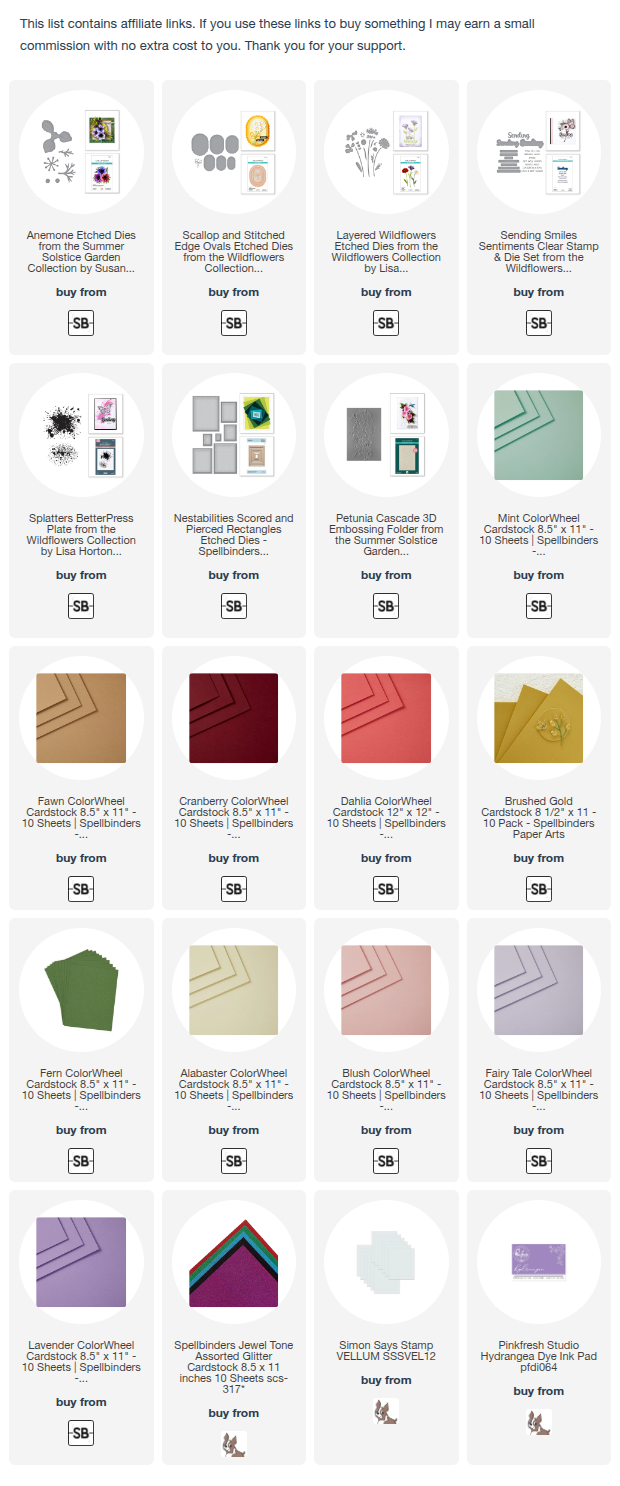
Please check out the visual supply list at the end of the blog post.
You can watch the detailed tutorial tutorial on YouTube by clicking on the thumbnail below:
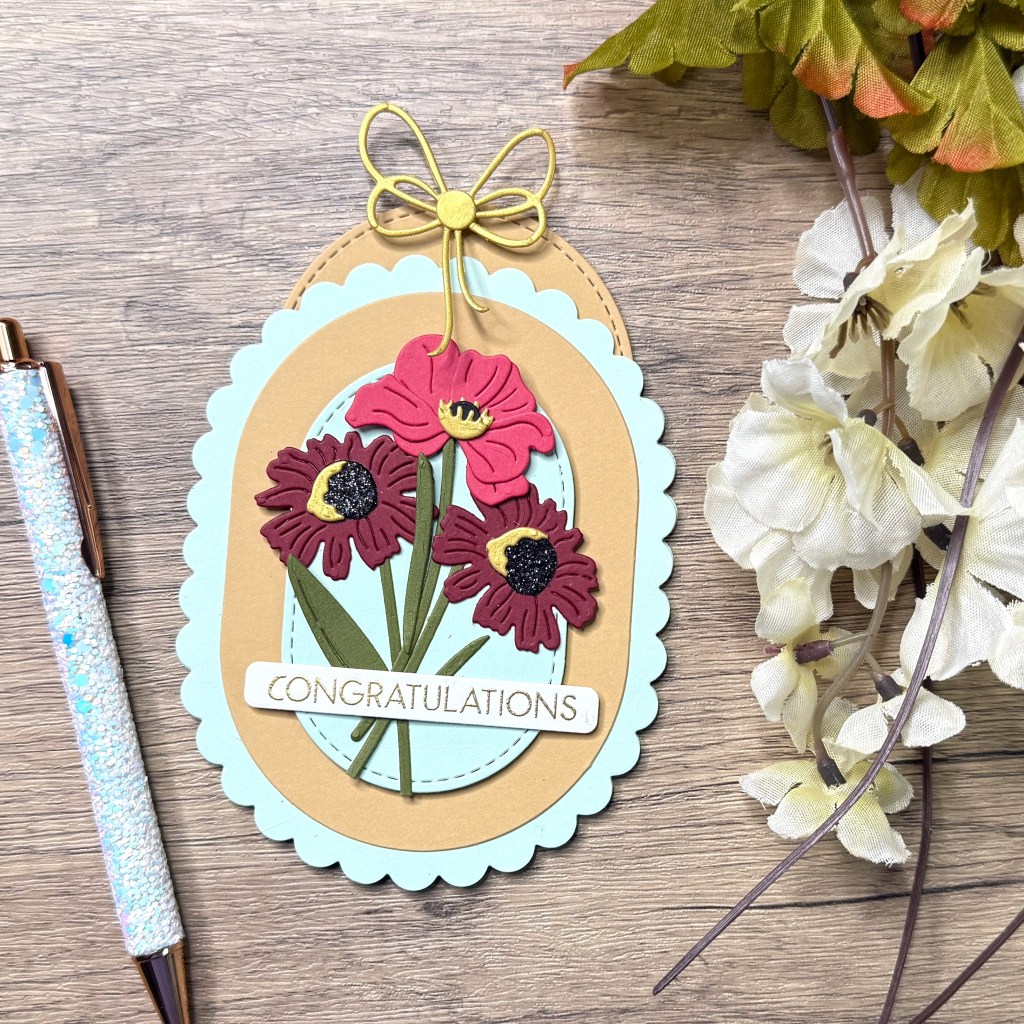
Card #1: Pull-Out Floral Gift Card Holder
For this floral gift card holder, I have used sentiment stamps and coordinating die set that stamp and cut out several sentiments at a time, a beautiful set of wildflower dies for the focal point, and scalloped and stitched dies for the card base and layers. You can use the “Congratulations” sentiment, or customize it as you wish.
Supplies Used:
- Sending Smiles Sentiments Clear Stamp & Die Set
- Lisa Horton’s Wildflowers Etched Dies
- Scallop and Stitched Edge Ovals Etched Dies (for card base and layers)
- Black glitter card stock
- Brushed Gold card stock
- Fawn ColorWheel Cardstock (for layering and tag insert)
- Mint ColorWheel Cardstock (for layering)
- Cranberry ColorWheel Cardstock
- Dahlia ColorWheel Cardstock
- Fern ColorWheel Cardstock
- Thick card stock (for sentiments)
- Magnetic glass mat
- Liquid glue (e.g., Bearly Art)
- Foam tape (thin strips)
- Press’n Seal (optional)
- Double-sided tape (small piece for gift card)
- MISTI (or stamping tool)
- Anti-static powder
- Ranger Ultra Fine Gold embossing powder (or desired colour)
- Heat tool
- Mono eraser (optional, for cleaning up embossing)
Step-by-Step Instructions:
Step 1: Die Cutting and Flower Assembly
- Die Cut Components: Die cut all your pieces. For the card base, use one of the scalloped dies to create two panels that will form the gift card holder’s pocket. Cut out the centre from the front layer of the pocket to save paper. Use the second largest die from the set for the layer on the front of the pocket, and another stitched oval from the same set for the gift card tag. Finally, cut a small mint stitched panel to anchor the flowers.
- Prepare Flower Centres: Die-cut the flower centres from black glitter card stock and layer them with gold card stock for contrast.
- Assemble Flowers:
- For the daisy-like flowers, match the small nub on the bottom piece of the dome-shaped flower centre to the nub on the top narrow piece for easy alignment. Add glue to the top layer and position it over the bottom one.
- For the poppy-like flower with two layers cut from the same colour, fit the pieces together like a jigsaw puzzle.
- Assemble Three-Layer Flower Centre: The flower centre with three layers goes on the poppy. Use gold for the top and back layers and black glitter for the middle. Place the slightly larger gold piece on the bottom, then layer the black glitter centre, and finally the smaller gold piece on top.
Step 2: Assembling the Gift Card Holder Pocket
- Attach Craft Oval: Attach the craft oval to the card base using liquid glue, being careful to avoid the centre where the opening is. Liquid glue allows you a few seconds to adjust the position.
- Add Dimension to Top Layer: Pop up the top layer using foam tape for dimension. Add a bit of liquid glue to the foam tape for extra wiggle room while positioning.
- Arrange Floral Cluster: Arrange your top floral cluster, ensuring the stems come together naturally.
- Secure Floral Cluster: Once you like the arrangement, pick it up all at once using a piece of Press’n Seal to hold everything in place.
- Add Lift to Flowers: Add a tiny bit of foam behind one of the flowers to give it lift and allow it to overlap the flower next to it. Trim any extra foam and add glue underneath for slight repositioning before it sets.
- Attach Leaves: Attach the leaves, allowing them to hang a little loose for a natural, layered look.
- Create the Pocket: Place the insert piece temporarily to ensure it moves freely inside the pocket. Use a small magnet to hold it in place while you apply tiny strips of foam tape behind one of the pocket panels. Align the second panel with the card base to form a neat pocket.
Step 3: The Pull-Out Tab and Finishing Touches
- Attach Gift Card: To attach a gift card, use a small piece of double-sided tape on the insert piece. The insert should slide nicely into the pocket with a bit of room at the bottom.
- Create a Stopper/Pull Tab: Attach a bow to the top of the insert, raising it slightly with foam tape so it acts as a stopper and is easy to grab. Layer a second piece of foam tape if needed for more height. Secure the bow with a dab of glue to prevent it from popping off.
- Stamp and Emboss Sentiment: Place thick card stock on a sticky mat in your MISTI. Rub off any manufacturing residue from the stamp. Prep the card stock with anti-static powder. Stamp the sentiment (the set will stamp all the sentiments in one go) with embossing ink and apply Ranger Ultra Fine Gold embossing powder (or desired colour). Heat emboss the sentiment and clean up any stray embossing with a mono eraser if needed.
- Die Cut Sentiment: Centre the die on your embossed sentiment and run it through your die-cutting machine.
- Add Dimension to Sentiment: Instead of foam tape, use sturdy leftover paper strips for dimension and better support. Layer these backing strips across the sentiment.
- Adhere Sentiment: Use liquid glue to adhere the sentiment to the front, wiggling it into place until it’s perfectly centred.
- Final Check: Test the pull-out piece to ensure it slides in beautifully. It may catch slightly on the foam, which helps prevent it from slipping in too far. You can stamp an extra sentiment on the pull-out tab for a surprise, or write your message directly on the tab if not using it for a gift card. The top of the gift card should peek out just enough for the recipient to know there’s something to pull.
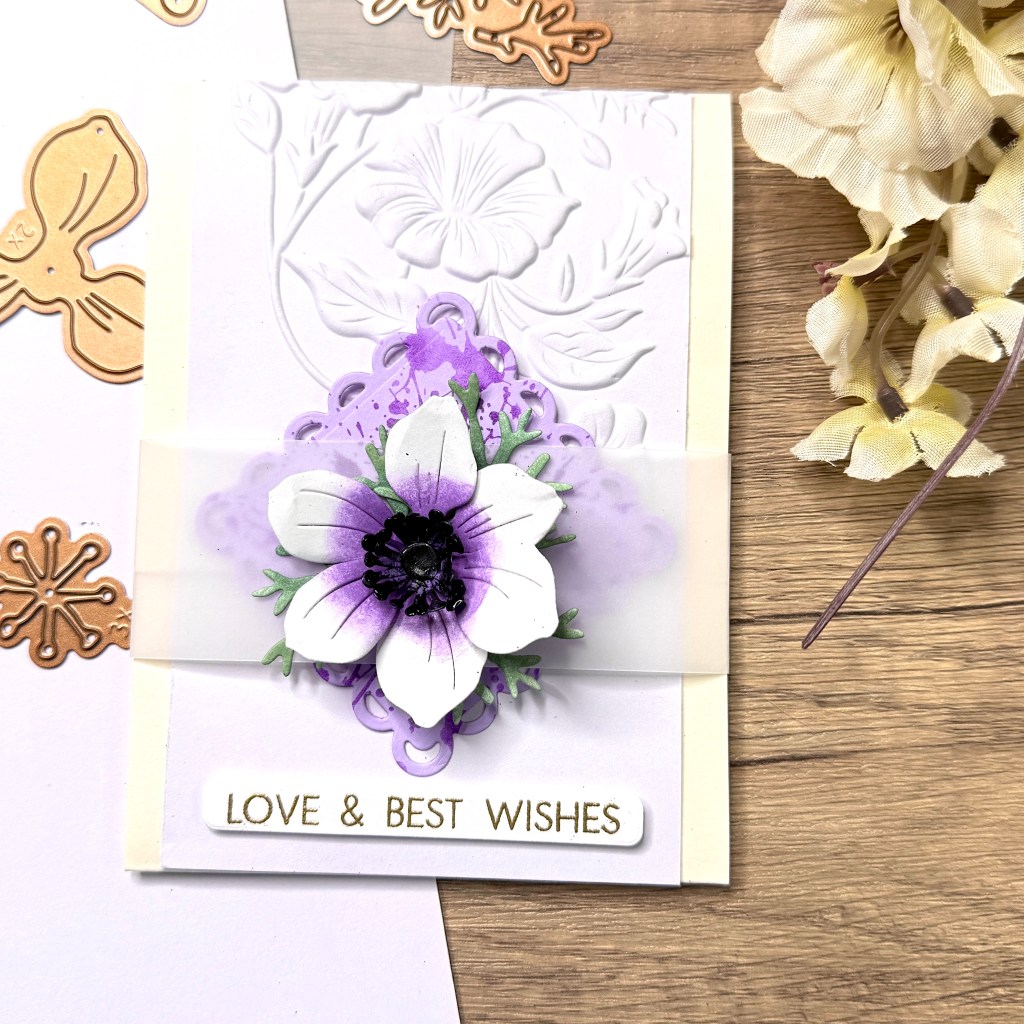
Card #2: Simple & Elegant Floral Gift Card Holder
This next gift card holder is a very simple design – quick to put together but still looks beautiful.
Supplies Used:
- Alabaster ColorWheel Cardstock – cut to 11 x 4 ¼ in. panel
- Fairy Tale ColorWheel Cardstock – cut to 3 ¾ x 4 in.
- Lavender ColorWheel Cardstock –
- Fern ColorWheel Cardstock
- Splatters BetterPress Plate
- Petunia Cascade 3D Embossing Folder (for texture on top fold)
- Hammermill cardstock – 4 x 5 ¼ in. panel (for inside of card)
- Black Embossing Powder (for flower stamens)
- Heavy-weight vellum (for belly band)
- Label die (e.g., third smallest square in a set)
- Pinkfresh Studio Ink – Hydrangea
- Scoring tool
- Thin double-sided tape
- Insert piece (for gift card)
- Ribbon or twine (optional, for pull)
- Flower-shaping tools
Step-by-Step Instructions:
- Score Card Panel: Start with an 11 x 4 ¼ inch card panel. Score it at 3 ½ inches. Then, flip the panel around and score it again at 2 inches.
- Glue Inner Panel: Before closing the pocket, glue the inner panel with the white lightweight cardstock panel so there’s space to write a message. Ensure a nice even margin on the top and sides, as this part will be visible.
- Form the Pocket: Apply thin double-sided tape along the very edges of the small flap, close to the sides. Burnish it well, then close the flap and press down firmly to form the pocket.
- Prepare Insert: Prepare an insert piece that fits nicely inside. If using, punch a hole at one end and add a small piece of ribbon or twine. Keep the ribbon pull short so it can close easily.
- Test the Fit:To test, attach a dummy gift card or credit card secured with a bit of washi tape to the insert. It should fit inside the pocket easily.
- Add Belly Band: Use heavy-weight vellum to create a belly band to keep the card closed.
- Decorate Label: Add a splatter design to a piece of Lavender ColorWheel Cardstock using the Splatters BetterPress Plate and Hydrangea ink. Cut the square label using a label die (e.g., the third smallest in the set). Add one of the sentiments you created earlier.
- Add Background Texture: For the background, use an embossing folder to add texture to the top fold, but keep the bottom of the panel plain to draw attention to the sentiment.
- Create Anemone Flower:
- Die cut two flower petal pieces from lightweight white card stock and add a little Hydrangea ink to the centres with a blending brush.
- Add three stamen pieces from the Lavender ColorWheel Cardstock card stock, add pollen powder if you have any to the tips. I dipped the tips in embossing ink, applied black embossing powder and used a heat tool to melt it.
- Die cut two large and two small leaves using Fern ColorWheel Cardstock.
- petals on top using a small stylus or flower-shaping tools to give the petals and centre some form. Add it to the centre of the belly band to hide the seam.
- Assemble Card: Slide the belly band back on. The label on the belly band helps hold everything down nicely.
Bonus Gift Card Holder Ideas
Here is another idea using the pull-out tag technique, created using the Cosmos Etched Dies and a sentiment from the Sending Smiles Sentiments Clear Stamp & Die Set. I created the gift card holder pocket and the pull-out tag with the Nestabilities Scored and Pierced Rectangles Etched Dies, and the top stitched oval layer with the Scallop and Stitched Edge Ovals Etched Dies.
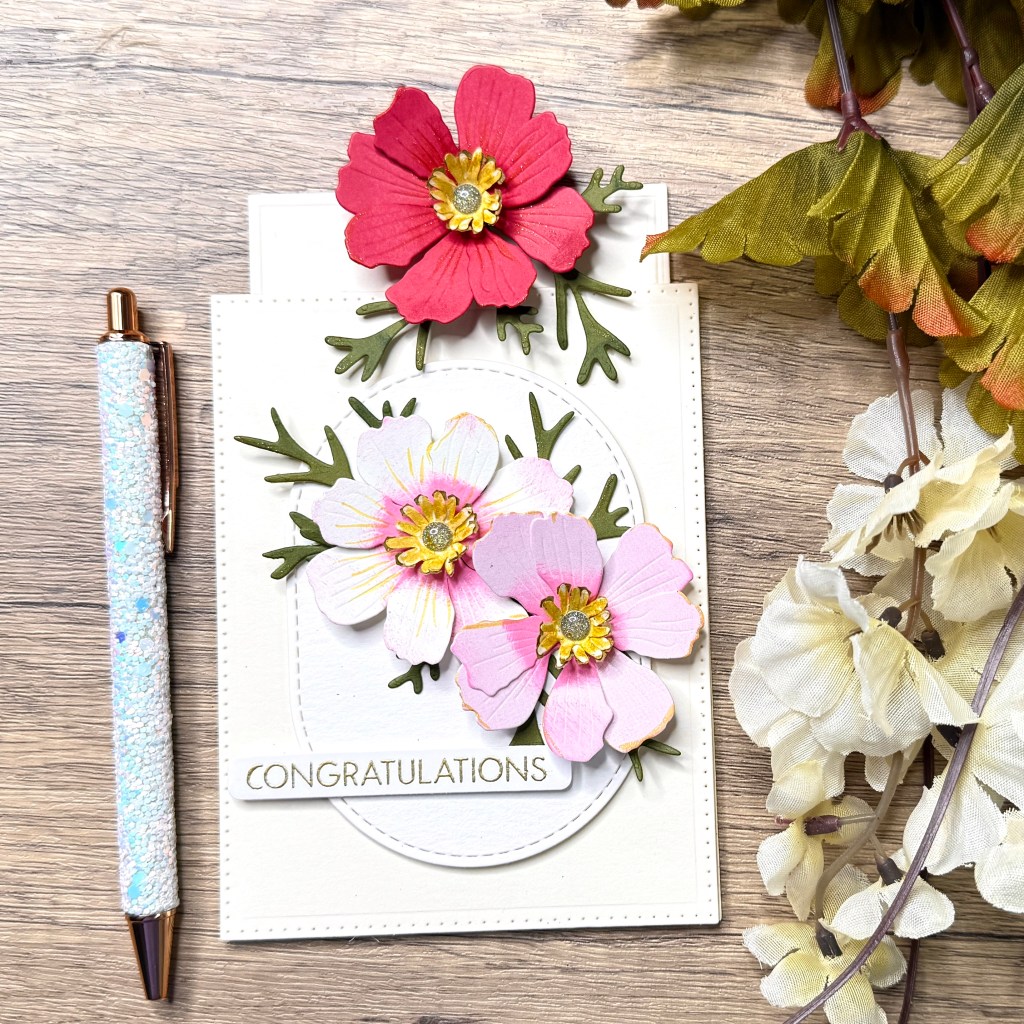
You can customize these cards by using elements from your stash as a stopper for the tab insert, such as a word die that says “Dad” or “Happy Father’s Day”.
Looking for more fancy fold card ideas? Check out this video on using patterned papers with fancy folds: Easiest Fun Fold Cards Creative DIY Ideas.
Here’s a visual list of all the supplies I used to make the three gift card holders:
https://linkdeli.com/widget.js?id=f5e8378456858c916708
If you’re looking for a list of tools, here’s my list of favourites:https://linkdeli.com/widget.js?id=f5e8378456858c916708


Leave a comment