Have you ever sat down to start a paper crafting project, only to realize you’re missing a tool or using something that just doesn’t work the way you want? Or maybe you’ve wasted money buying fancy tools that end up sitting in a drawer because they don’t actually make your crafting any easriier?
Well, today I’m breaking down 15 essential paper crafting tools that every crafter actually needs—and the best part? They’re affordable, they work, and they’ll completely transform your projects starting today!
You can watch the detailed tutorial tutorial on YouTube by clicking on the thumbnail below:
Please check out the visual supply list below and read more details about tools in this blog post:
 https://linkdeli.com/widget.js?id=f5e8378456858c916708
Workspace Organization & Efficiency Tools
These first few tools are absolute lifelines for me when it comes to having a functional and organized workspace, helping me be super efficient with my crafting process. I’ve grouped them by category, not in order of my preference.
1. Glass Mat
This is hands-down one of my most-used tools! My magnetic glass mat, which is from Simon Says Stamp, gives me a smooth, heat-resistant surface that’s perfect for card assembly, gluing, ink blending, and colour layering. I often use it as a palette, especially when I’m ink blending different colours. For example, if my sticky mat has green ink on it, I can smoosh a blue ink pad onto my glass mat and then dip my blending brush in, keeping my blues and greens perfectly separate.
I also love using neodymium magnets with my glass mat; they’re extremely strong and help keep my card panels and other design elements in place, especially when I’m assembling and gluing them down. It’s also a fabulous tool for ink blending or stencilling. And clean-up is super easy—just use water or rubbing alcohol, and it looks brand new again!
2. Craft Stax
Now here’s another one of my favourite sets of tools—the Spellbinders Craft Stax! These are so handy for project prep. Let’s say I’m going to use a specific die and an embossing folder—I just pop them into one of these boxes. The Craft Stax are stackable, and you can even flip the lid to use it like a tray, which is super convenient. Each set comes with four small boxes. They’re perfect when I’m prepping or die-cutting; I just toss everything I need into these and stack them up. They’re super compact, and they stay put. I absolutely love how much they’ve helped me stay organized—especially when I’m filming my videos!
3. Magnetic Die Catcher
Now, let me show you another favourite tool—this die catcher that I keep on my desk. It’s magnetic and super handy especially when I’m working with small dies. Sometimes when I’m working quickly, I don’t have time to put everything back in its proper storage, so I just pop the dies onto this magnetic pad, and they stay put. The grip is strong, and even the sides are magnetic! On the topic of magnets, I have stopped losing dies since I started using this pad! If one slips and falls out of my hands, I run one of these heavy-duty magnets over the area. Look at how far I can hold it and it still catches the die—about an inch and a half away. It’s amazing—it just helps me stay organized and keeps those tiny dies from disappearing into the abyss.
Cutting & Prepping Tools
Let’s move on to my favourite cutting and prepping tools, and I’ll explain why they’re my go-to’s!
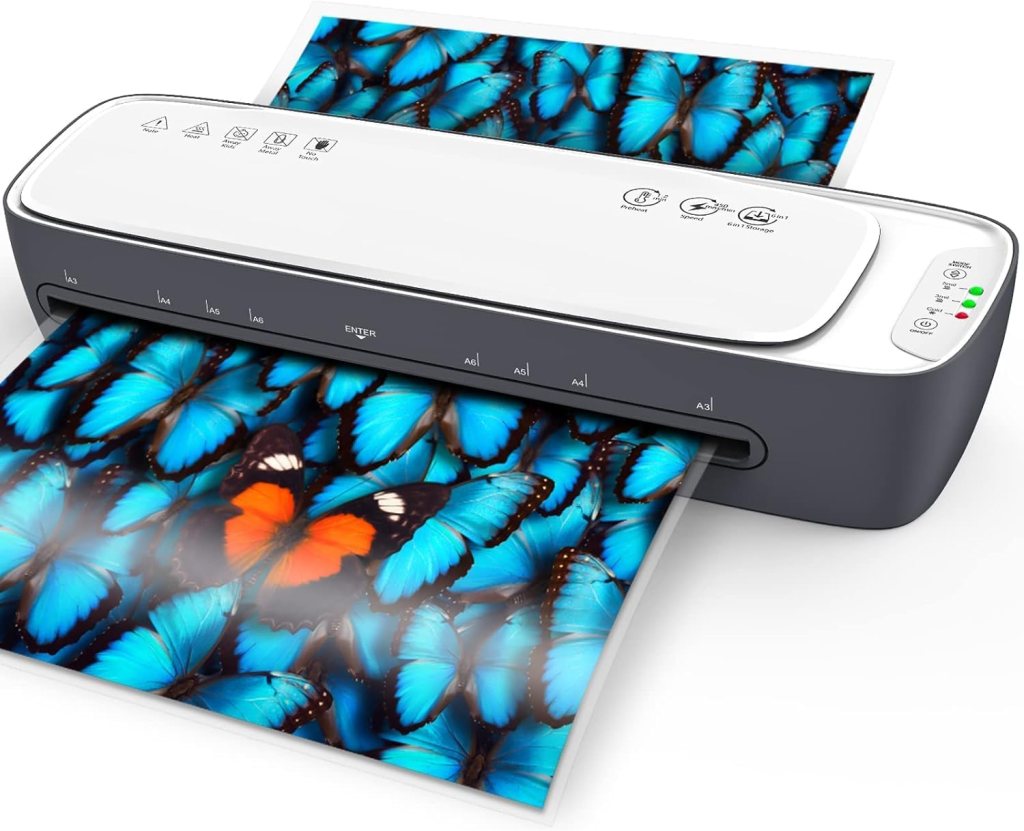
4. Laminator
Okay, another one of my recent favourite tools is my laminator! It’s honestly so much fun to use. Mine came with a little trimmer, some binder rings, a corner punch, a hole punch, and even a spare blade. What I love about it is that it’s helping me stay organized and stretch my supplies. For example, I’ve made cute little bookmarks, stencils (or masks), and even amazing storage folders for my stamps, dies, and scraps. This tool has truly helped me get more organized because I can make my own custom storage solutions, tools, and gifts all at once!
QFun Laminator: 🇺🇸 https://bit.ly/3H4MABd 🇨🇦 https://bit.ly/44U4n82
5. Guillotine Trimmer
Alright, next up is the guillotine trimmer. We all use it to cut card panels, right? But here’s a tip you might not know: You can actually use the plastic finger guard to help align your sentiment strips perfectly. I line up the bottom of my sentiment with the edge of the plastic guard, then trim it. Then I turn it around and line it up again the same way. When I cut it, the top and bottom borders are perfectly uniform! I do the same for the sides. Just line it up with the guard, trim carefully, and—look at that! Perfect margins all around! This is such a simple trick, but it really elevates the look of your sentiment labels.
6. Scissors & Tweezers
I have an array of scissors, but the most important ones I have are the ones I use for cutting sticky tapes and detailed fussy cutting. Please check the visual supply list at the end for the different types of scissors I consider essential in my craft room.
- Craft Knife: This is super helpful—especially when I’m working with washi tape. I reach for it often for those clean, precision cuts.
- Favourite Scissors: This pair by Spellbinders is currently my absolute favourite. They’re non-stick and super smooth; I even use them for fussy cutting.
- Sticky Stuff Scissors: I have a separate pair of scissors I picked up from Amazon, and I use these strictly for cutting sticky stuff—like adhesive strips and foam tape. Always, always keep your scissors for adhesives separate from your paper-cutting ones. That way, your main pair doesn’t get gunky!
- Ergonomic Scissors: This one here is from scrapbook.com and it’s ergonomic—which is great for fussy cutting since I have arthritis, and traditional scissors can put too much pressure on my fingers. I use this one for fussy cutting when I need more comfort, and it actually does a pretty good job. But for very fine detail, I still need to go in with one of my smaller detail scissors.
- Regular Tweezers: This pair here is basically my lifeline for heat embossing or gluing things. I like to keep my fingers away from the card front so I can see what I’m doing while aligning things precisely. I got these off Amazon for just a few bucks, and they’re such a lifesaver.
- Reverse Tweezers: This next one is a reverse tweezer—also from Amazon. Instead of squeezing to hold something, you squeeze to open, and it holds onto your item when you release. It’s perfect when you’re using a heat tool and want to keep your fingers away from the heat, and it’s also great for tying bows!
- Tiny Piece Picker-Upper: This little tool here is from Simon Says Stamp used for picking up small pieces like die cuts or embellishments. Honestly, I couldn’t live without this, especially when I’m placing sequins or tiny elements.
7. Spellbinders Platinum 6
Next up is my beloved Spellbinders Platinum 6. This is absolutely one of my most-used tools because I do a lot of die cutting, and this machine cuts beautifully. It’s also the only machine that works with my BetterPress system, which is such a joy to work with because it creates incredibly sharp impressions.
While I also had a Gemini Junior, which is an electric machine that makes die cutting easier with less effort, I mostly use my Platinum 6. It’s consistent, the pressure is just right, and the cuts are flawless. Plus, I found that with the Gemini Junior, the embossing mat would keep tearing because of the immense pressure from the machine. With the Spellbinders Platinum 6, embossing is a breeze and the outcome is stunning!
Adhesives & Smart Hacks
Now let me introduce you to my favourite adhesives and some game-changing tools in my toolbox!
8. Tape Runner
One of my absolute favourite dry adhesives is the Tape Runner. You’ll often see me using it, especially when I’m working with my BetterPress system. That makes it perfect when I’m just trying something out or working with thin paper or cardstock. If I use a liquid glue on thin paper, the moisture might cause warping or buckling, and that would ruin the card. This tape runner goes on temporarily, but after a few minutes, it actually becomes permanent. So if I’ve misaligned something and need to reposition, I still have time to peel it off gently. I also use the one from scrapbook.com. It’s great for trying out different designs or layouts without committing right away.
9. Bearly Art Liquid Glue + Card Stock Scrap
Now, here’s my most-used tool—ready? Ta-da—it’s a scrap piece of cardstock! I picked up this hack from Bibi Cameron, and it’s life-changing! I use it in combination with my favourite liquid glue, which is Bearly Art Precision Craft Glue. It comes with this amazing ultra-fine tip, which is a lifesaver for detailed applications.
Instead of applying glue directly to my project, especially with delicate die cuts or thin edges that come loose, I just squirt a bit of glue onto this cardstock scrap and slide the corner beneath the loose edge. That way, the glue goes exactly where I need it. I call this my “slide test”—if I can slide this piece of cardstock under a layer that should be adhered, I know it needs glue. And once it passes the slide test, I know it’s good to go!
10. Press’n Seal
Now, here’s another absolute favourite — Press’n Seal. I cut small pieces of Press’n Seal and keep them in my drawer. When I’m creating card layouts—especially floral arrangements—this helps me hold everything in place.
You take a piece of Press’n Seal — sticky side down—and place it over your arrangement. To prevent shifting (especially with static cling in drier climates), I anchor one edge first, then gently drop the rest of the sheet over the top and press it down firmly. Now, when you lift it up, everything stays in place. You can flip it over, apply adhesive to the back, and then place it on your card front. Let the glue set for a few seconds, then peel off the wrap.
Stamping & Blending Essentials
Let’s talk about some of my go-to’s for perfect stamping and blending.
11. MISTI
As you all know, the primary reason to use a MISTI is for precision stamping, especially when you need to stamp the same image multiple times. That’s something you really can’t do with an acrylic block. This tool is incredibly useful because if an impression isn’t great, you can re-stamp in exactly the same spot, ensuring everything comes through clearly!
12. Altenew Grip Mat
This next tool is an absolute favourite of mine—especially when I’m ink blending or stencilling! It’s the Altenew Grip Mat, and as you can probably tell… it’s well loved! My favourite way to use it is by placing it directly on top of my magnetic glass mat. That combo works beautifully! Once it’s down, it grips the glass so well—it’s not budging! It has a natural tackiness that makes it cling to the surface, which is part of what makes it so great for stencilling and ink blending.
Once the grip mat is stuck down, it’s not easy to peel off—which is kind of the point! But when you do want to remove it, the best way is to curl the mat back on itself; that helps release it without damaging the surface. Once I have the grip mat in place, I simply lay my cardstock on top, and it stays put perfectly. The best part is when I place my stencil over it—it sticks too, without any extra tape or magnets. I can use a decent amount of pressure, and nothing moves. I’m not even holding the stencil down with my hand—hands-free blending, which is such a game changer! Honestly, I think this is one of the best ways to do stencilling and ink blending—just stick everything down and go. It’s super easy and efficient.
13. Blending Brushes
While on the topic of ink blending, I have to show you my Spellbinders brushes! I purchased them a few months ago, and I’m in love! These make for stunning ink blending, especially for card backgrounds, as the large brushes offer great coverage while being easy on the hands, especially for my arthritis. They are so good for creating smooth, ink-blended backgrounds.
Finishing Touches & Rescue Tools
14. Heat Tool
Alright, so this is another one of my essential crafting tools! I’ve had this heat tool for a very long time—pretty much since I started working with mixed media about four years ago. I use it nearly every single day, and it’s held up really well. Of course, you know the heat tool is mainly used for heat embossing. But it’s also perfect for drying your ink-blended or watercoloured pieces.
And I’m going to show you one more trick that I absolutely love: if you ever end up with a card panel that’s a little skewed—maybe the foam tape didn’t line up properly—you can use your heat tool to gently loosen it without damaging anything. I’ve done this before: I heated the top of the panel, and it lifted off cleanly, leaving the foam tape behind. With just a little bit of heat, you can see how easily the foam starts to lift, and if I continued, the entire strip would peel right off. This is such a great way to fix alignment issues without destroying your card front if you’ve somehow glued it down wrong! It works like a charm with foam strips and is one of my favourite heat tool hacks—especially when you want to rescue a panel you worked hard on!
15. Mono Sand Eraser
It’s one of those tools every crafter should have in their stash. You can use the Mono Sand Eraser to gently rub over areas with stray embossing when heat embossing. It also works incredibly well, especially with ink too. If you’ve ever accidentally touched your card front with inky fingers, this eraser can help fix that as well. An additional way to use it would be to use it on over-foiled areas when hot foiling.
16. Scoring Board
It’s primarily meant for scoring, but here’s why I still reach for it: I love making fun fold cards! For example, a stepper card has multiple folds and panels, and for something like this, I need a scoring board to create those folds accurately. That kind of project definitely needs a scoring tool to get those precise fold lines.
So yes—it’s for basic scoring, but I also use it in a different way. Let’s say I’m adhering a card front to a card base and I want it perfectly aligned. I’ll use my scoring board to tuck both the base and the card front into the corner, so they’re snug against the sides. That gives me a perfect alignment every time. So while it may seem like just a basic tool, I actually get a lot of versatility out of it—from fun folds to helping with alignment—and that’s why it’s still a go-to in my craft room.


Leave a comment