If you think handmade cards are always flat and predictable, it’s time to think again! Fun-fold cards instantly add movement, layers, and a gorgeous pop-up surprise — and the best part is, you don’t need complicated dies or advanced techniques. With just a few sheets of cardstock, some patterned paper, and a bit of folding, you can create cards that completely wow the recipient.
In this tutorial, I’m walking you through two designs: a Double Pop-Up Card and an Explosion Card. Both are beginner-friendly, require minimal supplies, and come together much faster than they look. Once you try these folds, you’ll want to make them again and again!
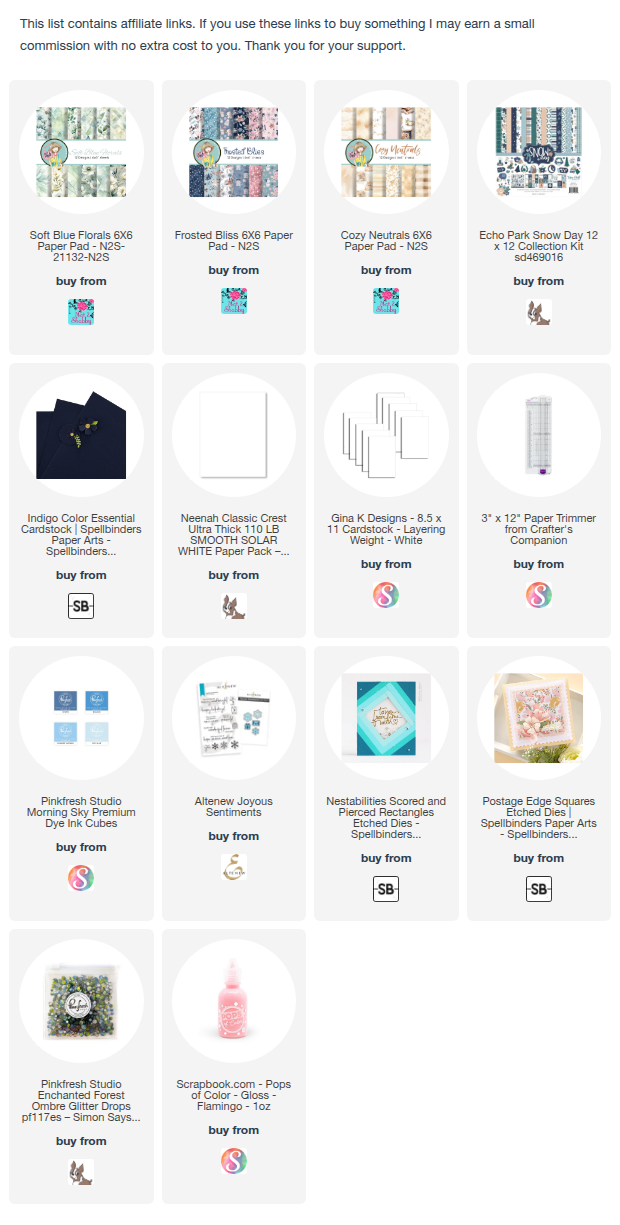
You can watch the detailed YouTube tutorial here. I’ve also included a complete visual list of the supplies that are currently available at the end of the blog post for your convenience:
🛠 Supplies You’ll Need
Cardstock & Paper
- Medium-weight cardstock (80lb works best for the pop-up mechanism)
- Patterned paper — Not 2 Shabby (Double Pop-Up Card)
- Echo Park “Snowed In” paper pad (Explosion Card)
- A2 card bases
- Spellbinders Indigo cardstock (Explosion Card base)
- Neenah Solar Crest 110 lb cardstock
- White cardstock (sentiment panels)
Tools & Adhesives
- Scoring board or wire trimmer
- Stylus (Simon Says Stamp Jewel Picker stylus end works well)
- Scoring tool & bone folder
- Bearly Art liquid glue
- Magnetic glass mat + magnets
- Foam tape
- Pencil
Embellishments
- BetterPress sentiments
- Scrap cardstock
- Spellbinders dies
- Glitter snowflakes
- Pink Pops of Color
- Pre-cut vellum belly band
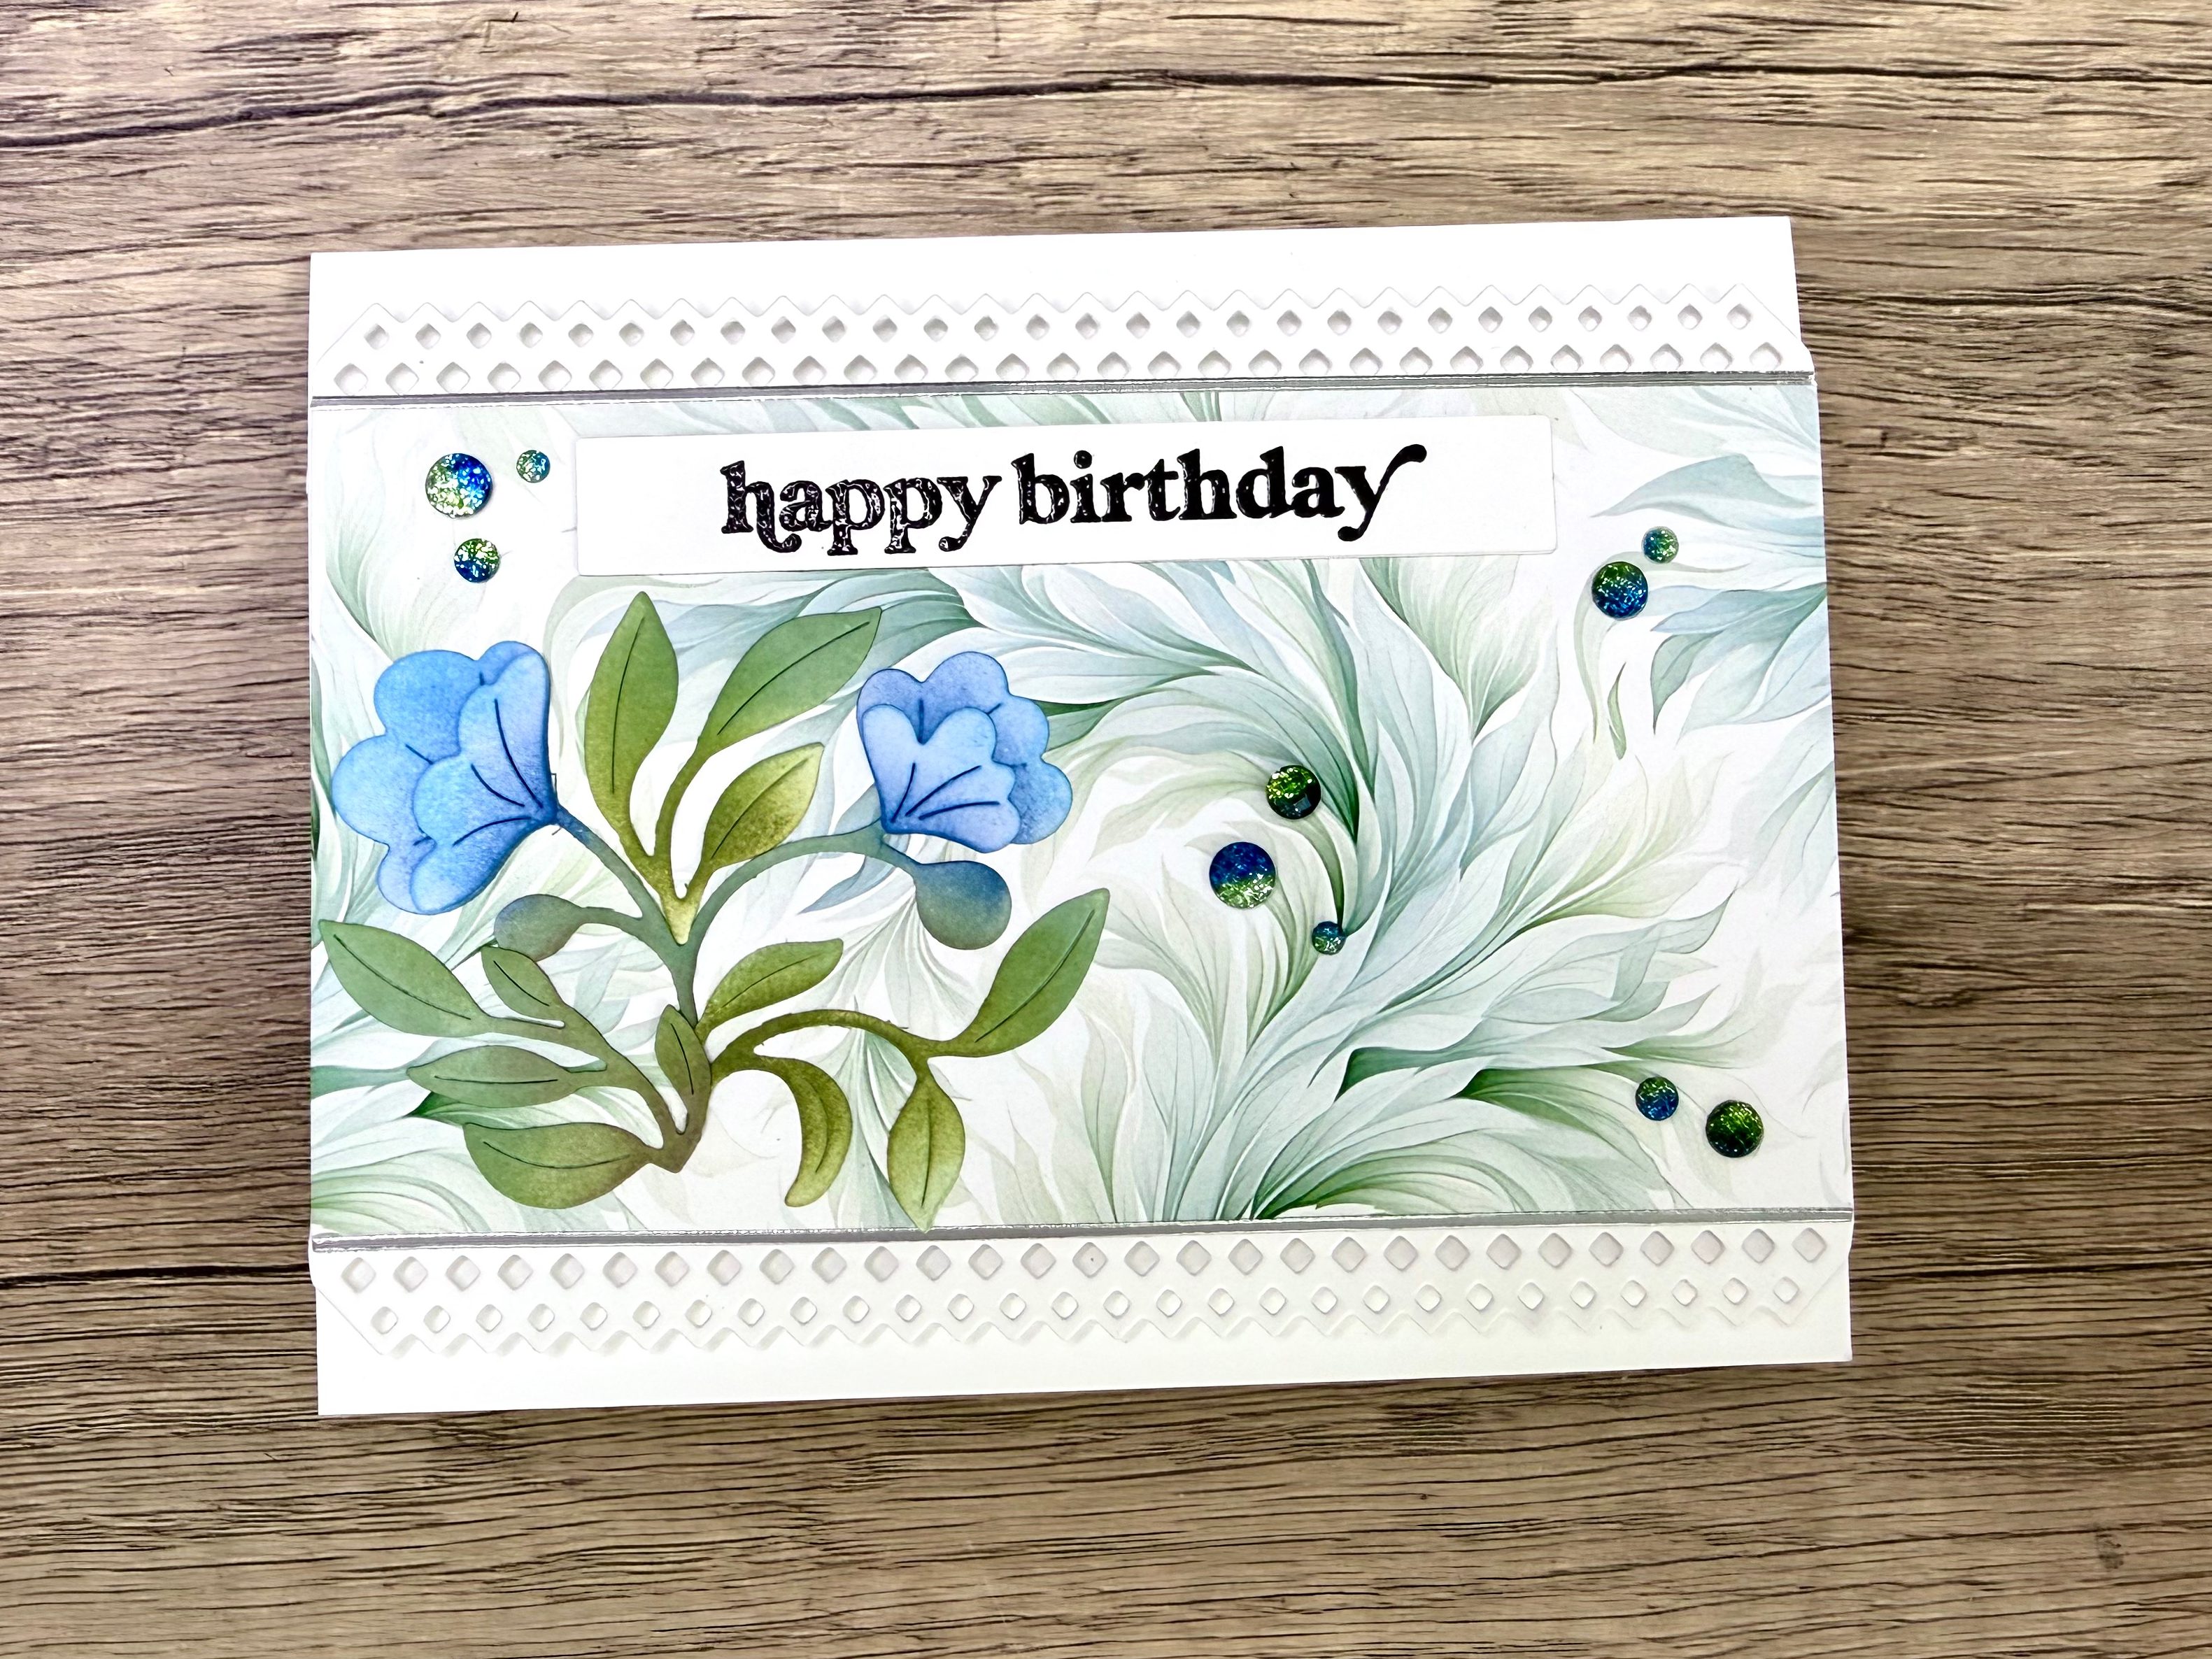
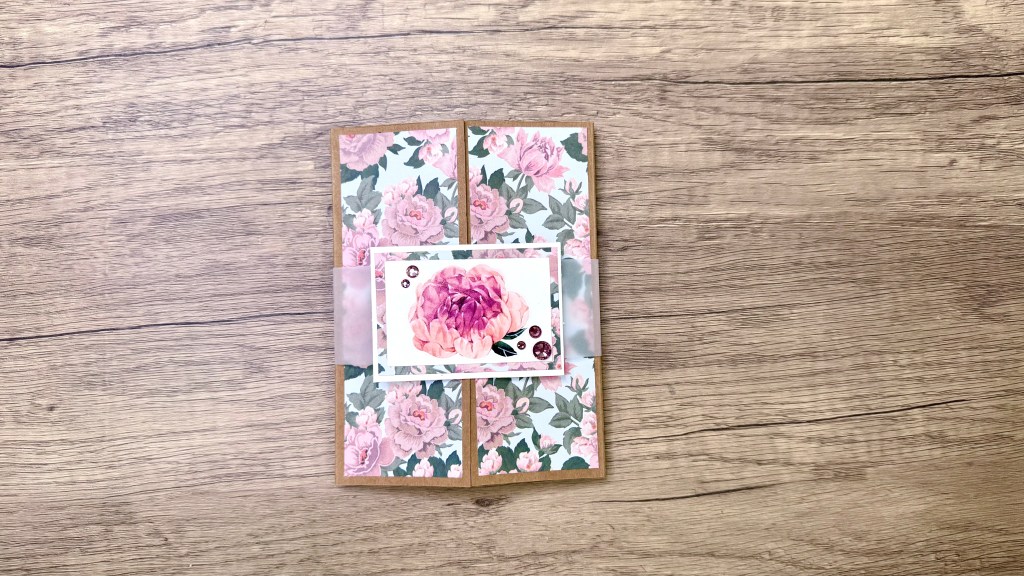
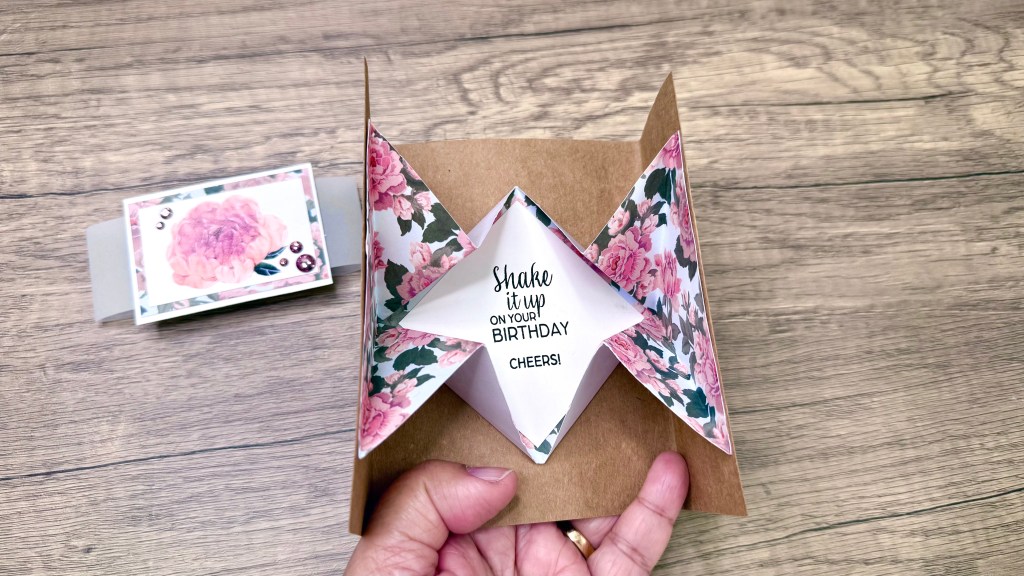
Project 1: The Double Pop-Up Card
This card looks simple from the outside, but inside it reveals two fun pop-up flaps that open like a little surprise gift.

Step 1: Cut and Prep Your Panels
Prepare all the pieces for an A2-size card:
Card base:
5 ½ in. x 8 ½ in. scored at 4 ¼ in. scored along the long edge
Inside panels
- Two panels: 4 in. × 5¼ in.
Pop-up flaps
- Two panels: 3 in. × 3¼ in.
- Two panels: 3 in. × 3 in.
Embellishments
- Fussy-cut element from the patterned paper or other embellishments
- Create two labels: one white circle for the fussy-cut element, and one coordinating sentiment circle for balance
Step 2: Create the Pop-Up Mechanism
Use medium-weight cardstock for smooth folding.
Cut:
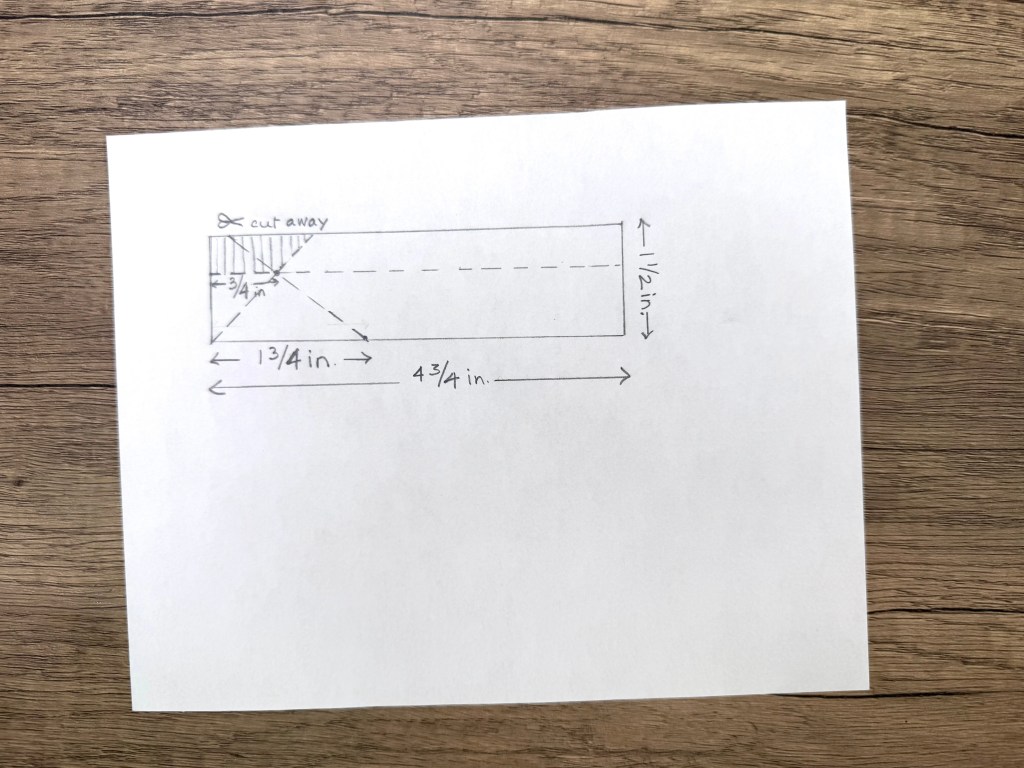
- Two strips: 1½” × 4¾”
Mechanism Piece 1 — Scoring Board Method
- Score at 1 in.
- Position the strip horizontally on your scoring board, keeping the ½ in. portion at the top.
- Add pencil marks at ¾ in (directly on the score line) and 1¾ in. (along the bottom edge).
- Line up the two pencil marks and score a line joining the two pencil markings.
- Rotate and score the second diagonal joining the top corner of the strip and the pencil marking at ¾ in.
- Trim the small area indicated by the pencil shading on the template.
- Burnish all the folds well.
Mechanism Piece 2 — Wire Trimmer Method
(This is easier!)
- Score at 1 in.
- Position the strip horizontally on your scoring board, keeping the ½ in. portion at the top.
- Use the wire track to line up the pencil markings and score the diagonal lines.
- Trim the small area indicated by the pencil shading on the template.
- Burnish all the folds well.
Fold:
- Fold the long 1/2 in. portion inward.
- Flip the second piece and fold the long 1/2 in. portion outward so the flaps mirror each other.
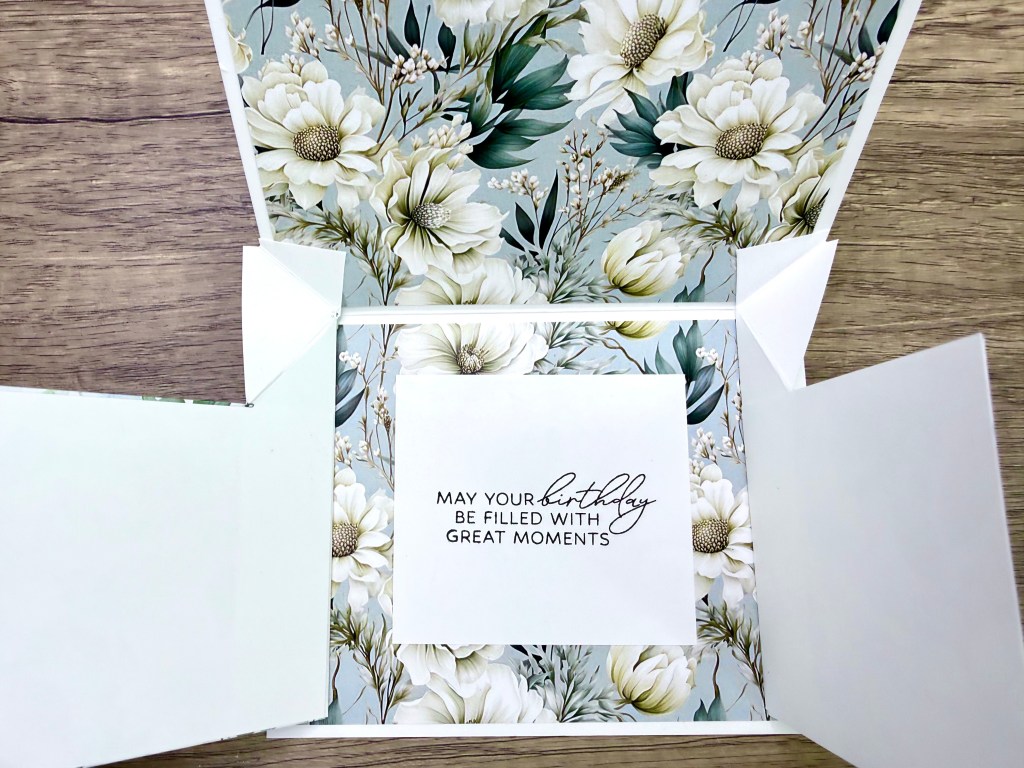
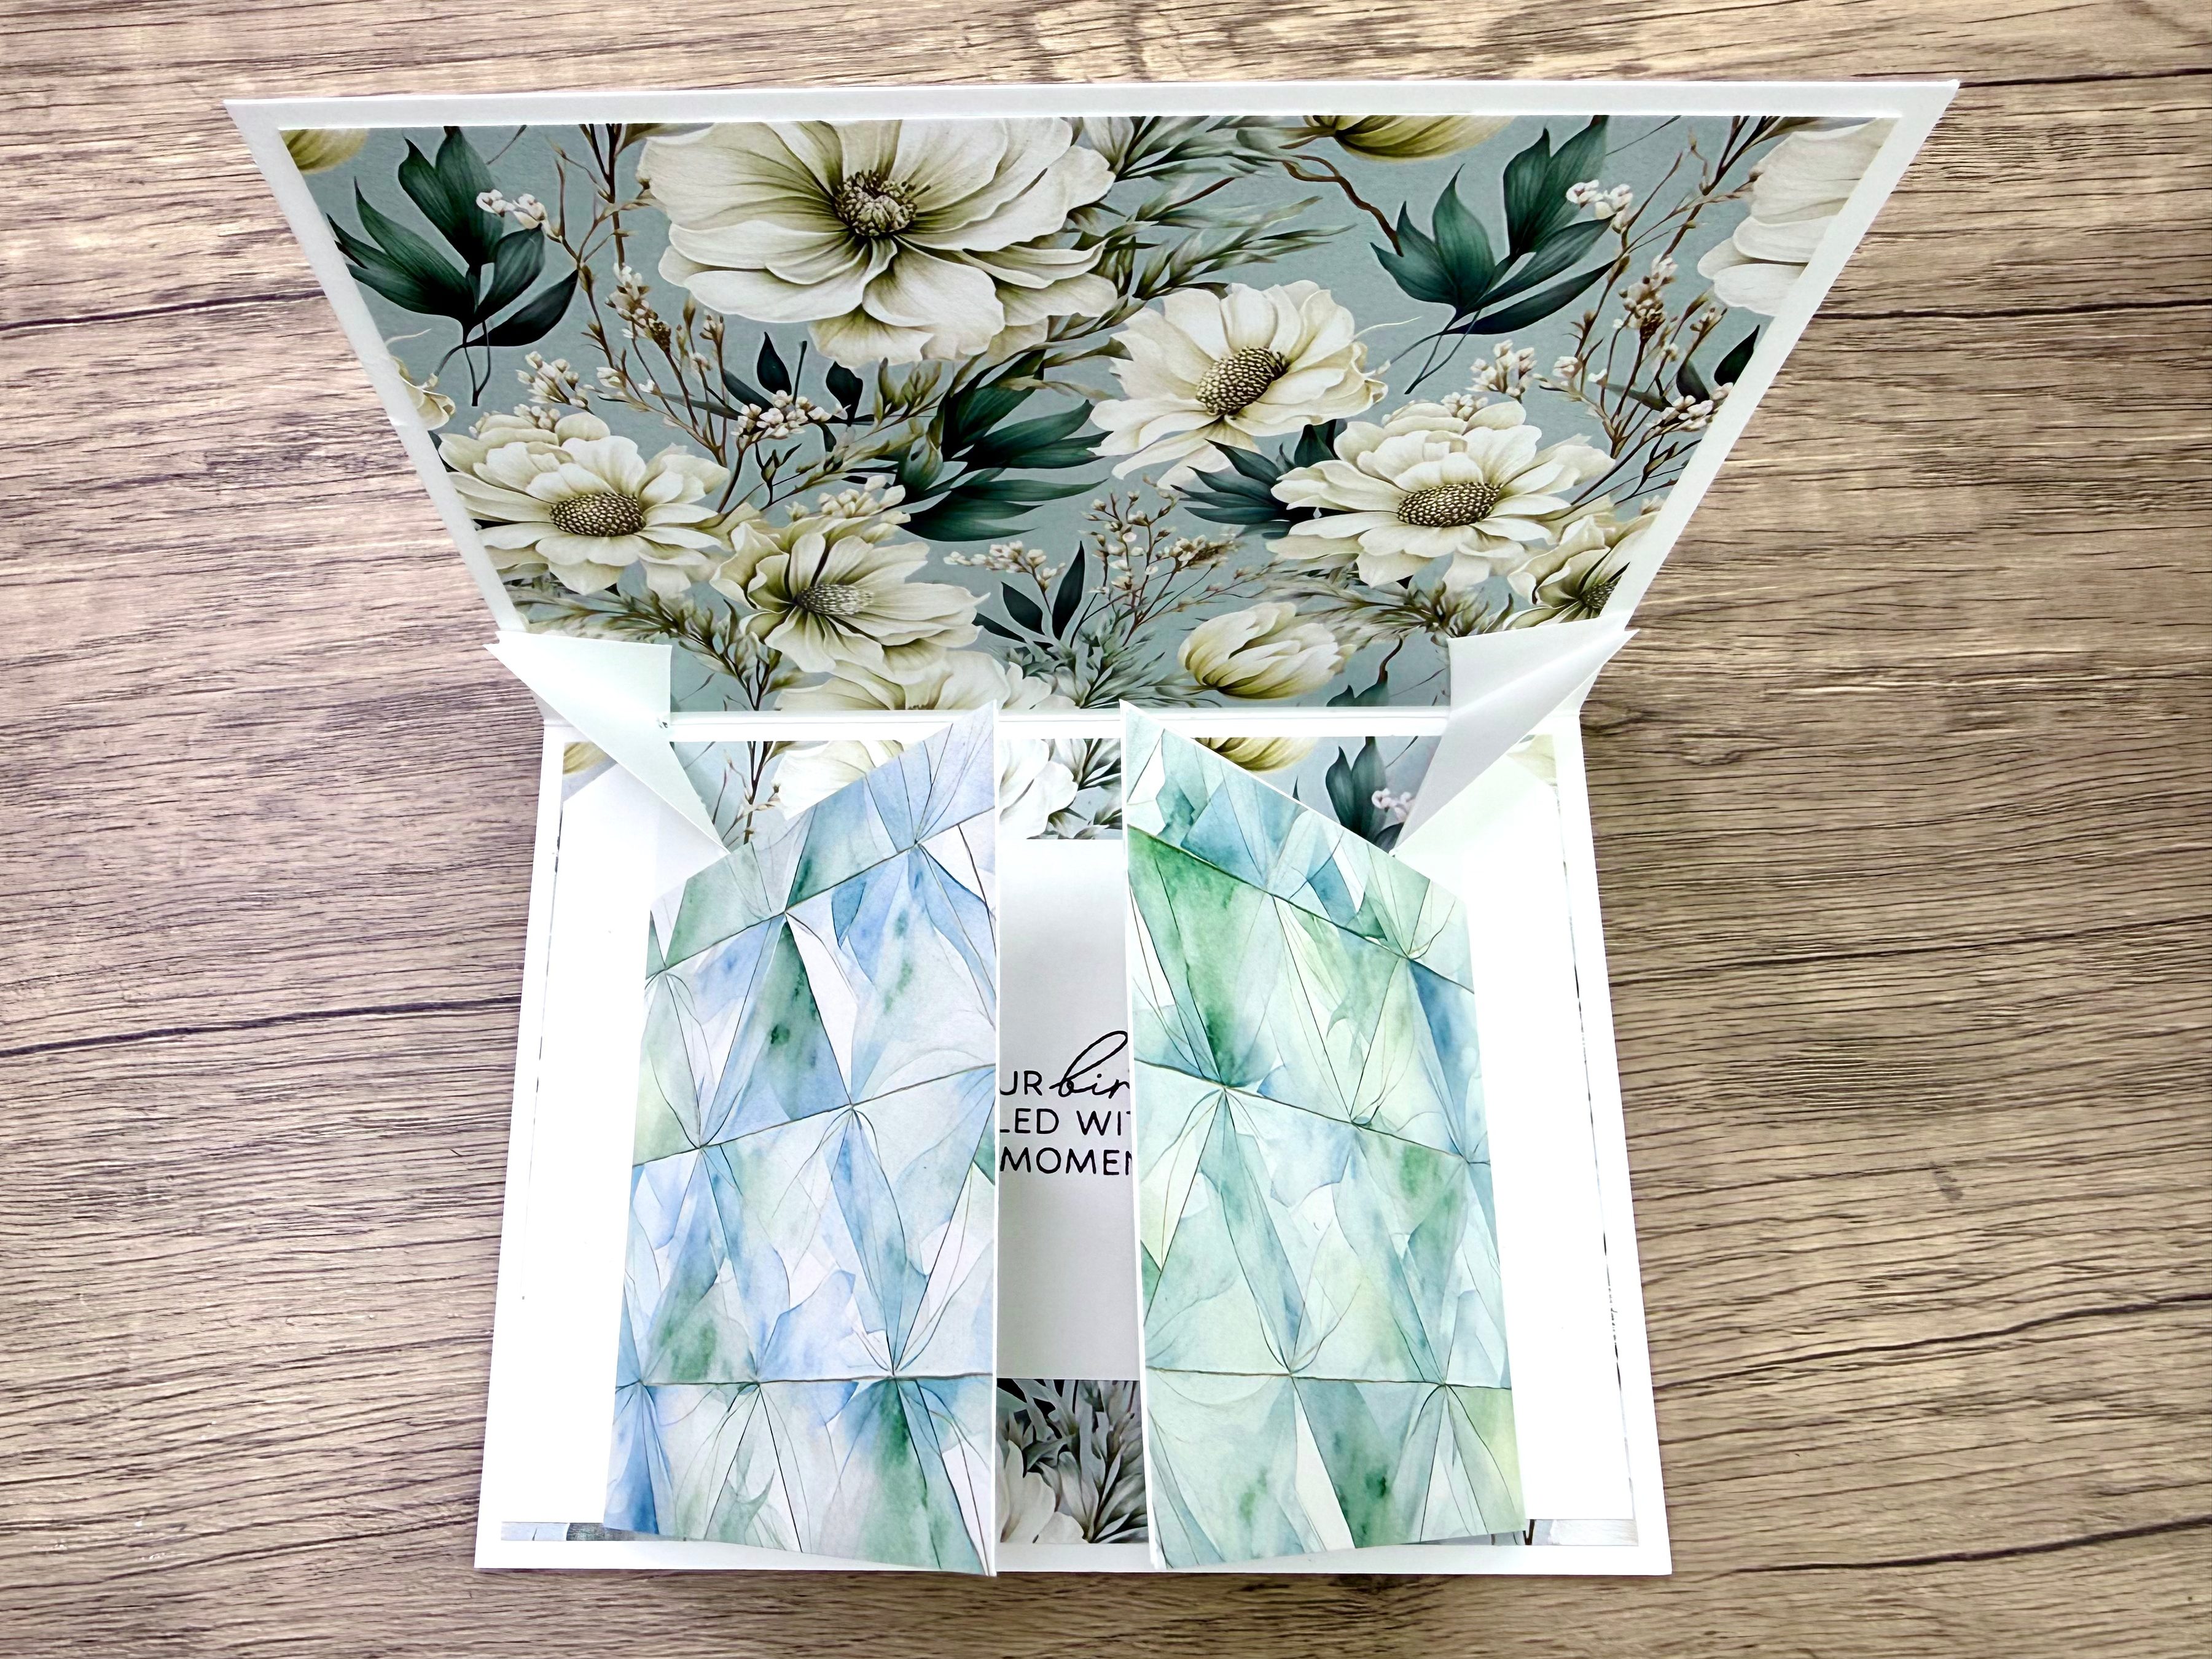
Step 3: Assemble the Inside
- Adhere the two large inside panels.
- Glue the 3¼ in. × 3¼ in. white square in the centre as a message panel.
- Position the first mechanism so the wide end faces inward.
- Apply liquid glue and line the tip of the triangle up with the card’s centre fold.
- Repeat on the opposite side.
- Add the patterned paper flaps, keeping them slightly shy of the fold line so they open smoothly.
- (Optional) Add patterned paper inside to hide the mechanism.
- Add the circular labels (or other embellishments) on the flaps.
Step 4: Decorate and Finish
- Glue the top patterned panels in place.
- Attach the front panel.
- Add glitter snowflakes (or other embellishments) and a sentiment.
- Add a drop of Pink Pops of Color to each snowflake centre and gently tap the card to flatten the dots.
And that’s your finished double pop-up — such a satisfying mechanism for such simple cuts!

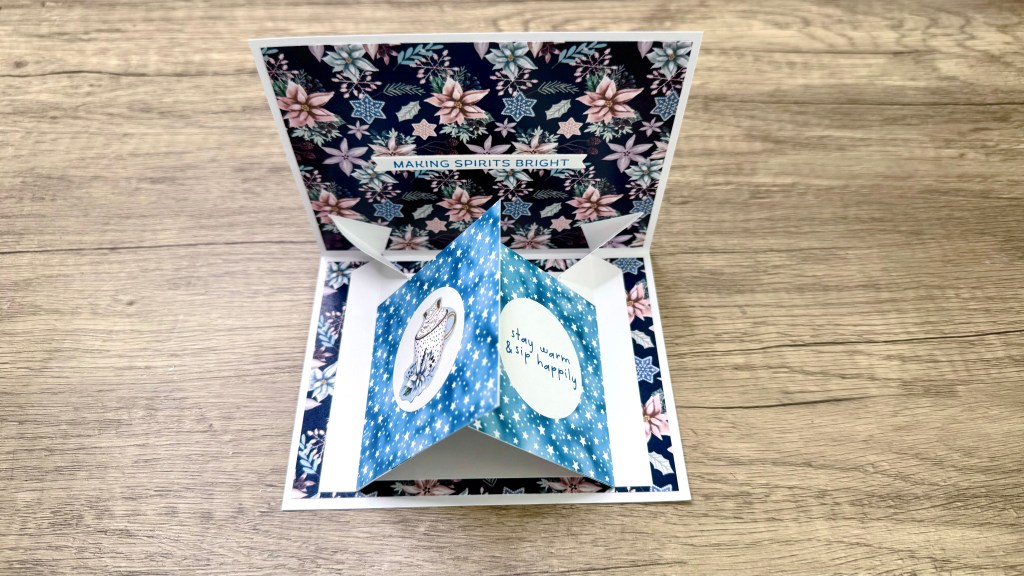
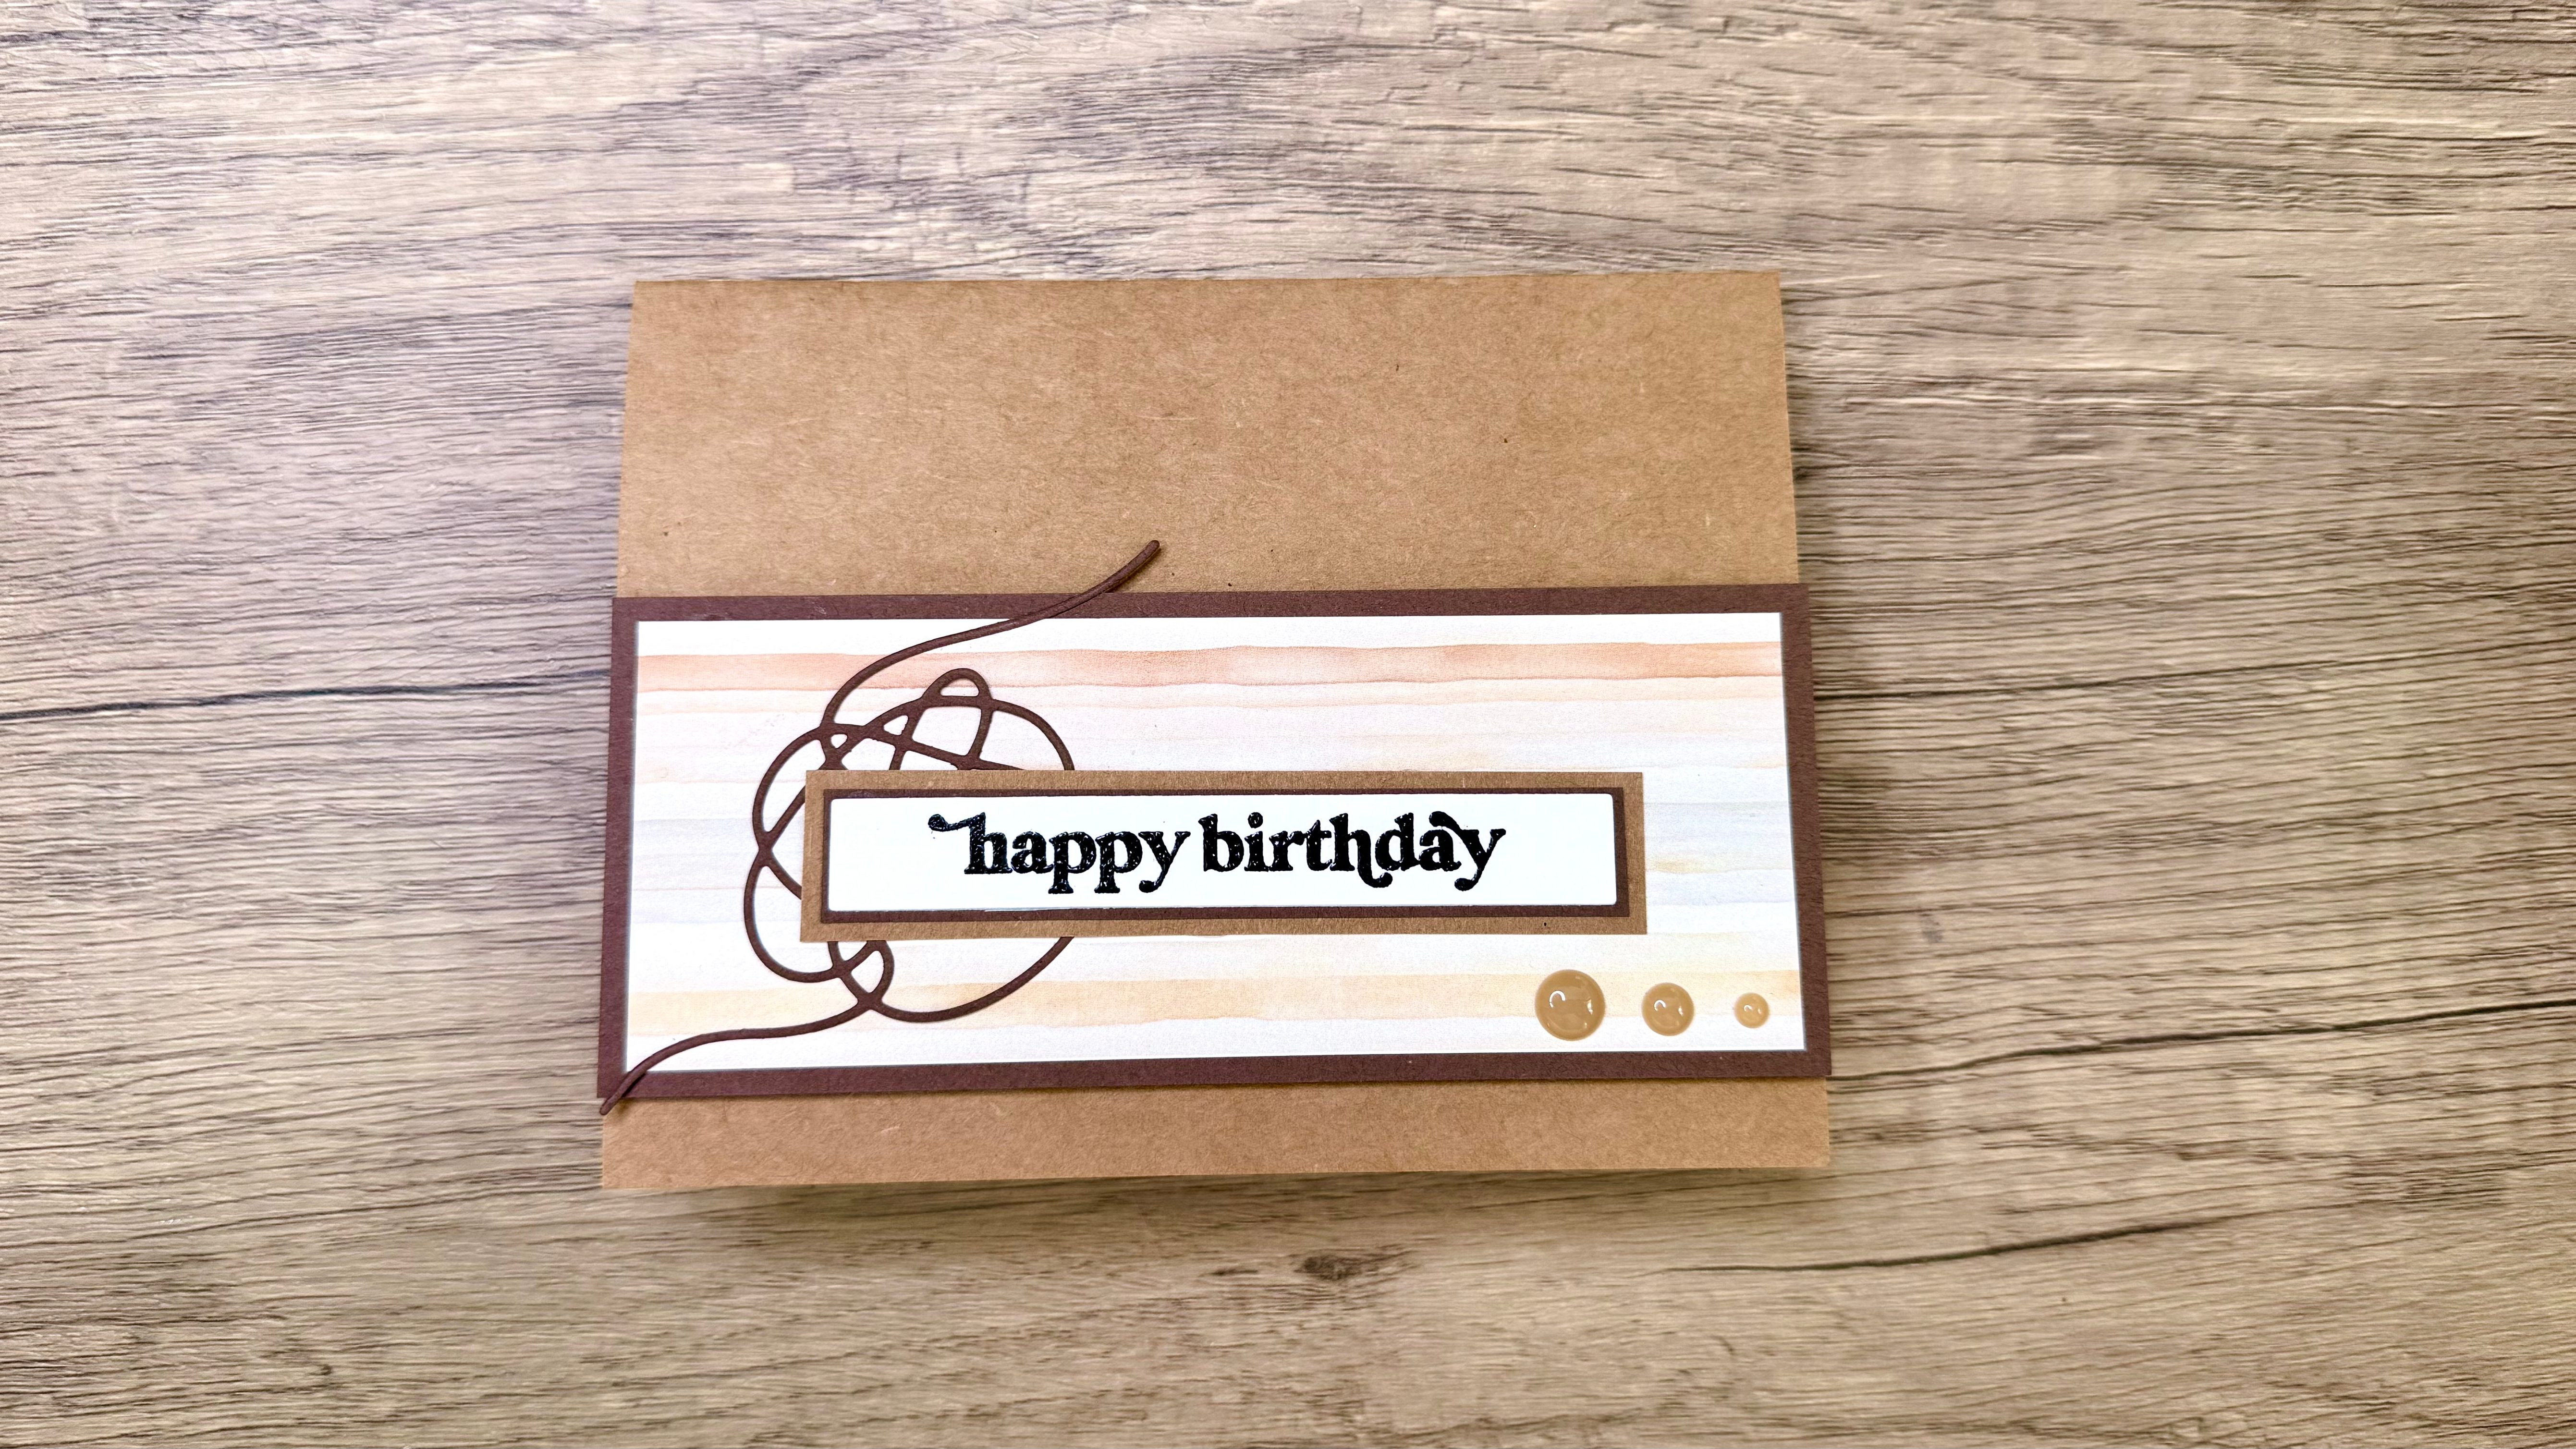
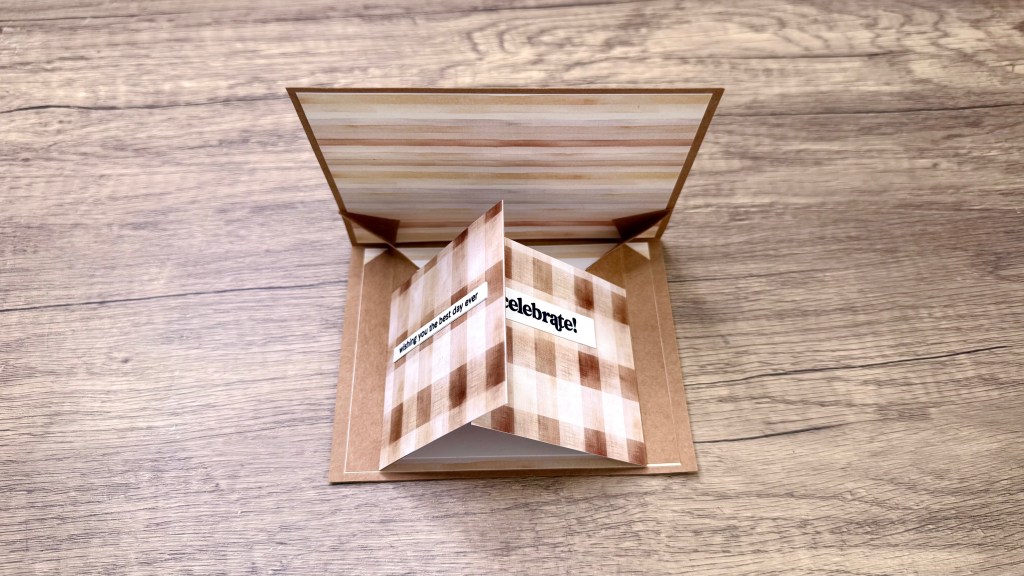
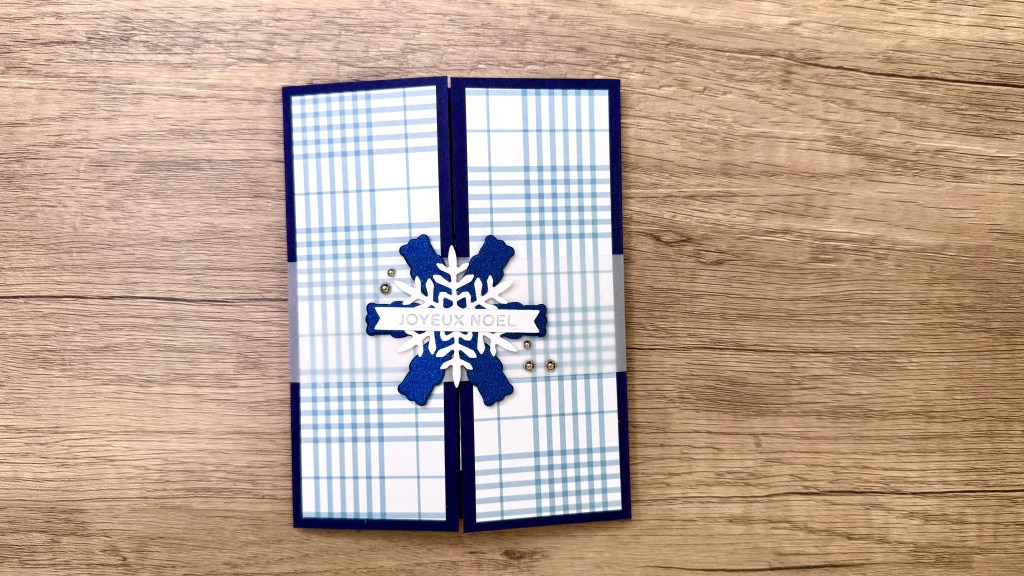
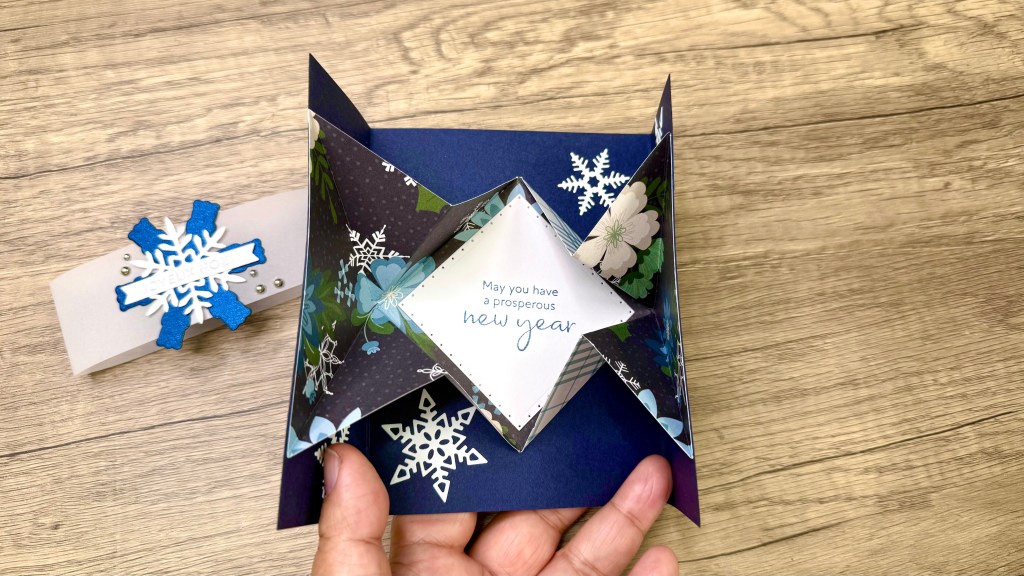
🎁 Project 2: The Explosion Card
This card unfolds into a dramatic diamond-shaped pop-out centre, perfect for holiday or birthday greetings.

Step 1: Create the Gatefold Base
Use Spellbinders Indigo cardstock for a rich wintery look.
- Score at 2⅛ in, flip, and score again (helps with heavyweight cardstock).
- Turn and repeat on the opposite side.
- Use a bone folder to reinforce the gatefold.
- Add two patterned paper panels measuring 1 ⅞ in x 5 ¼ in. on the front flaps.
Step 2: Make the Explosion Panel
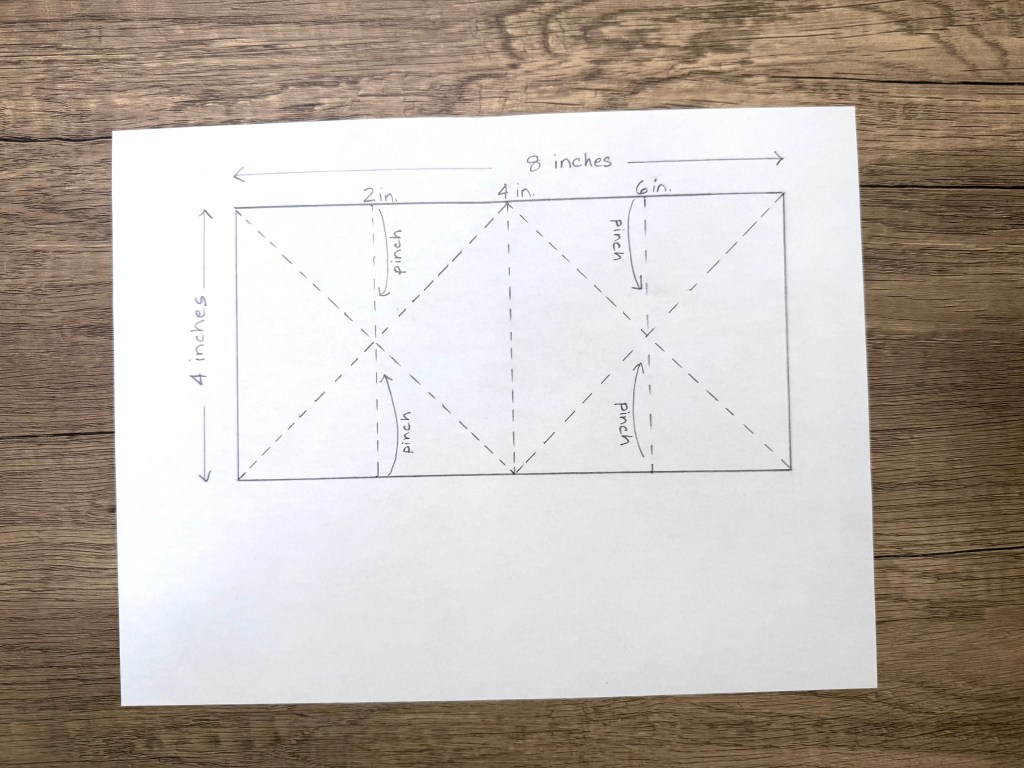
Cut:
- One panel: 8 in. × 4 in.
Score Vertically:
- Score at 2 in. , 4 in. , and 6 in. — flip and score again for clean folds.
Mark for Diagonals:
- Lightly mark the top and bottom edges at 2 in. , 4 in. , and 6 in.
Score Diagonals:
- Line up the pencil marks and score diagonal lines so they form a diamond shape in the centre.
- Continue until all diagonals are complete.
Burnish:
- Burnish every line except the centre 4 in. line (that one is a guide).
- Pinch in the vertical fold to collapse the panel into its explosion shape.
- Burnish the resulting triangle on both sides.
Step 3: Assemble the Explosion Card
- Centre the folded explosion panel inside the gatefold.
- Add glue to one half only, close the flap, and adjust so it sits slightly away from the card edge.
- Hold in place for a few seconds.
- Repeat on the other side and secure with a magnet until dry.
Step 4: Make and Add the Belly Band
- Wrap pre-cut vellum loosely around the closed card.
- Crease and trim the excess.
- Glue the overlap where embellishments will hide it.
- Decorate the front with snowflakes, a sentiment, and silver pearls.
- Add a couple of snowflakes inside for extra charm.
✨ Final Thoughts
Both fun-fold designs come together beautifully with minimal supplies. Once the scoring is done, the assembly is truly effortless — and the interactive elements make these cards unforgettable. Whether you’re crafting for the holidays, birthdays, or just because, these folds are guaranteed to delight.
https://linkdeli.com/widget.js?id=f5e8378456858c916708
Here is a list of all the crafting tools I use on a regular basis to create my card projects:


Leave a comment