If you’re looking for handmade Mother’s Day cards that are both quick to make and beautifully detailed, these two designs are perfect.
Using just a few coordinating supplies, you can create:
- A layered shaped arch card with a soft vellum detail
- A bookmark card—a thoughtful and functional design that’s perfect for book lovers
Both cards come together easily, but still feel polished and special.
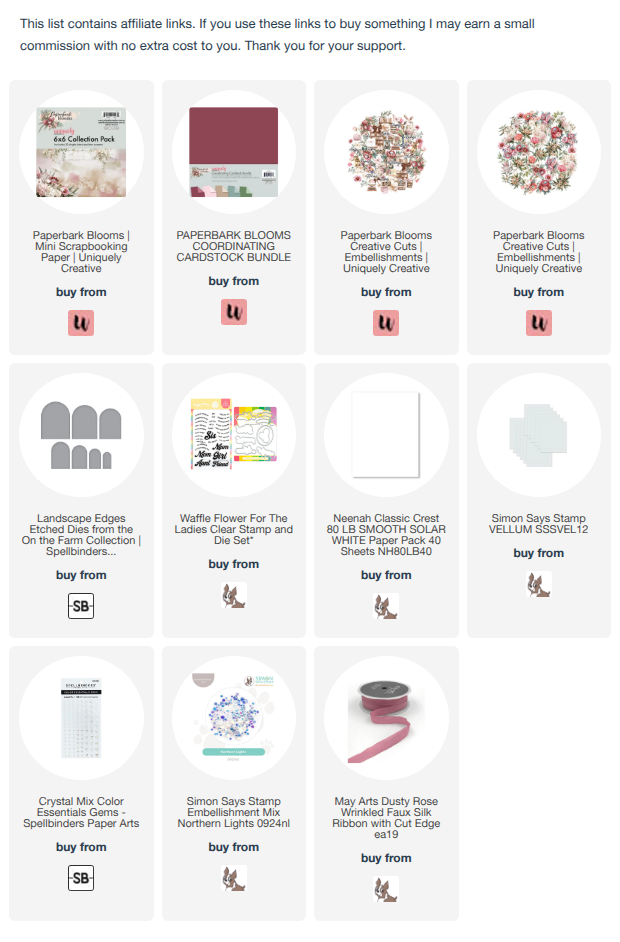
You can watch the detailed YouTube tutorial here. I’ve also included a complete visual list of the supplies that are currently available at the end of the blog post for your convenience:
Card #1: Shaped Arch Card
This card is all about layering and soft details, with vellum to diffuse the background and ephemera for effortless embellishing.


✂️ Supplies Used
- Cardstock & Paper
- Paperbark Blooms 6 x 6 Collection Pack
- Paperbark Blooms Coordinating Cardstock Bundle
- White cardstock (for card base)
- Lightweight vellum
- Dies
- Embellishments
Tools
- Die-cutting machine (Spellbinders Platinum 6)
- Paper trimmer
- Bone folder
- Pencil
- Adhesives
- Liquid glue with fine-tip nozzle
- Foam tape
Step-by-Step Instructions
Step 1: Create the Card Base
- Use a standard sheet of white cardstock 8½” x 11”.
- Score at 5½” to and fold into a tent/top fold card.
- Trim along width to about 4½”–4¾”.
- Place the largest arch die slightly above the top edge (do not align flush).
- Secure with low-tack tape and run through your die cutting machine.
→ This creates a shaped card while keeping the fold intact.
Step 2: Die Cut the Layers
Using nesting arch dies:
- Cut Layer 1 from solid coloured cardstock (largest arch).
- Cut Layer 2 from patterned paper 1 (next size down).
- Cut Layer 3 from patterned paper 2 (next size down).
- Cut Layer 4 from vellum (same size as one of the layers).
Step 3: Prepare the Sentiment
- Die cut your sentiment using a smaller arch or tag die.
- You can also create a custom sentiment for the outside or inside greeting.
Step 4: Assemble the Card
- Layer the arches using liquid glue for slight adjustability.
- Add foam tape behind one or two layers for dimension.
- Adhere the inside panel.
Step 5: Add the Vellum (Tip!)
- Do not apply glue directly behind vellum—it will show through.
- Instead, apply glue behind your focal element (e.g. tag or sentiment).
→ This hides the adhesive completely.
Step 6: Embellish
- Add ephemera (trim pieces if needed).
- Attach sentiment with foam tape.
- Tie ribbon onto tag.
- Finish with a few gems for subtle sparkle.
✨ Helpful Tips
- Offset your die slightly to preserve the fold.
- Use vellum to soften busy patterns.
- Ephemera makes decorating quick and effortless.
- Foam tape adds dimension without bulk.
Card #2: Bookmark Card
This design doubles as a card and a removable bookmark—perfect for anyone who loves to read.


✂️ Supplies Used
- Cardstock & Paper
- Paperbark Blooms 6 x 6 Collection Pack
- Paperbark Blooms Coordinating Cardstock Bundle
- White cardstock cut to 4″ x 5 ¼” for inside panel
- Dies & Stamps
- Embellishments
Tools
- Die-cutting machine (Spellbinders Platinum 6)
- Paper trimmer
- Bone folder
- Pencil & ruler
- Hole punch
- Adhesives
- Liquid glue with fine-tip nozzle
- Foam tape
Step-by-Step Instructions
Step 1: Create the Card Base
- Cut patterned paper to 5½” x 11”.
- Score at:
- 4¼”
- Rotate and score at 2½” on the other end.
- Fold to create a tri-fold structure with a front pocket.
Step 2: Add the Card Panels
- Cut a panel from white cardstock to 4” x 5¼”.
- Adhere to the inside of the card and stamp a sentiment.
- Cut a panel from the patterned paper to 4” x 5¼” and adhere to the card front staying away from the narrow panel.
Step 3: Create the Pocket
- Cut a panel from patterned paper to 2″ x 5¼”.
- Adhere to the front flap.
- Draw a diagonal guideline across the front flap.
- Cut along the line to form a pocket.
→ Position your cut to preserve key design elements - Adhere the bottom and side edges to the card front.
Step 4: Make the Bookmark
- Cut a strip measuring 2″ x 5 ¼” from the solid coloured cardstock.
- Cut a strip measuring 1¾” x 5” from patterned paper.
- Adhere the patterned paper panel to the base layer.
- Punch a hole at the top.
- Thread ribbon through and tie.
- Decorate as desired.
Step 5: Assemble the Card
- Adhere patterned panels to the card base.
- Slide the bookmark into the pocket to test fit.
- Adjust edges if needed after assembly for a clean finish.
Step 6: Finish the Design
- Add ephemera to front and/or inside.
- Stamp or adhere sentiment inside (keep front clean if design is busy).
- Add gems for a touch of sparkle.
✨ Helpful Tips
- Assemble first, then trim for a perfect fit.
- Use a pencil guideline before cutting diagonally.
- Thicker glue allows you to slide pieces into place.
- Ensure bookmark slides easily but stays secure.
Finishing Touches
- Use leftover paper strips to decorate your envelopes.
- Consider slightly larger envelopes if embellishments extend.
- Keep embellishments minimal for a clean, elegant look.
✂️ Want to craft along with me? Members get perks like badges, shout-outs, and Foiled Florals craft-along livestreams. Join the membership here: https://www.youtube.com/channel/UCDKhctb1ss7hbxVHivhT5YQ/join
https://linkdeli.com/widget.js?id=f5e8378456858c916708
Here is a list of all the crafting tools I use on a regular basis to create my card projects:


Leave a comment